French Silk Pie Recipe

- Published
- 48 comments


This classic French silk pie recipe is one of the most indulgent desserts to serve to your loved ones. I make the chocolate filling from scratch and pair it with a homemade crust to create a rich and decadent flavor that is perfect for holidays and birthday parties.
I really enjoy making all kinds of pies. They are typically easy to make and are perfect for feeding a crowd when I am hosting parties. I have made many over the years and shared them on my blog, from my decadent pecan pie recipe to my classic key lime pie, which my sweet tooth family absolutely loves.
French Silk Pie
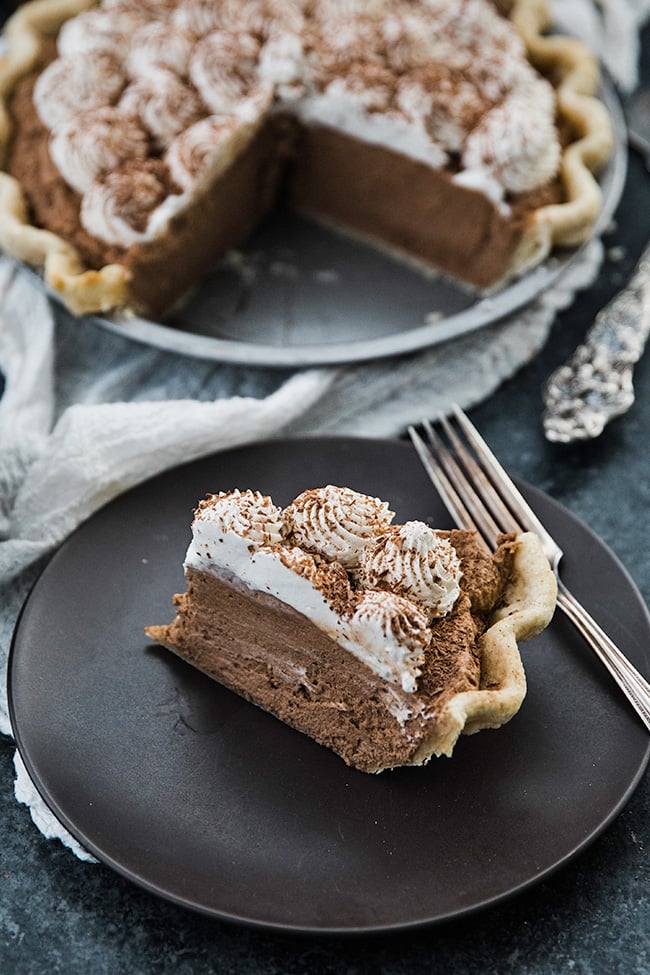
French silk pie consists of a chilled chocolate mousse filling that sets in a par baked pie crust and is topped with whipped cream. This American pie recipe was developed in the 1950s when Betty Cooper won a contest with an icebox pie. It gets its name from the smooth, silky, mousse like filling.
You will see many variations of this pie online, including versions topped with chocolate ganache or made with an Oreo cookie crust. For my recipe, I keep it the classic way and use simple pantry ingredients for the filling, and I make the pie crust from scratch.
Something important you should know is that this recipe does contain raw eggs. So, I always recommend buying organic eggs for recipes like this. You can also look for pasteurized egg brands, such as Davidsons, which eliminates bacteria like salmonella if that makes you feel more comfortable. Now let me show you how I make the most indulgent French silk pie.
Ingredient and Substitutions
- Pie Crust – I make a homemade pie crust with the addition of some sugar. Use my recipe, store-bought, or your favorite pie dough.
- Cream – You will need heavy whipping cream for this pie. It can not be substituted.
- Butter – I use unsalted butter in all my cooking and baking.
- Vanilla – Any good vanilla extract will work in this pie.
- Chocolate – I use semi-sweet chocolate bars, but chips will work also. In addition, if you like less sweet pies, you can use dark chocolate.
- Sugar – Regular granulated sugar is all you’ll need.
- Eggs – I use room-temperature eggs. Please see my chef’s tip regarding raw eggs.
How to Make Best French Silk Pie
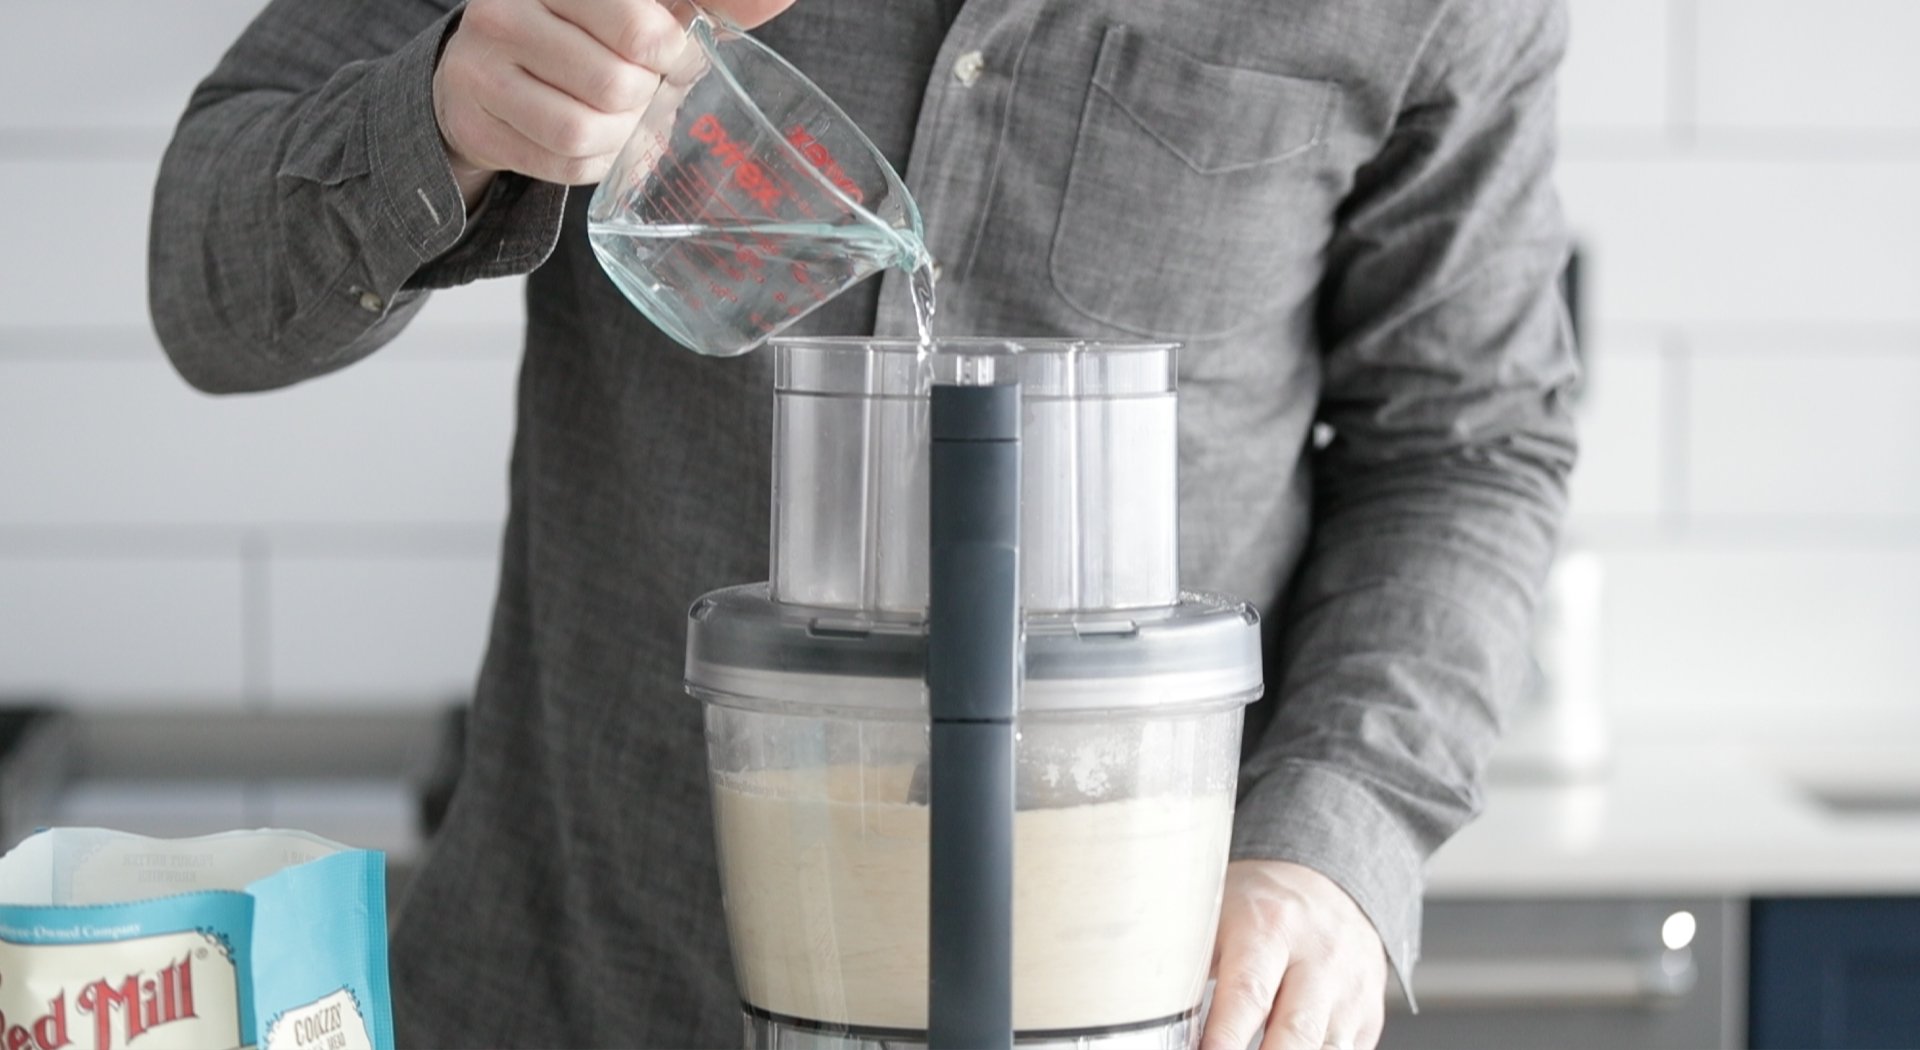
Mix the dough: I add the flour, butter, salt, and sugar to a food processor and pulse on high speed while slowly drizzling in the water until the mixture looks like a coarse meal.
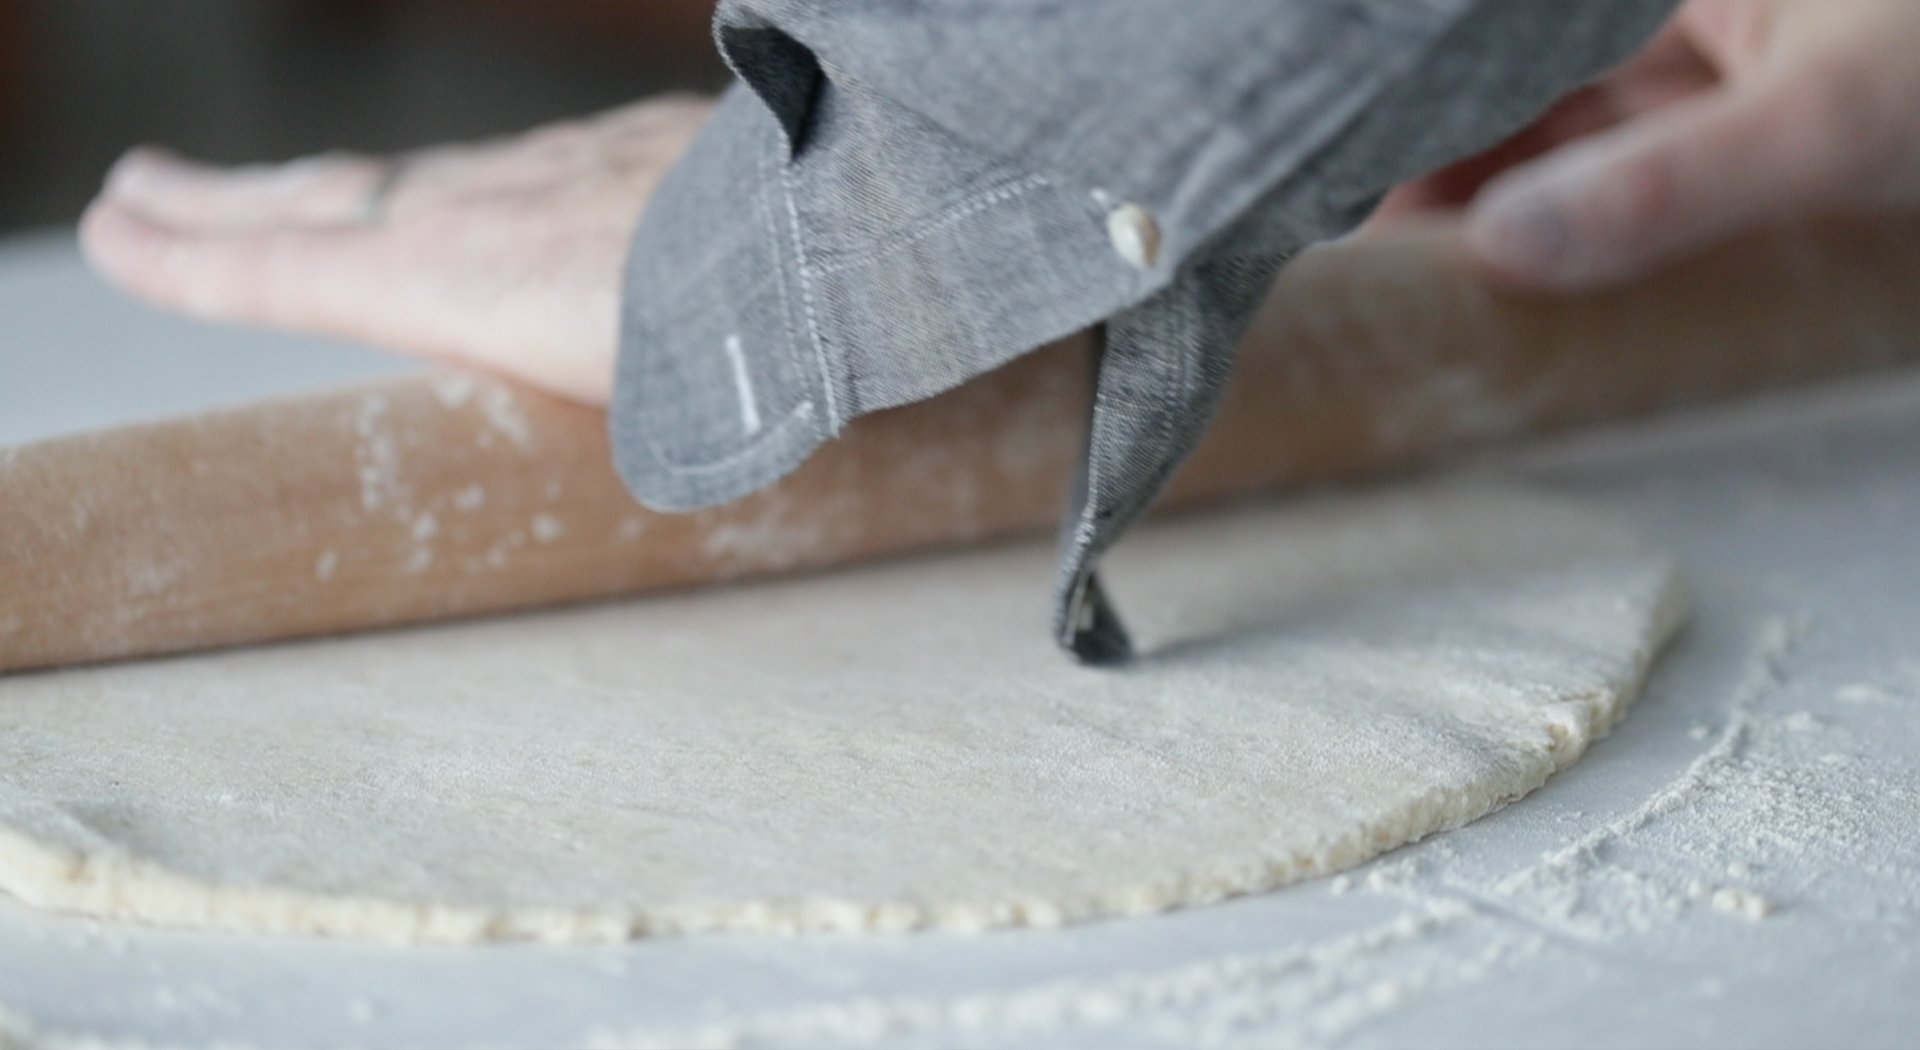
Shape: I transfer the dough to a clean surface dusted with flour, knead it to form a ball, and roll it out with a rolling pin until it is 1/8 ” thick.
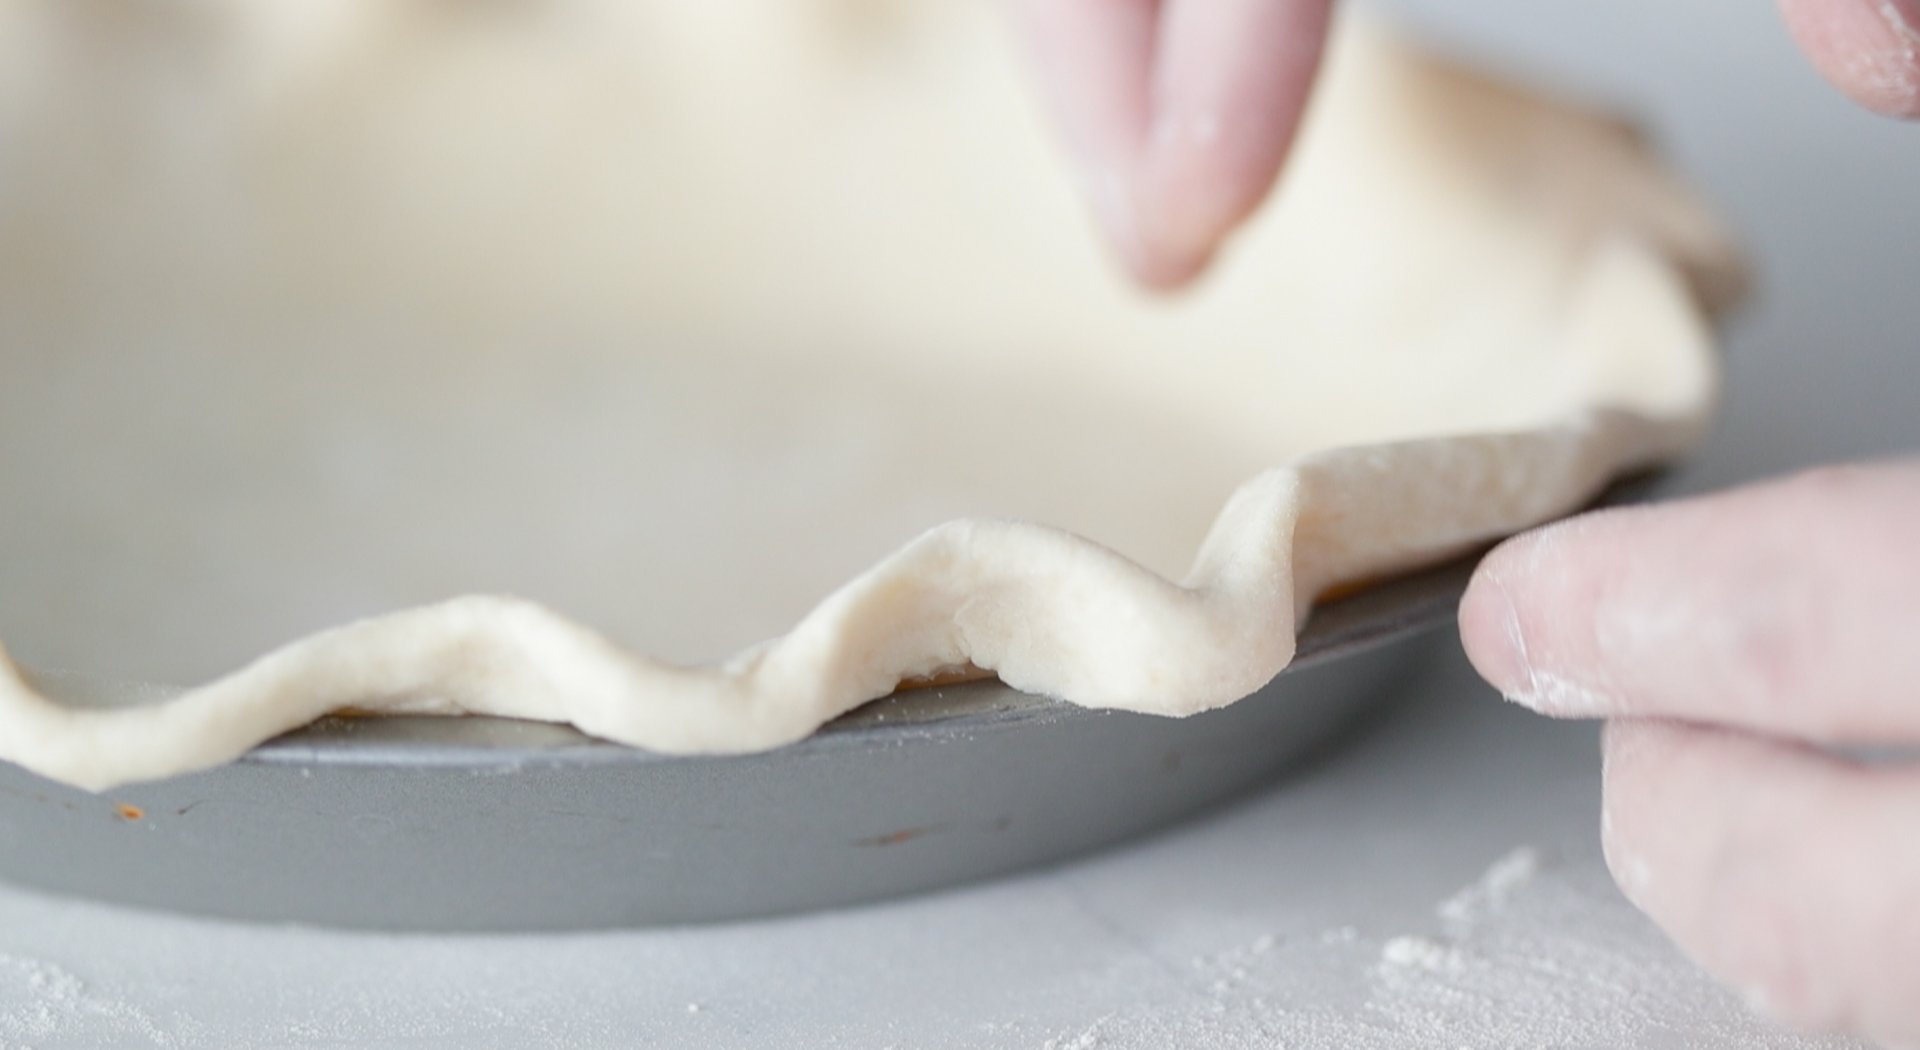
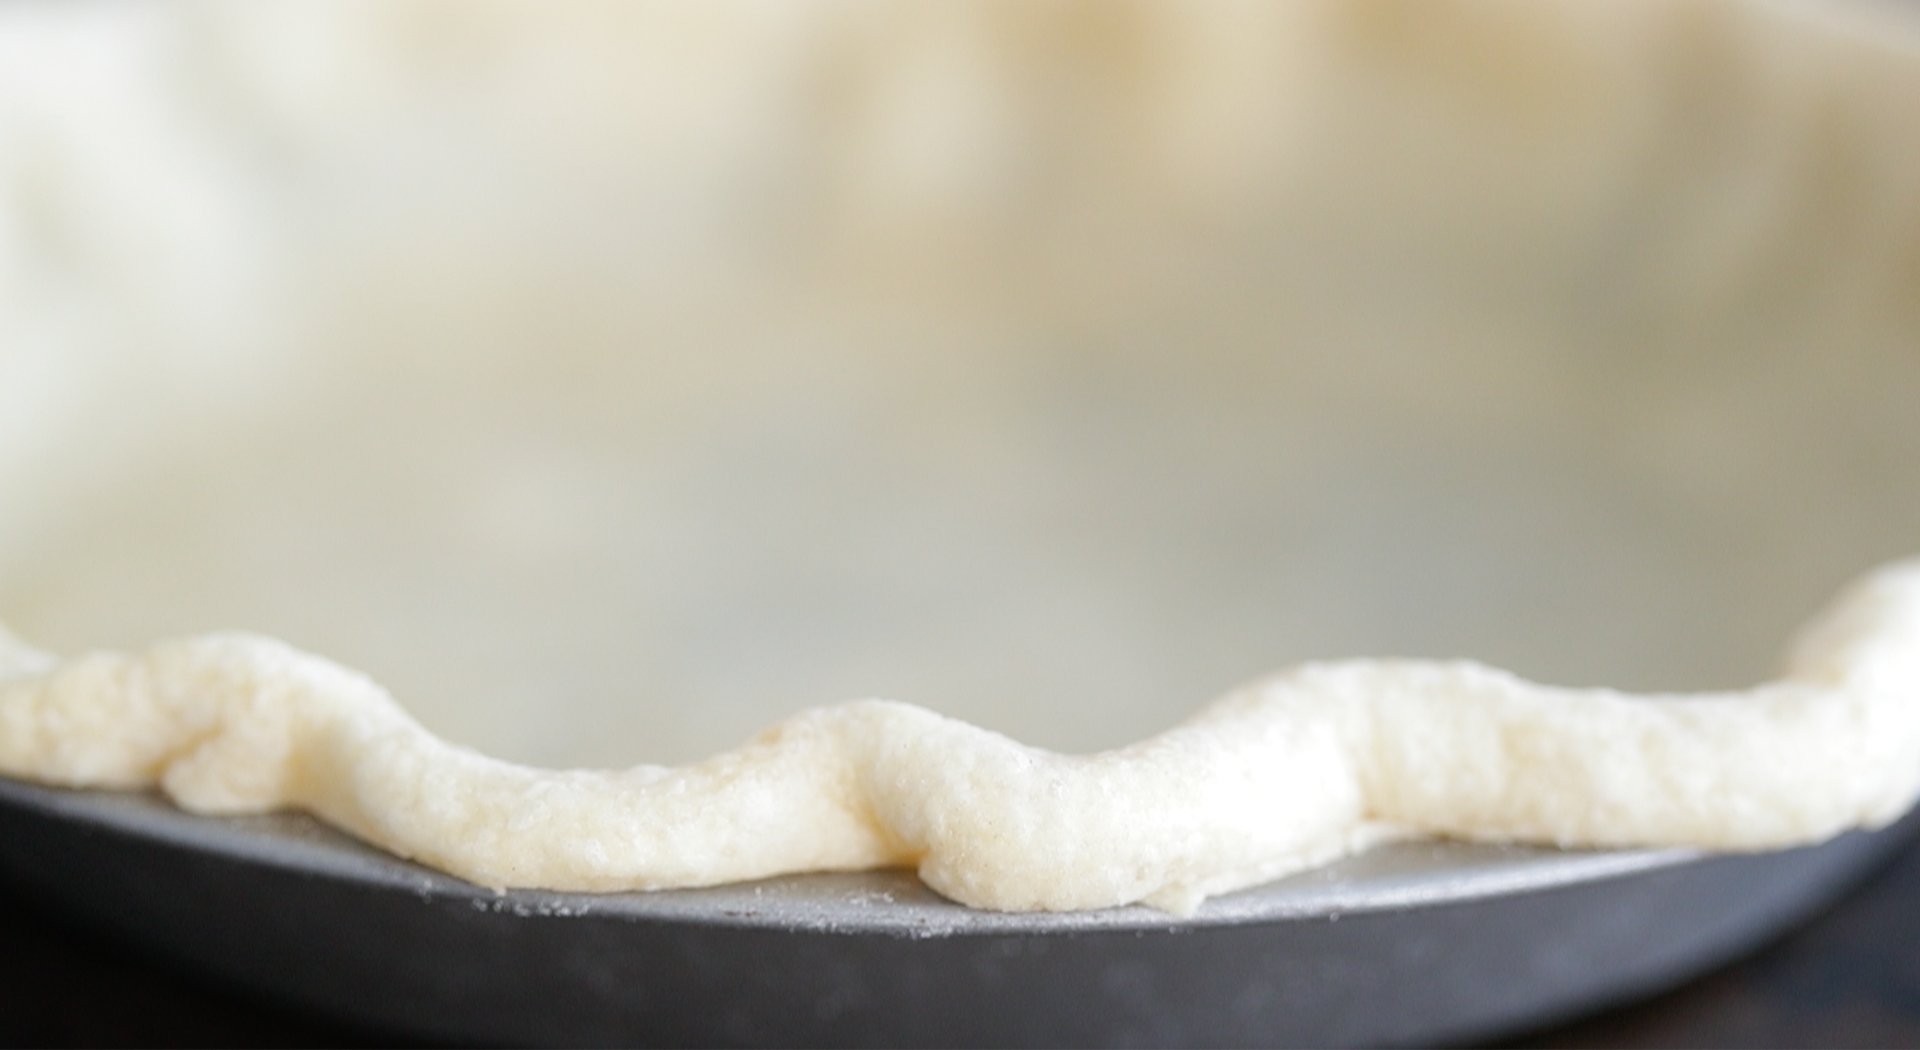
Prepare the crust: I form the dough into a 9″ pie pan, cut off any excess, and crimp the edges to create a ripple around the outside. I place the crust in the freezer for 10 minutes to chill the fat.
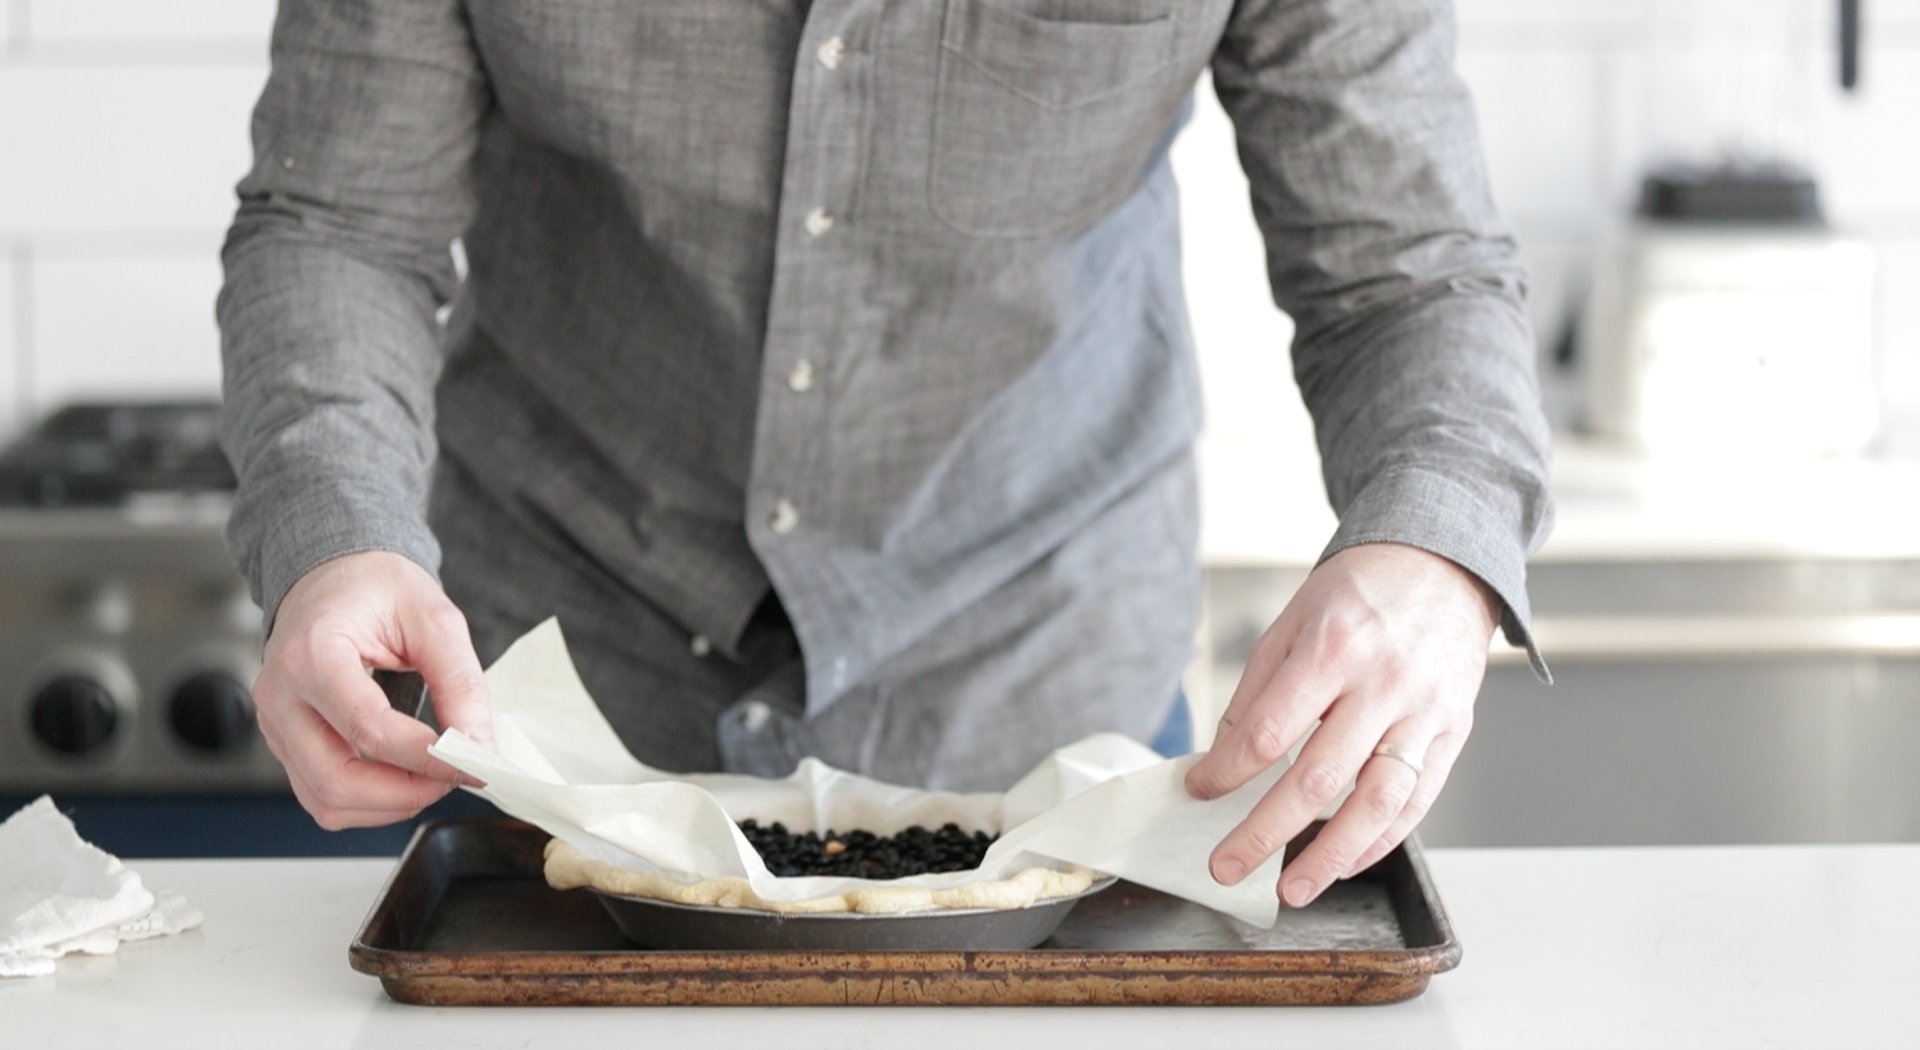
Par bake: I place a piece of parchment paper over the pie crust, add 3 cups of dried beans, and par bake it for 6 minutes at 450°.
Cool: Then, I remove the crust from the oven and let it cool completely in the refrigerator.
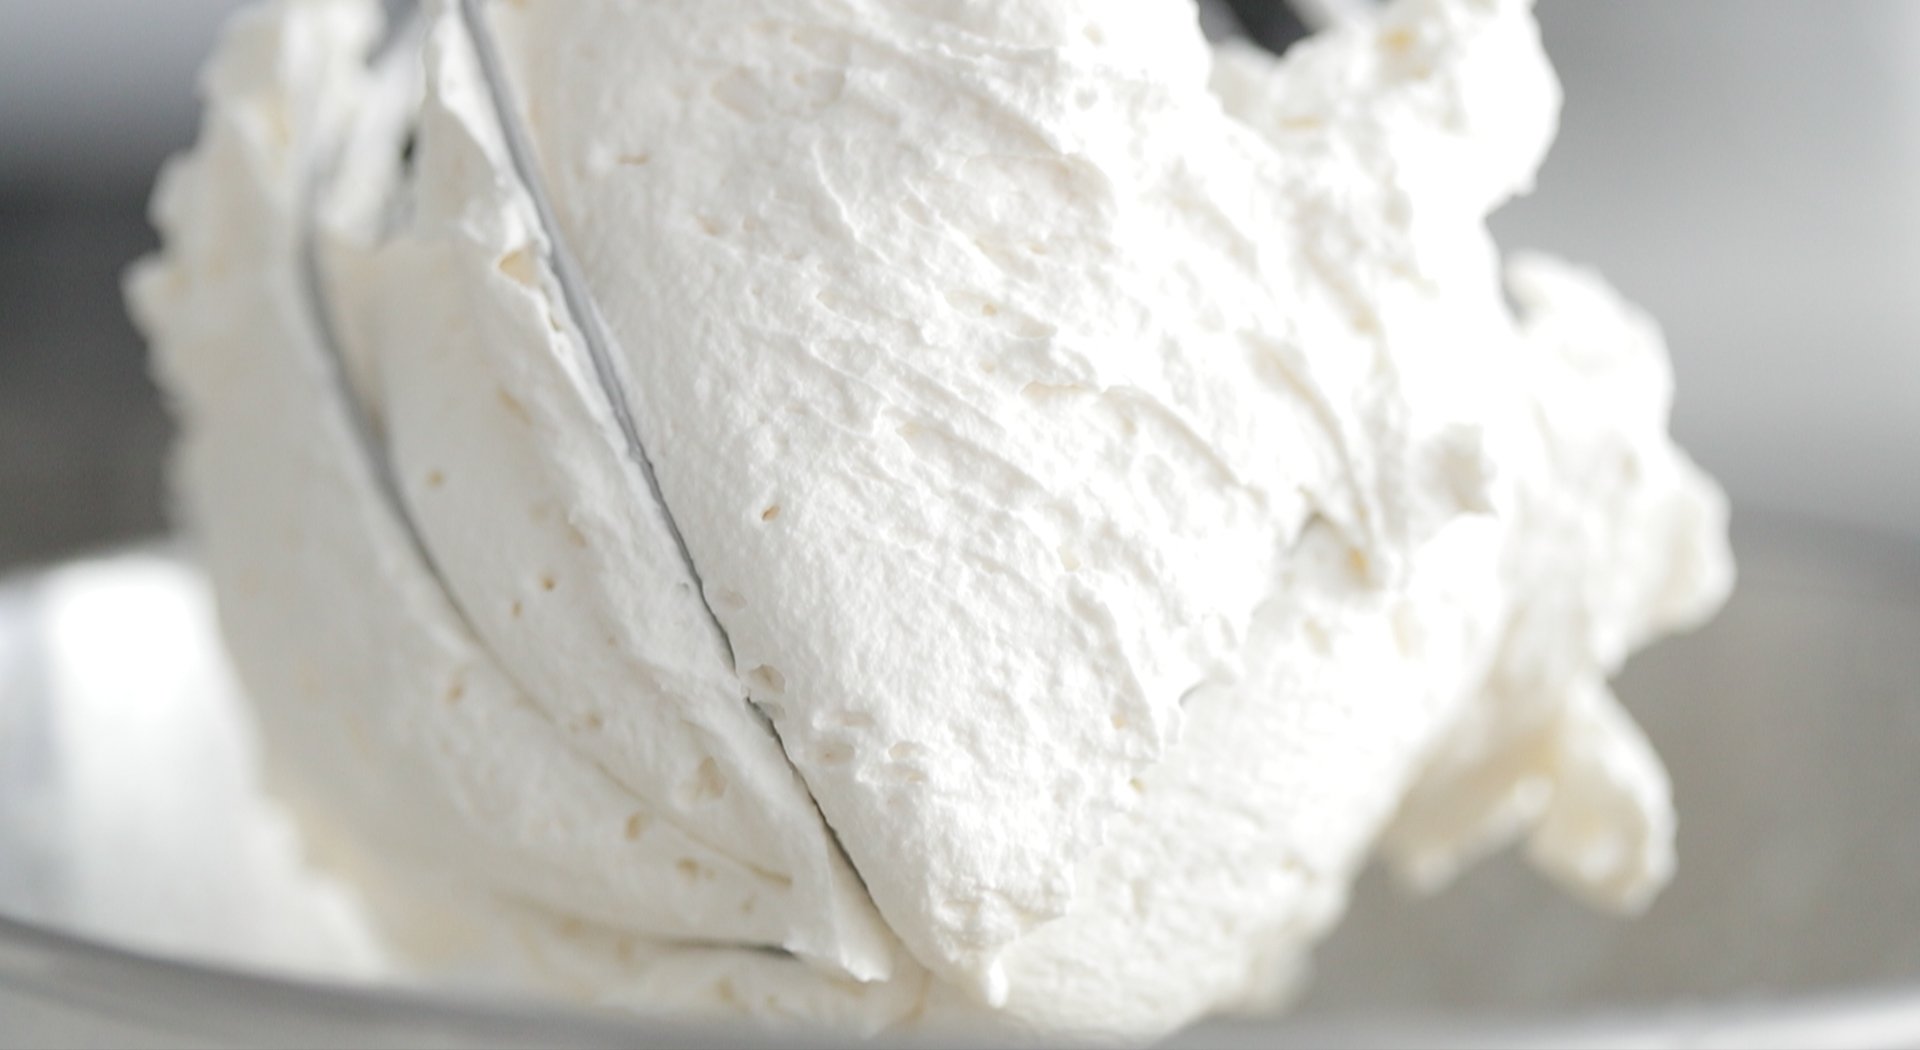
Whip the cream: I add the heavy cream and 1/2 cup of sugar to a stand mixer fitted with the whisk attachment and whisk on high speed until stiff peaks form.
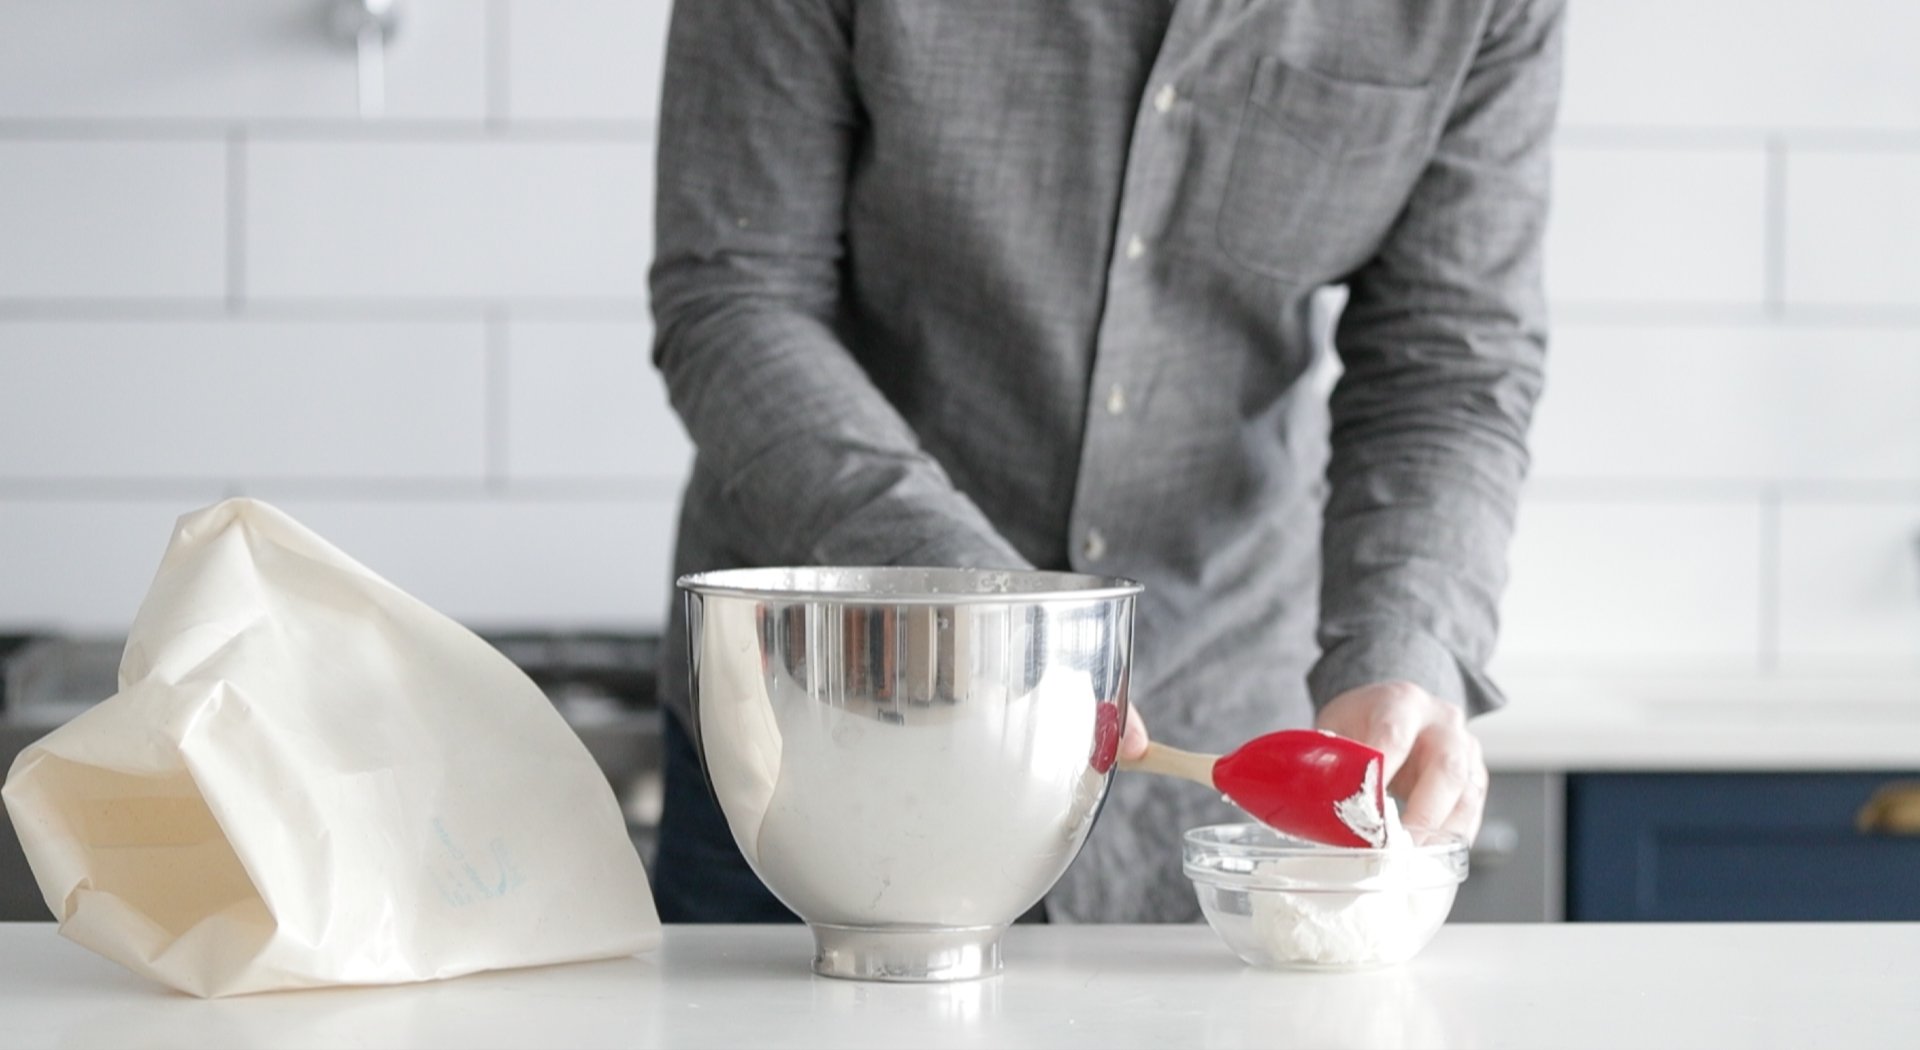
Chill: I transfer 1/3 of the whipped cream to a separate container and place both the 1/3 portion and the remaining 2/3 portion in the refrigerator to chill.
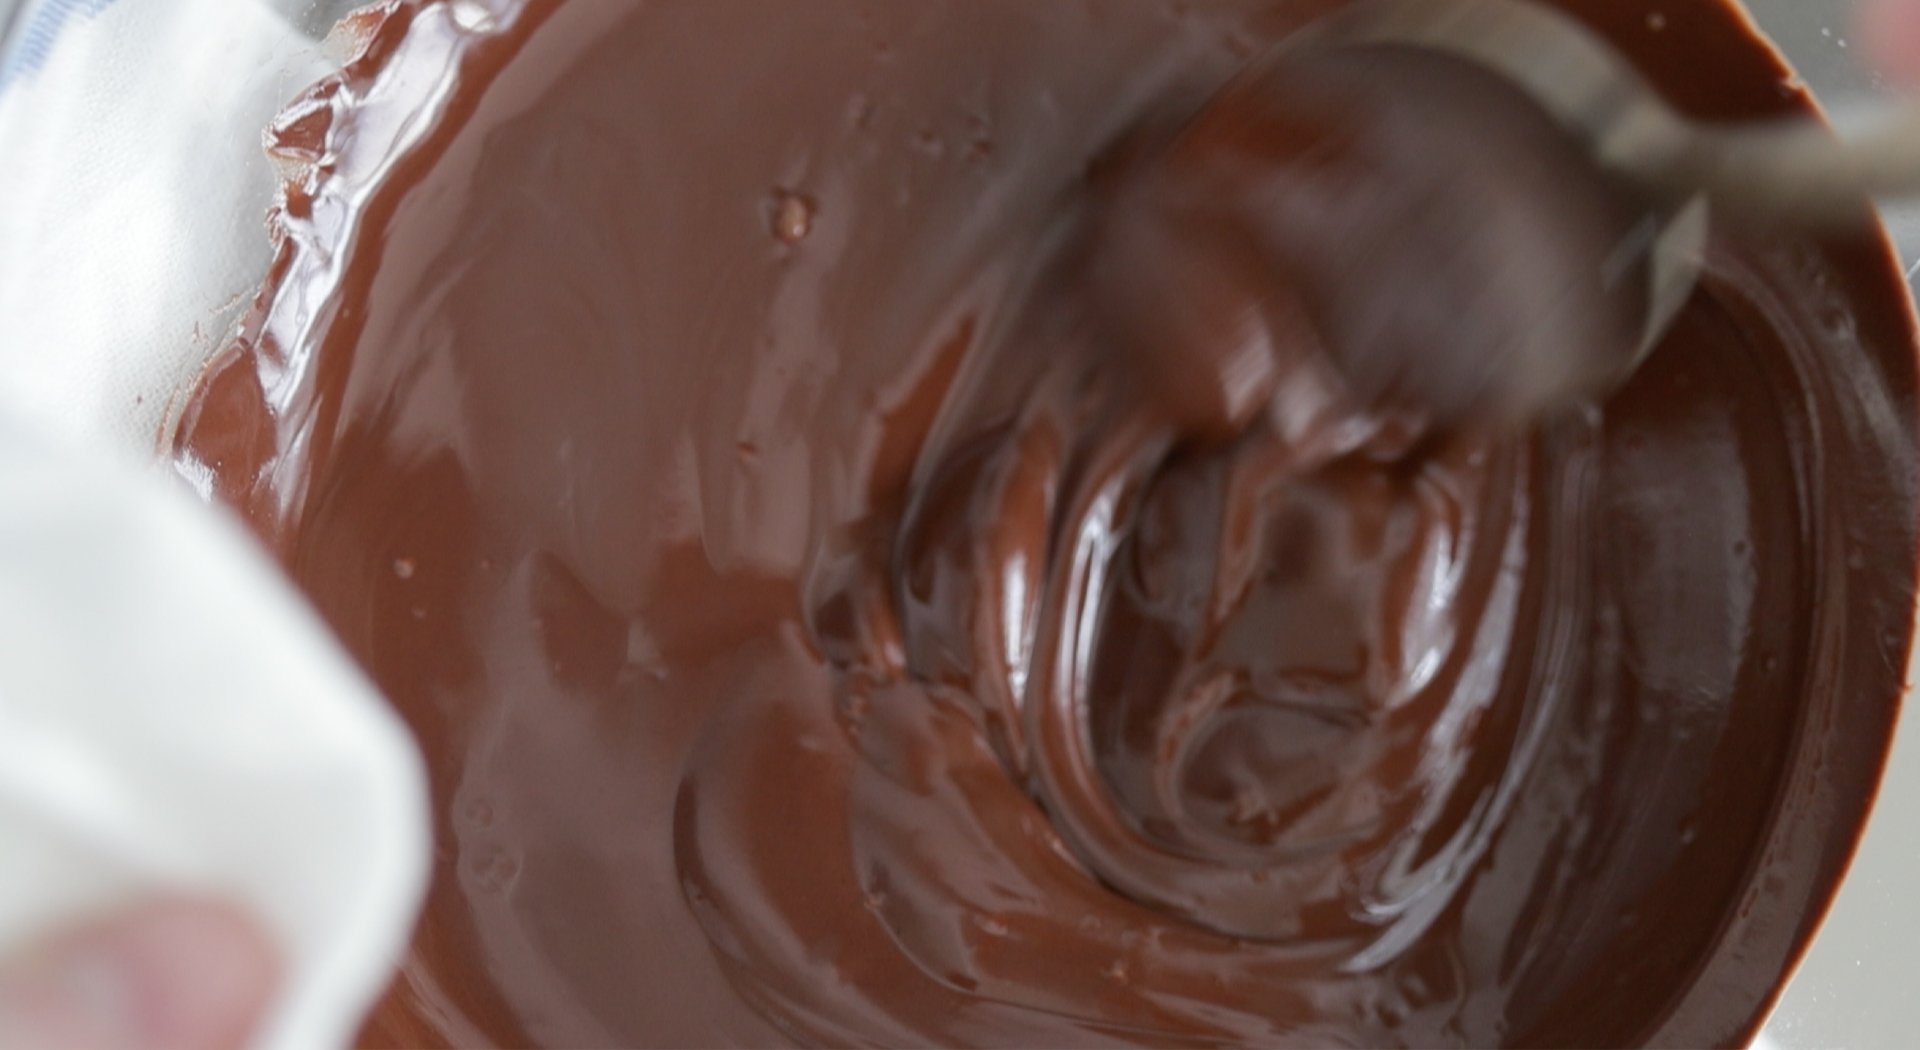
Melt the chocolate: I add the chocolate to a microwave safe bowl and heat it for 1 minute. I stir it, then return it to the microwave for 30 seconds. I stir again and heat it for another 30 seconds until the chocolate is fully melted. Then, let it cool to room temperature.
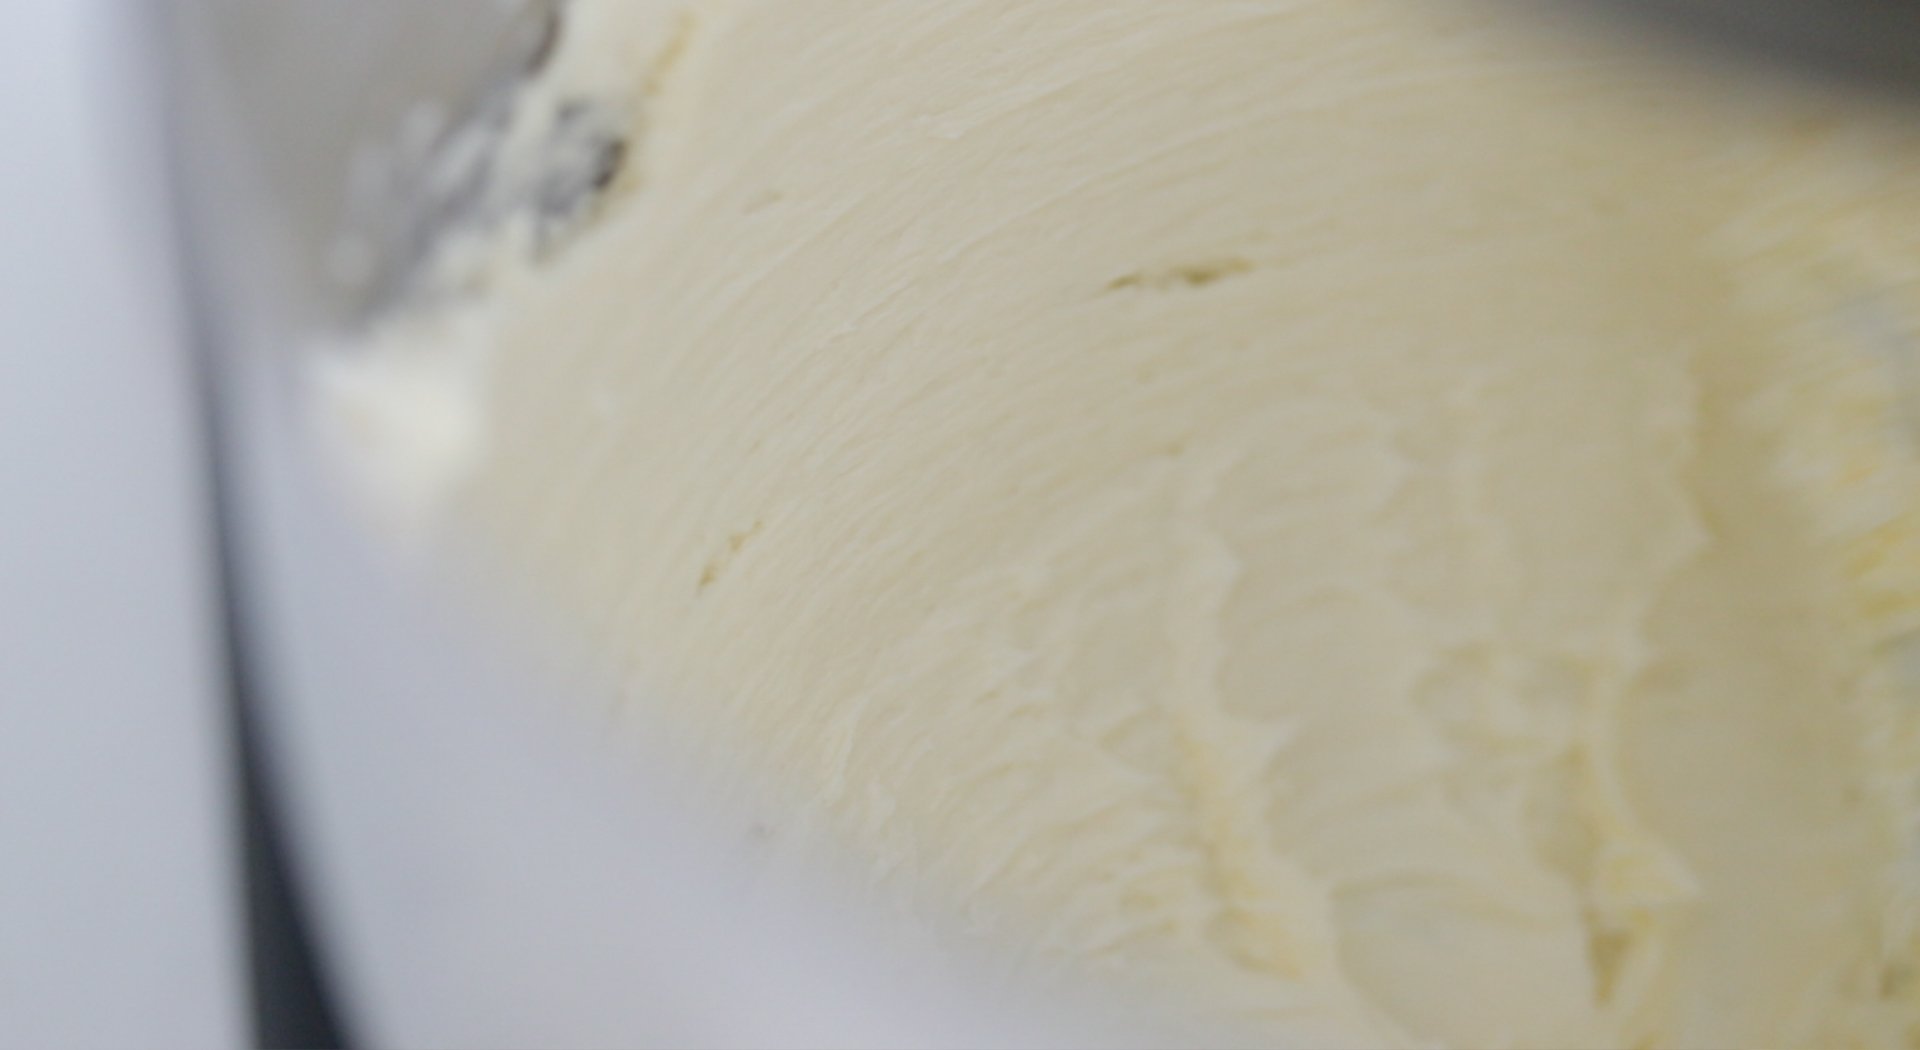
Cream the butter: I add the butter and sugar to a stand mixer fitted with the paddle attachment and mix on high speed, about 5 minutes.
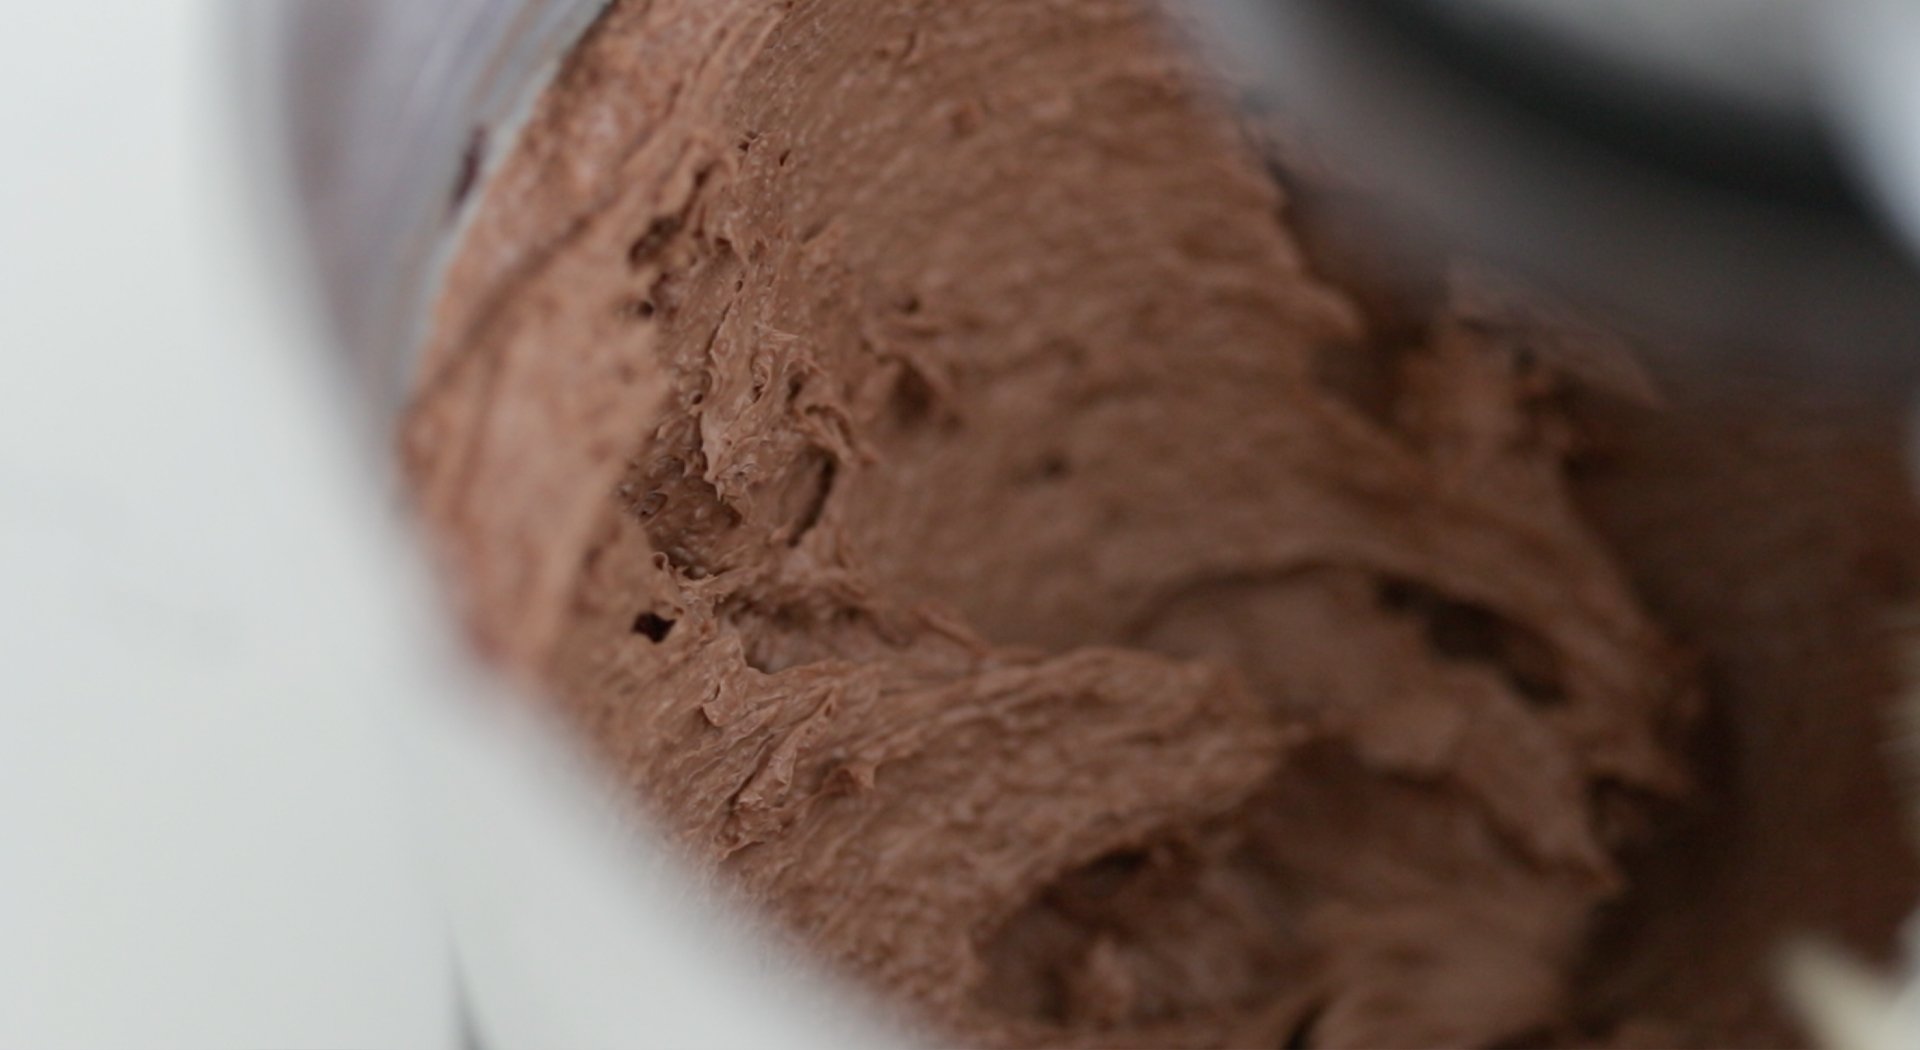
Add the flavoring: I mix in the vanilla extract and the cooled chocolate until everything is fully combined.
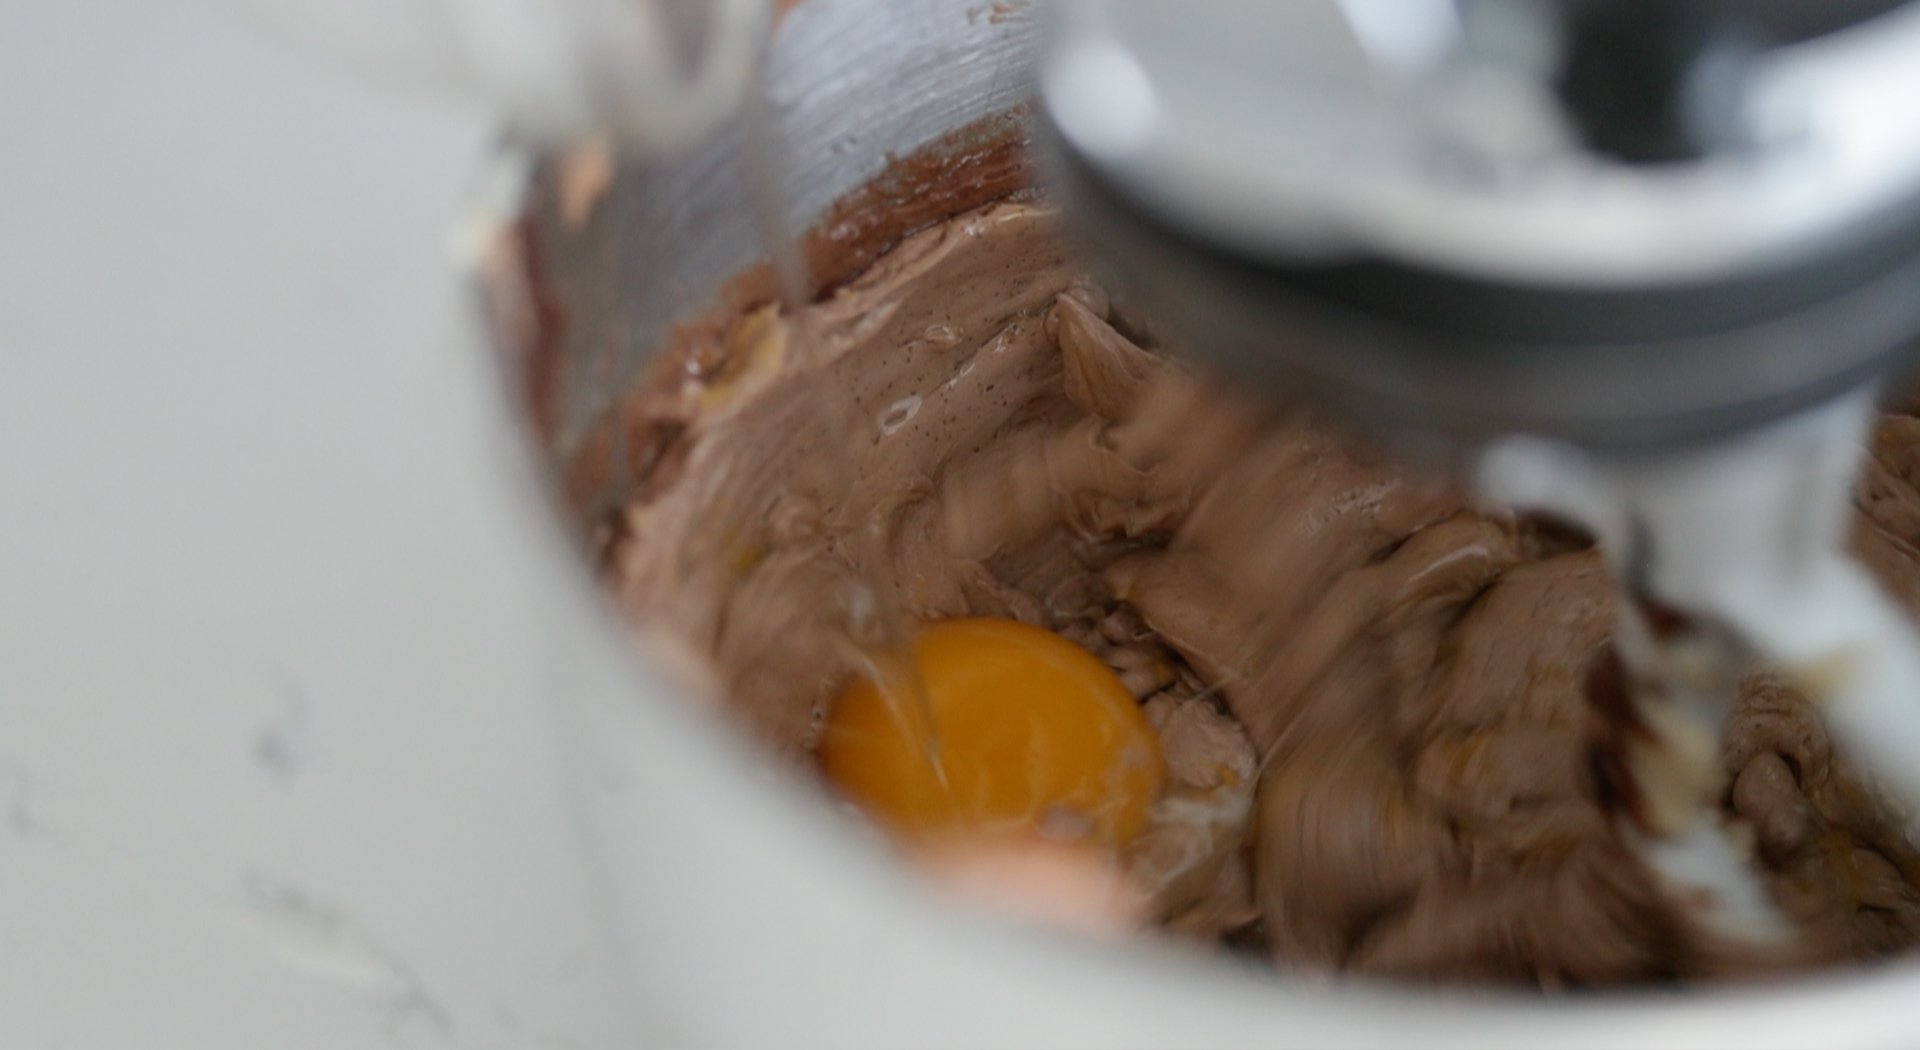
Add the eggs: I add 2 eggs and beat the mixture for 2 minutes before adding the remaining 2 eggs. I continue mixing for another 3 to 4 minutes until the filling is smooth and fluffy.
Fold in the cream: I fold in the chilled 1/3 cup of whipped cream using a rubber spatula.

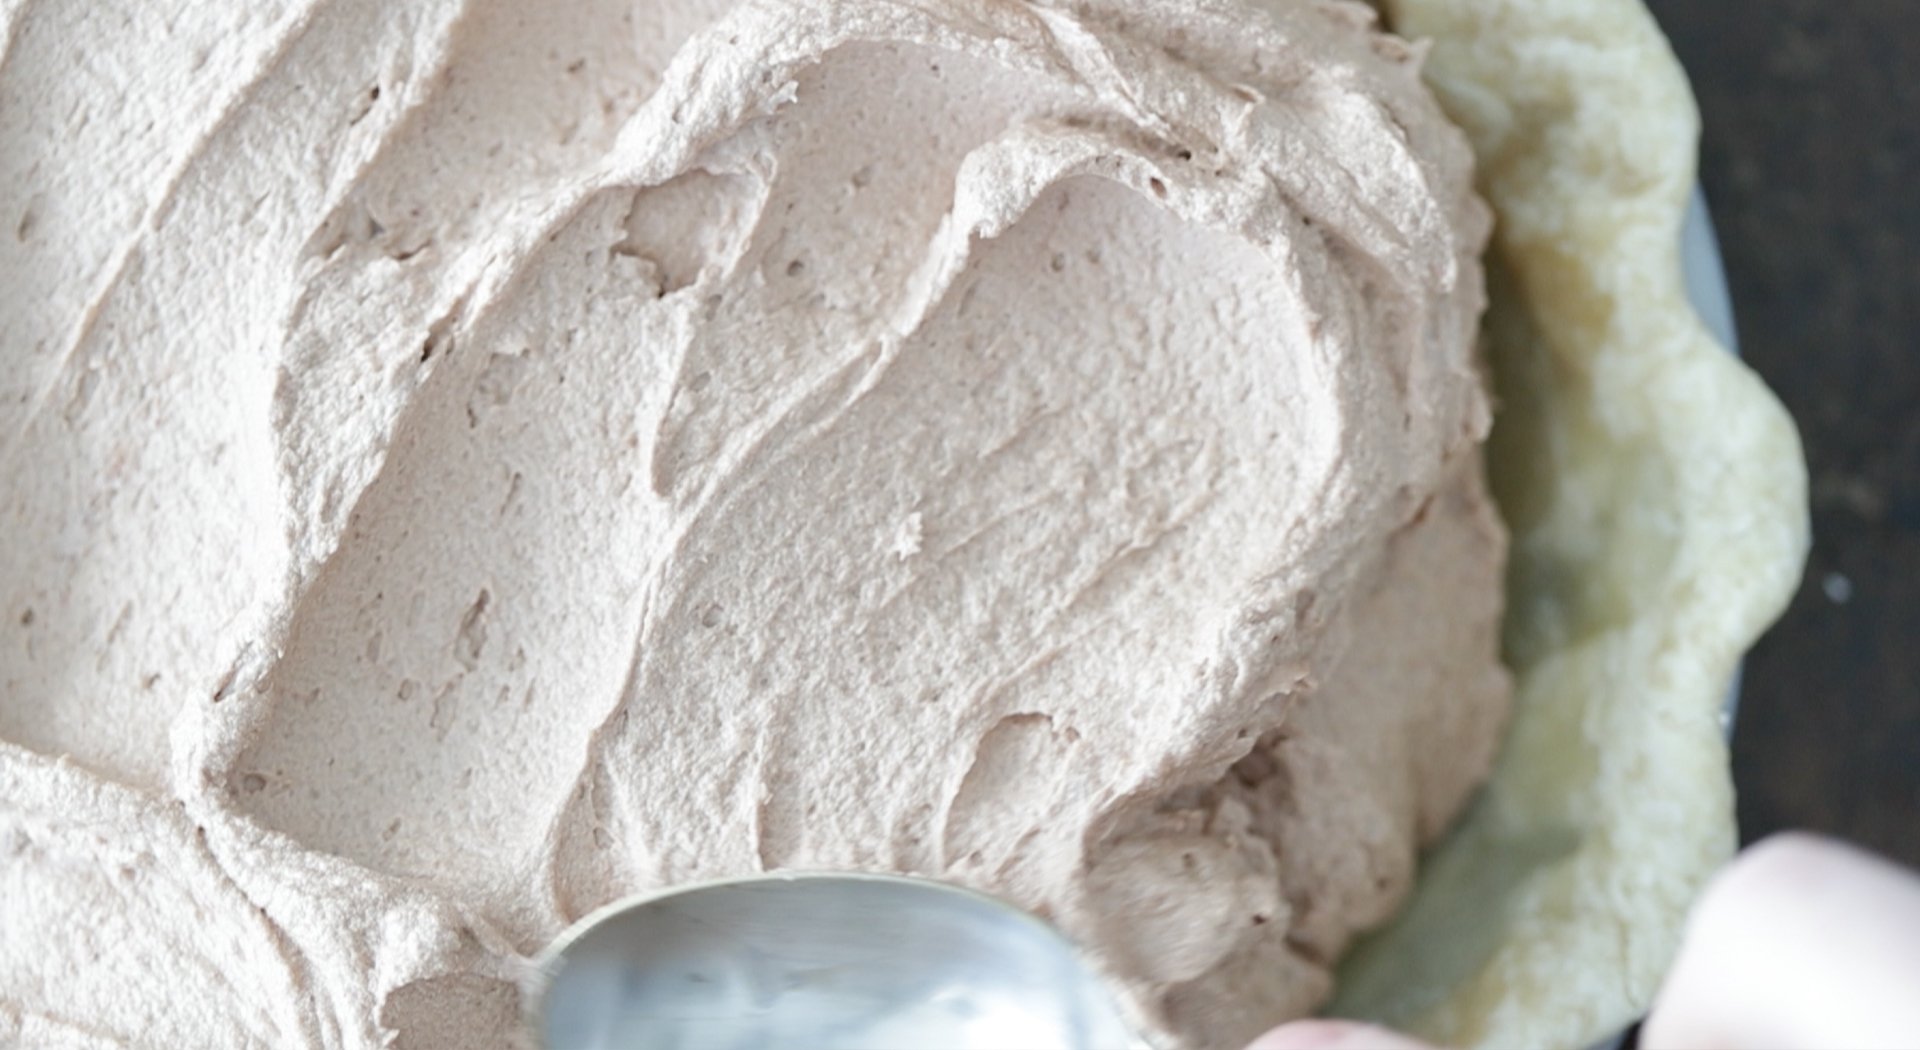
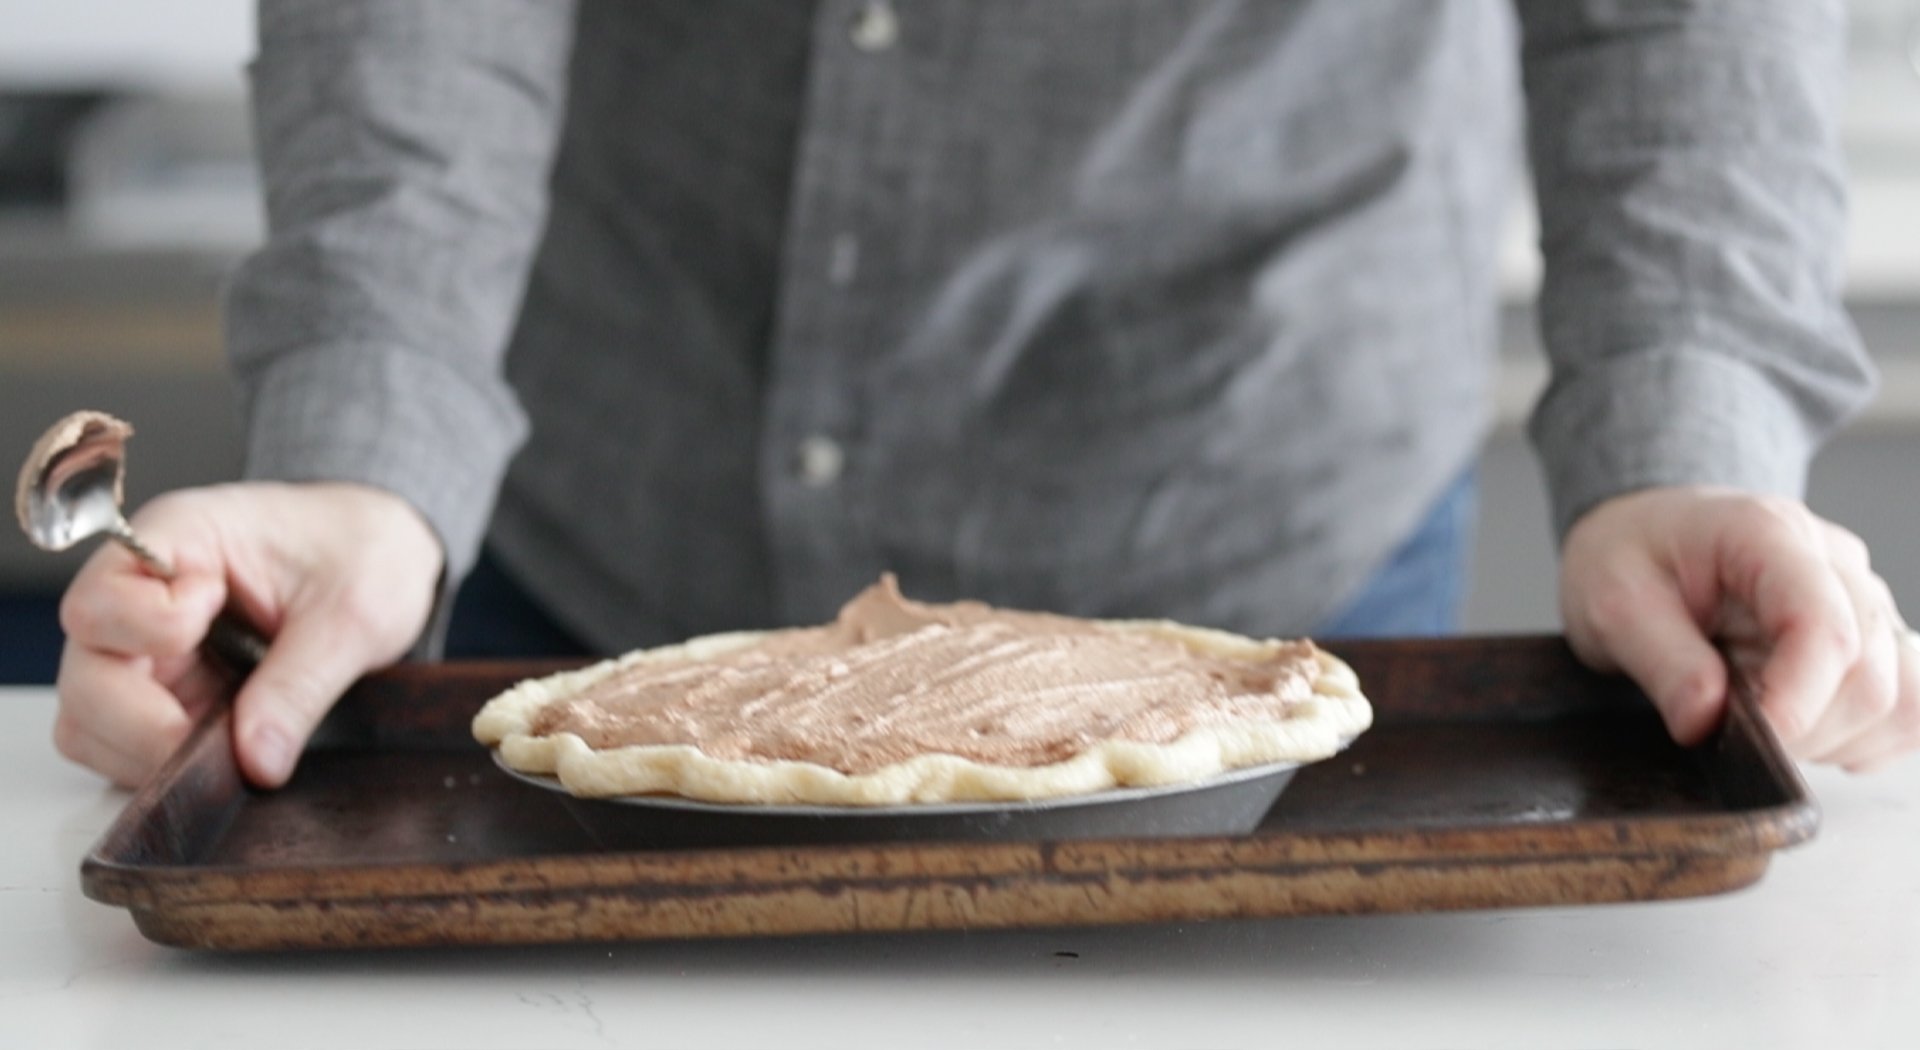
Fill the crust: I transfer the filling to the par baked pie crust and smooth it out using a spatula.
Chill the pie: Then, I place the pie in the refrigerator and chill it for at least 2 hours.
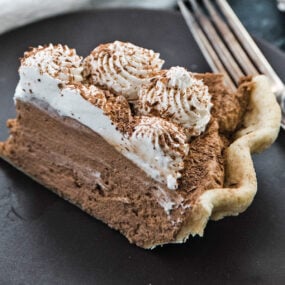
Finish the pie: I top the pie with the remaining whipped cream and add a garnish of shaved chocolate.


chef tip + notes
One of the most important things to understand with French silk pie is how the eggs are handled. I always use fresh organic eggs and let them come to room temperature so they blend smoothly into the filling. I understand the concern around raw eggs, but when you use the right technique, it is considered safe for most home cooks. For extra peace of mind, you can add the eggs one at a time while whisking them into the warm melted chocolate, slowly bringing them to a safer temperature before combining them with the rest of the filling.
- Use dried beans: I use whatever dried beans I have on hand, like lentils or kidney beans, when par baking the crust. They all work well to keep the crust in place.
- Soften the butter: I always make sure the butter is fully softened before mixing so it creams smoothly and creates a silky filling.
- Cool the chocolate: I let the melted chocolate cool slightly before adding it so it blends evenly without affecting the texture.
- Take your time mixing: I beat the butter and sugar long enough to add air, which helps the filling turn out light and smooth.
- Chill before slicing: I give the pie enough time in the refrigerator so it sets properly and slices cleanly when served.
Serving Suggestions
I made this French silk pie for Christmas, and everyone at the table could not stop talking about it. I shaved a block of chocolate over the top and finished it with a light dusting of cocoa powder, which instantly made the pie look more elevated.
If you are hosting New Years Eve, I really suggest giving this pie a try. When I want to make it extra chocolatey for my family, I serve it with my chocolate whipped cream recipe instead of classic whipped cream, which happens to be my daughters favorite. We usually enjoy it with a cup of coffee after dinner or even the next day if there are any leftovers.
Make-Ahead and Storage
Make-Ahead: You can make this pie up to 3 days ahead of time while keeping it cool in the refrigerator before serving. I recommend not adding the whipped cream to the top until it is ready to be eaten.
How to Store: You can keep the pie covered in plastic in the refrigerator for up to 5 days. This French silk pie will freeze and be covered for up to 3 months. Thaw it in the refrigerator for one day or until it is thawed.
More Dessert Recipes

Video
French Silk Pie Recipe
Ingredients
For the crust:
- 1 ½ cups all-purpose flour
- 1 stick of unsalted butter
- pinch of sea salt
- 2 teaspoons of sugar
- ¼ cup of ice cold water
For the Filling:
- 3 cups of heavy whipping cream
- ½ cup of sugar + 2/3 more
- 1 cup of unsalted butter
- 2 teaspoons vanilla extract
- 4 ounces semi-sweet chocolate
- 4 large eggs
Instructions
For the Pie Crust:
- Preheat the oven to 450°. If using convection, preheat it to 425°.
- Add the flour, butter, salt, and sugar to a food processor and pulse on high speed while drizzling in the water until it becomes like a meal. Note: you may need a bit more water.
- Transfer the dough to a clean surface dusted with flour, knead to form a ball, and then roll it out with a pin until it is 1/8 thick.
- Form the dough into a 9” pie pan, cutting off any excess and crimping the edges to make a ripple around the outside.
- Add a piece of parchment paper over the pie crust, pour some dried beans over the parchment paper, and par-bake for 6 to 8 minutes. The pie crust will not change much color but will become firm once cooled after baking.
- Remove from the oven and cool completely to room temperature.
For the Filling:
- Add the heavy cream and ½ cup of sugar to a standing mixer with the whisk attachment and whisk on high speed until stiff peaks have formed, which takes about 3 to 5 minutes.
- Set 1/3 of the whipped cream into a separate container, but chill both the 1/3 and 2/3 in the refrigerator until it’s time to use it.
- Add the chocolate to a microwave-safe bowl and heat for 1 minute. Stir and return to the microwave for 30 seconds. Stir and return to the microwave for 30 more seconds. At this point, it should be melted. Cool slightly to room temperature, which only takes 4 to 5 minutes.
- Add the butter and sugar to a standing mixer with the paddle attachment and mix on high speed until the butter becomes light and fluffy, which takes about 5 minutes.
- Mix in the vanilla extract and then the melted chocolate.
- Next, add 2 eggs and beat for 2 minutes before adding in the other 2 eggs. Beat for a further 3-4 minutes or until smooth and fluffy.
- Fold in the chilled 1/3 cup of whipped cream using a rubber spatula until it has been mixed in.
- Transfer the filling to the par-baked pie crust and smooth out using a spoon or spatula.
- Chill in the refrigerator for at least 2 hours or until the pie has settled and is firm.
- Top off with the remaining chilled whipped cream and add an optional garnish of shaved chocolate.
I made this pie using a shop-bought crust (too lazy to make one myself today…!).
The pie is delicious and very easy to make. The whipped cream and the chocolate filling make it very light and fluffy. It is so pleasant to eat! I will make it again, for sure.
Thank you for sharing the recipe!
Thank you for giving it a shot!
Can’t wait to make this! Can the pie dough be made in advance and frozen? Thank you.
Yes
I noticed you put 2tsp vanilla in the whipping cream. Does that take the vanilla measurement to 4 tsp total in the recipe?
Making it today but I have a question, can I substitute Milk Chocolate on place of the Semi Sweet Chocolate?
Thank you.
Dude, I know the Pie will be awesome, it’s your recipe Billy.
yes
Made two for Easter get together with family and friends. Was fabulous! Easy to make crust, super smooth filling and whip cream left over to put in my coffee in the morning. Win win. Thanks for the recipe
Appreciate you trying it!
I made this fabulous pie for Thanksgiving. I have made french silk pies before but none this wonderful !!!! EVERYONE loved it. It will be the recipe I go to from now on !
Excellent!
Made this for my daughter’s birthday this past weekend and everyone loved it! It looked beautiful and tasted heavenly! Thank you so much for your recipe and tutorial video!! 😀
My pleasure!
I made this for the holiday and my family couldn’t believe I actually made this! It was a huge hit and the whole process was easier then I thought. I will never buy a French silk pie again!