

Ladyfingers Recipe (Savoiardi)

- By Chef Billy Parisi
- Published

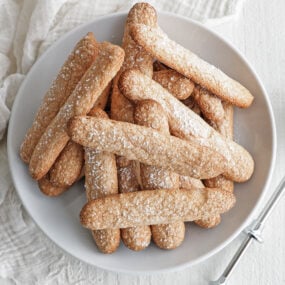
These homemade ladyfingers are long, slender sponge cookies, crunchy on top and light as air inside. I make a batch whenever I want tiramisu from scratch, and they need nothing but flour, cornstarch, eggs, and sugar. The prep takes me 30 minutes, and they bake in 10.
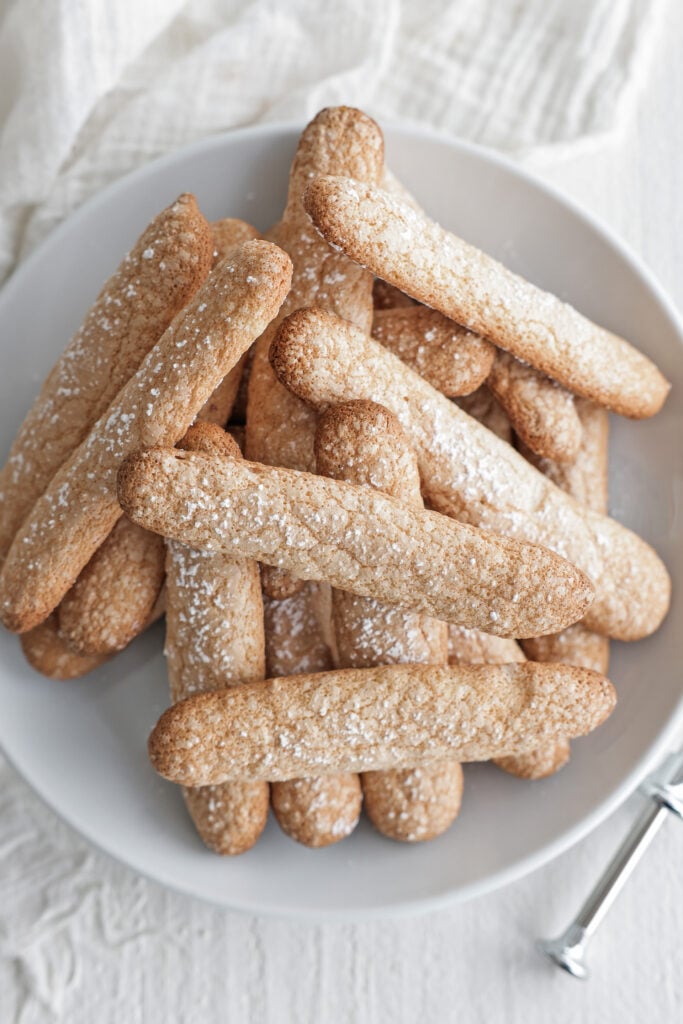

You may know these as savoiardi, which is what we always called them growing up in an Italian-American house. I admit that I used to buy the boxed ones at the store, back when I was working the line and did not have a spare hour on a day off to pipe cookies. Then I made them once for a real homemade tiramisu and never went back. If you like a homemade Italian dessert to go with your espresso, my homemade cannoli and cherry biscotti sit in the same corner of my recipe box. I have to confess that this is the cookie I make most lately.
Homemade Ladyfingers (Savoiardi)
Ladyfingers, known in Italy as savoiardi, are a long, thin, dry sponge cookie sweetened with a crisp powdered-sugar crust on top. They are the classic base for tiramisu. They also show up layered into trifles, and plenty of people eat them straight alongside a morning espresso. That last one is my favorite, and it is genuinely awesome first thing in the day.
Here is the whole thing at a glance before you start. You whip the yolks with sugar until they are thick and pale. Whip the whites separately to medium-stiff peaks, then fold the two together. Then, fold in a sifted flour and cornstarch mix. Pipe them out with a round tip, dust them hard with powdered sugar, and bake hot and fast until the tops are lightly browned.
I will be honest with you, this is not the easiest cookie I make. The batter texture and the sizing take a little attention, and so does catching them at the right second in the oven. But the recipe is foolproof if you follow it, and once you have done it once, your hands know what to do. These come out crunchy enough to stand on their own, which is exactly what you want for tiramisu instead of the pre-made boxed kind. Sound good, let’s cook!
Ingredients and Substitutions
These are the ingredients I use to make the ladyfingers from scratch. I also provide a few substitutions that work well:
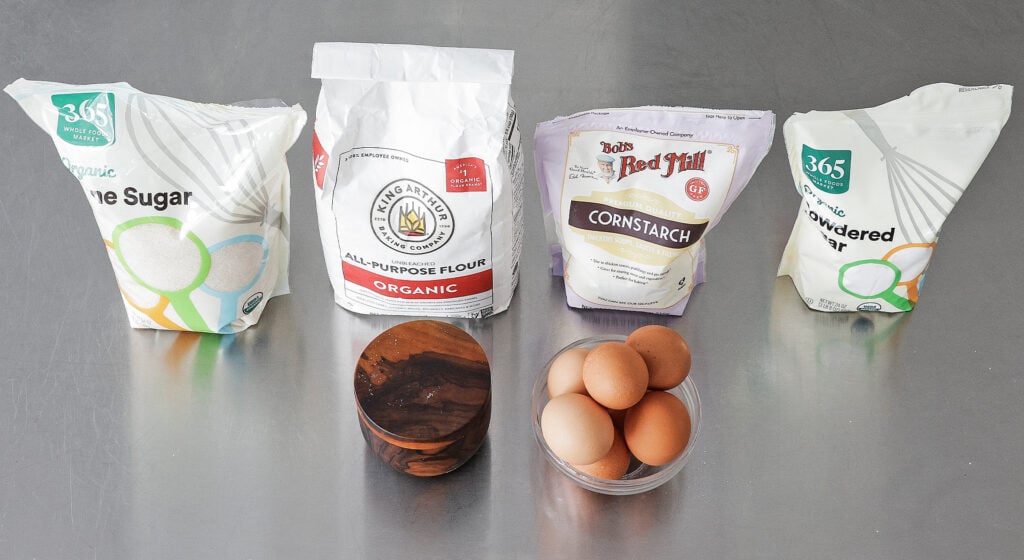
- All-purpose flour gives the cookies their structure so they set properly and stay crisp instead of collapsing. It is the backbone of the sponge.
- Cornstarch – Sifted together with the all-purpose flour, it lowers the protein and essentially makes a homemade cake flour. That is what provides ladyfingers their fine crumb and pale even color. If you keep cake flour on hand, use it straight and skip both this and the all-purpose.
- Egg yolks whipped with sugar until thick and light, the yolks bring color, fat, and richness to the batter. There is no swap here; the whole texture depends on them.
- Egg whites – Whipped separately to medium-stiff peaks, the whites are what make the batter airy and give the cookies their lift as they bake. Fresh eggs whip taller than old ones.
- Granulated sugar, split between the yolks and the whites, it sweetens the cookies and helps stabilize both whips. These are not overly sweet; to me they are perfectly balanced.
- Powdered sugar – A heavy dusting over the piped batter right before baking. It sweetens the top and lightly caramelizes in the oven, which is what browns and crisps the crust.
How to Make Ladyfingers
Preheat the oven: Set the oven to 400 F with no fan and let it come fully up to temperature. These bake hot and fast, so a properly heated oven matters before the first tray goes in.
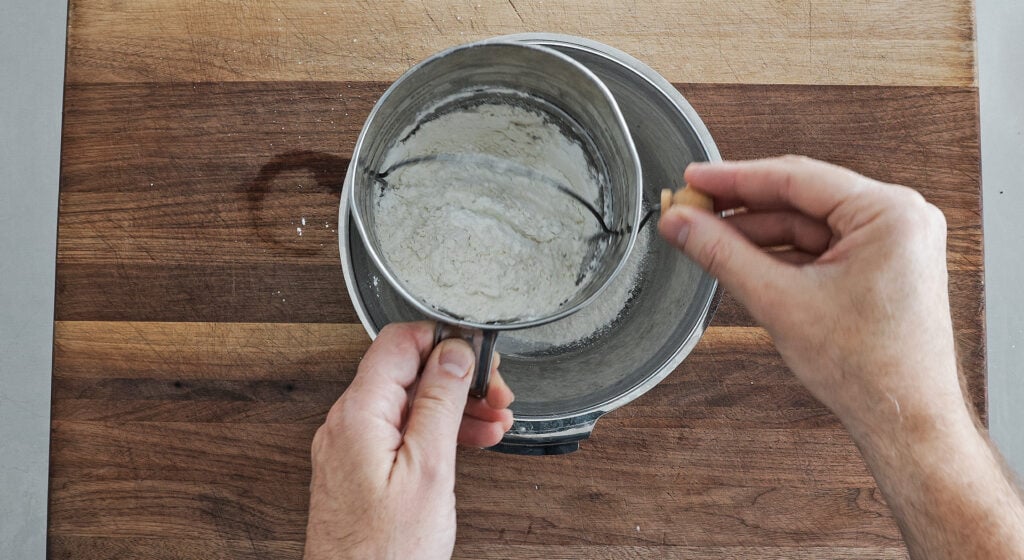
Sift the dry ingredients: Sift the all-purpose flour and cornstarch together into a bowl and set it aside. Sifting is what keeps the crumb fine and free of lumps, and it is how the cornstarch does its cake-flour job.
Whip the yolks: Add the egg yolks and 1/4 cup of the sugar to a stand mixer with the whisk attachment, or use an electric hand mixer. Whip on high for about 8 minutes until the mixture is thick, pale, and light. This is the base of the whole sponge, so do not shortcut the time; the volume you whip in here is the volume you get in the cookie. Set it aside.
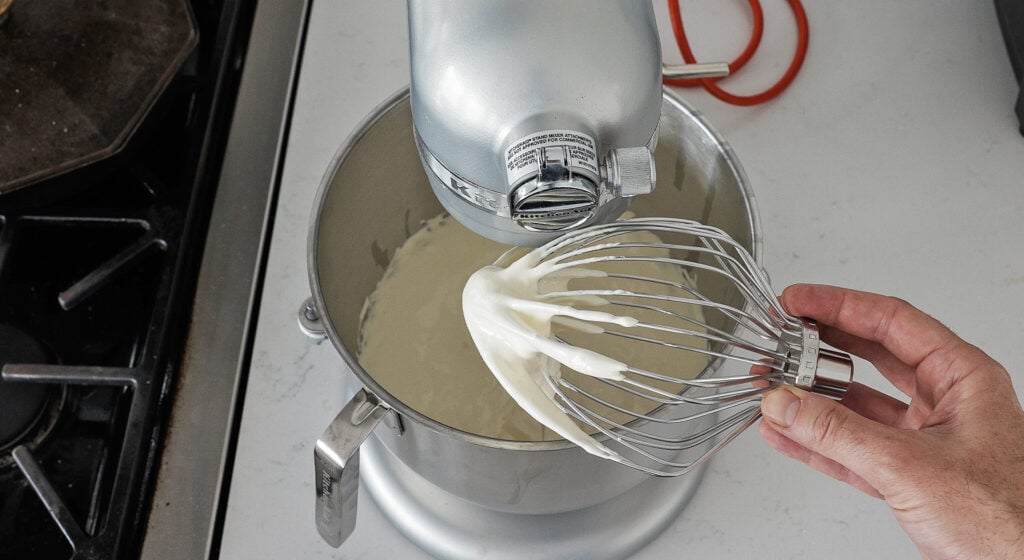
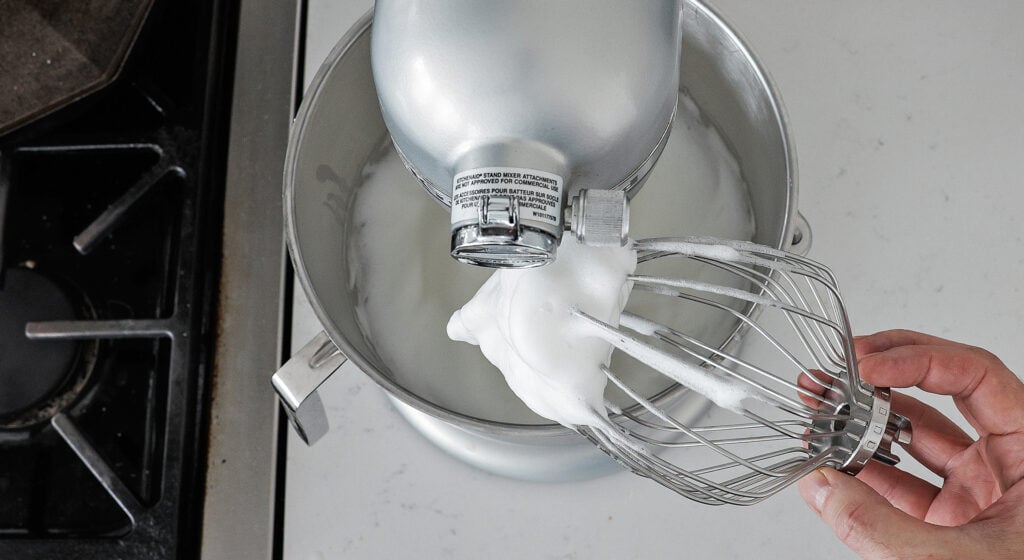
Whip the whites: In a clean stand mixer bowl with the whisk attachment, add the egg whites and the remaining sugar. Whip on high until they form medium-stiff peaks. Medium-stiff, not dry and cracked, is the target, because whites taken too far lose the flex you need for folding.
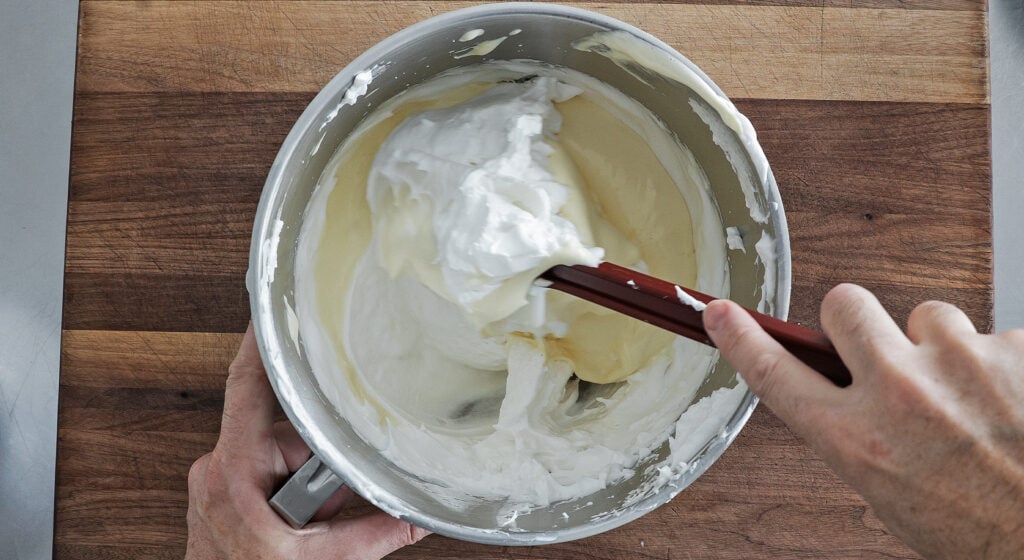
Fold in the yolks: Fold the whipped yolks into the whites until just combined. Work quickly but with a light hand. Every stroke you take deflates the batter a little, so the goal is combined with as few folds as possible.
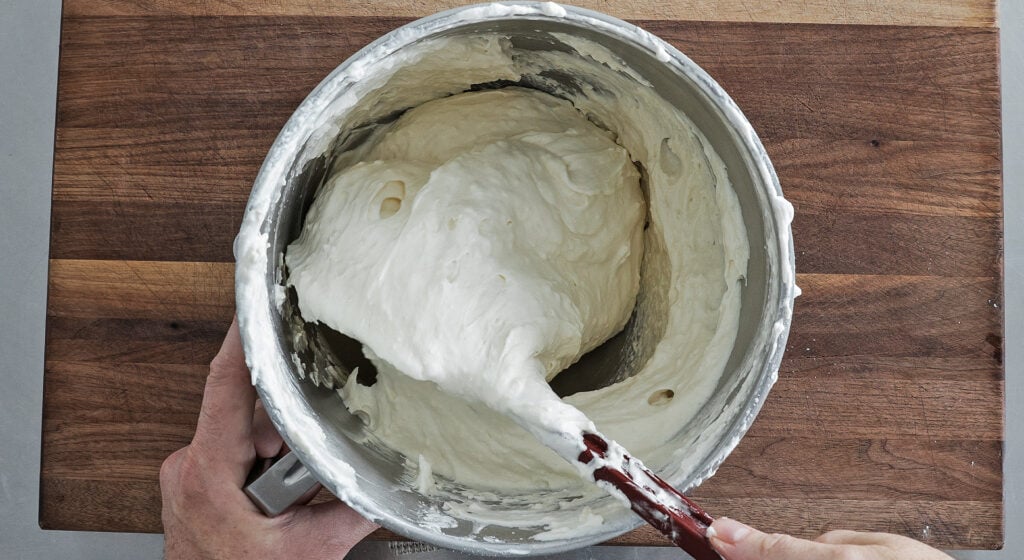
Fold in the flour: Fold the sifted flour-and-cornstarch mixture into the eggs until combined and smooth. Transfer the batter to a piping bag fitted with a #4 round tip or similar. It will not all fit in one batch.
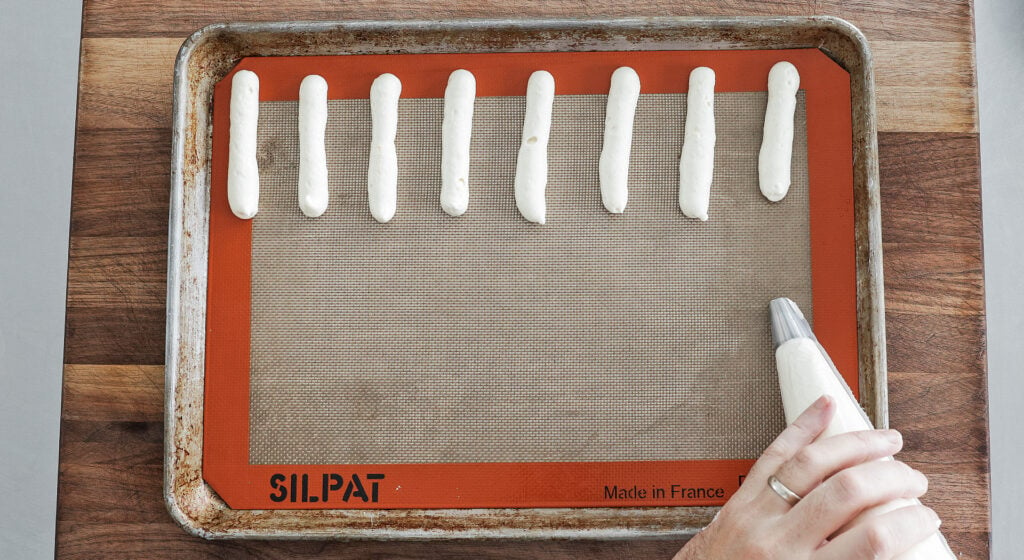
Pipe the cookies: Squeeze out the batter in strips about 4 to 5 inches long onto a sheet tray lined with parchment or, better yet, a Silpat. A Silpat releases them far more easily than parchment. You should fit 20 to 25 per tray, and the finished cookies should measure about an inch wide and 1/2 inch thick.
Dust with powdered sugar: Dust the piped cookies heavily with powdered sugar. Do not be shy here; a heavy hand is what gives you that crackly, sweet, lightly browned top.
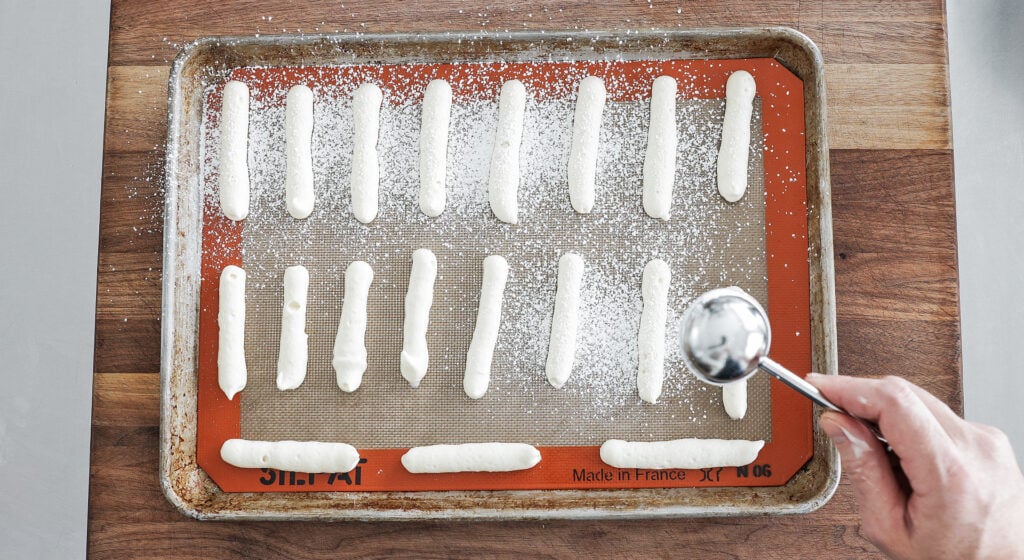
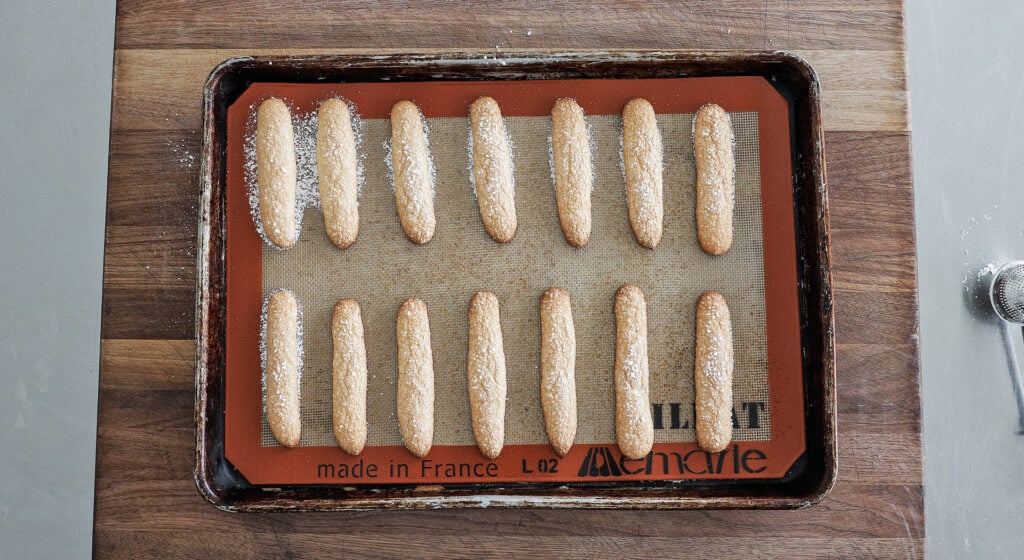
Bake: Bake on the middle rack at 400 F for 10 minutes, until lightly browned on top and around the edges. That color is what tells you the crust has set crunchy enough for tiramisu. If you are baking more than one tray at a time, rotate the pans halfway through.
Cool completely: Cool the cookies completely on a rack before serving or storing. They firm up as they cool, so give them the time.

Chef Tip + Notes
Here is the tip I highly recommend when making ladyfingers at home: I whip the yolks and whites to two different stages, and treating them the same is the fastest way to end up with a flat batch. The yolks need a full 8 minutes until they’re thick, pale, and ribbon-like, while the whites only need to reach medium-stiff peaks. When both are right, the batter stays airy as you fold, and the ladyfingers bake up light instead of turning into dense sticks.
- Fold fast and light: Once the whips meet, every stroke deflates the batter. Combine the yolks and whites with as few folds as you can, then do the same with the flour. Overfolding is what flattens ladyfingers.
- Use a #4 round tip: The tip size is how you hit the classic 4 to 5 inch by 1 inch cookie without guessing. Pipe with steady even pressure and lift off at the end to break the strip.
- Line the tray with a Silpat: Parchment works, but a Silpat releases these delicate cookies without tearing the bottoms. It is the single easiest upgrade for a neat tray.
- Dust heavily: A generous coat of powdered sugar before baking is not just for looks. The sugar caramelizes in the oven, which browns and crisps the top into that signature crackly crust.
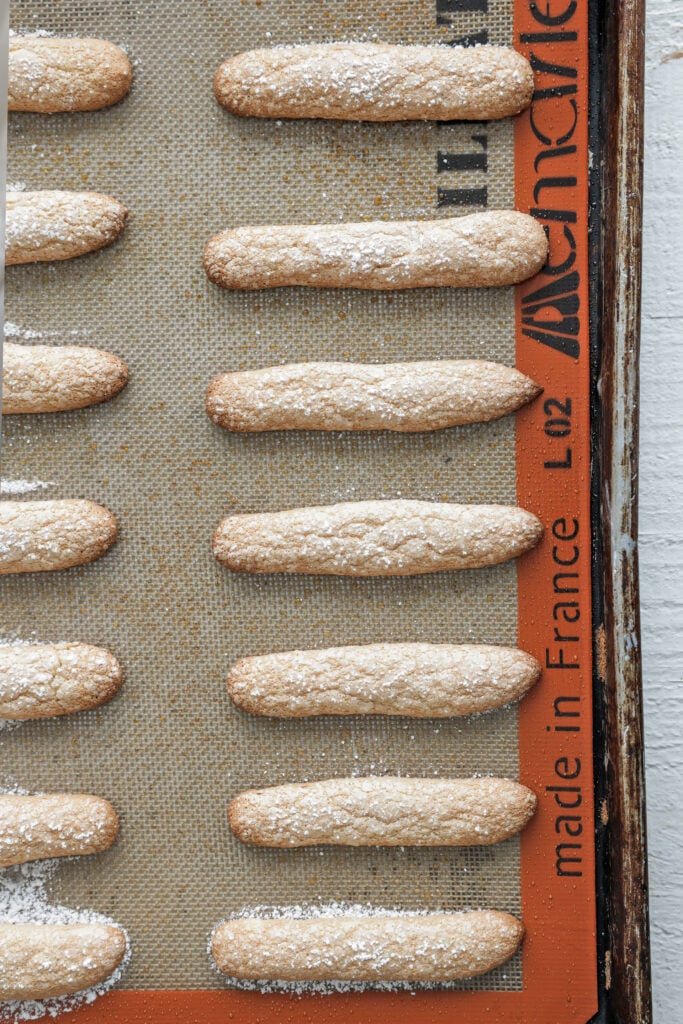
- Bake for crunch: Take them to lightly browned at the edges and top. That dryness is exactly what you want for tiramisu, so the cookies hold up when they soak instead of falling apart.
Serving Suggestions
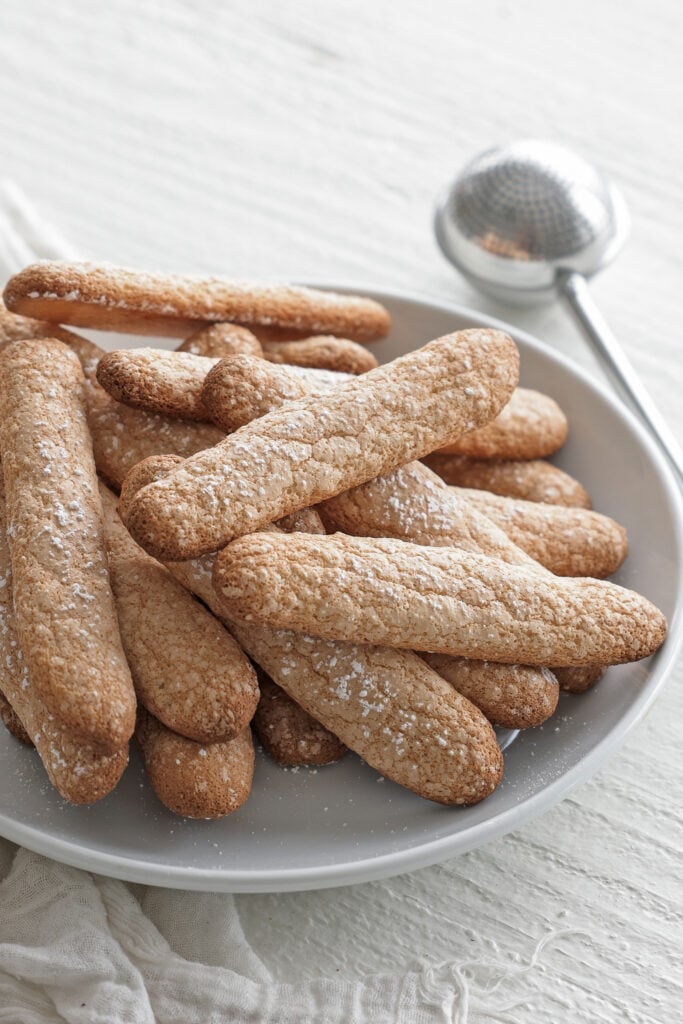
The way these show up most in my house is next to coffee. A couple of ladyfingers with a cortadito in the morning is a genuinely great start to the day. When I want to make more of it, I love adding a scoop of homemade vanilla ice cream so we can use the cookies as edible spoons.
Of course the real reason I make a batch is tiramisu, where the dry, crisp cookie is made to soak up espresso and hold its structure under the mascarpone. They are just as good layered into a trifle, or laid alongside a bowl of berries and a pour of crème anglaise for a quick plated dessert. Any that go stale are even better for dunking, so I never worry about a cookie or two hanging around past its prime.
Make-Ahead and Storage
Make-Ahead: I make these up to one day ahead for the best freshness. If they are going into tiramisu, I leave them uncovered for up to a day after baking so they dry out even more before I assemble.
How to Store: I cover them and keep them at room temperature for up to 3 days.
How to Freeze: I freeze them covered for up to 2 months. To thaw, I move them to the refrigerator for a day or until fully thawed. They may lose a little of their crunch once thawed.
More Dessert Recipes
- Homemade Sicilian S Cookies
- Torta Caprese
- Italian Ricotta Cheesecake
- Ricotta Olive Oil Cake Recipe
- Perfect Crème Brûlée Recipe

Homemade Ladyfingers Recipe (Savoiardi)
Ingredients
- 1 cup all-purpose flour, plus 1 tablespoon
- 2 tablespoons cornstarch
- 9 large egg
- 1 cup granulated sugar, scant
- 6 egg whites
- Powdered sugar for garnish
Instructions
- Preheat the oven to 400° F no fan.
- Sift together the flour and cornstarch into a bowl. Set it to the side.
- Add the egg yolks along with a ¼ cup of the sugar to a stand mixer with the whisk attachment. You may also use an electric hand mixer. Whip on high speed for about 8 minutes until it is thick and light. Remove it from the mixer and set it to the side.
- In a clean stand mixer bowl with the whisk attachment add in the egg whites and the remaining sugar. Whip on high speed until it forms medium stiff peaks.
- Remove it from the mixer and fold in the whipped egg yolks until combined. Be quick but be gentle.
- Then fold in the flour-cornstarch mixture until combined and smooth. Transfer the mixture to a piping bag with the #4 round tip, or like tip. You will not be able to fit it all in 1 batch.
- Next gently squeeze out the batter about 4 to 5 inches long evenly on a sheet tray with parchment paper or better yet a Silpat. You should be able to fit 20 to 25 per sheet tray.
- Heavily dust the cookies with powdered sugar.
- Bake on a middle rack at 400° F for 10 minutes or until lightly browned on top and around the edges. This will render a crunchy cookie perfect for tiramisu. If you are baking all of them at once, rotate the pans half way through the cooking process.
- Cool completely on a rack before serving.