Focaccia Recipe (Focaccia alla Genovese)


Learn how to make authentic Focaccia alla Genovese in your own kitchen. This easy recipe uses a flavorful biga pre-ferment and baking staples to give you Italian focaccia with a crisp, golden crust, a tender crumb, and mouthwatering oil-soaked dimples. Top it with rosemary and garlic or customize it with your favorite flavors.
I love making my own bread not only because it tastes better than store-bought but also because the process is so satisfying. If you’re on your own breadmaking journey, I’d encourage you to try my French Boule and Brioche Bread recipes.
Homemade Focaccia
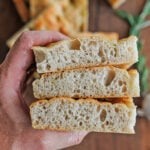
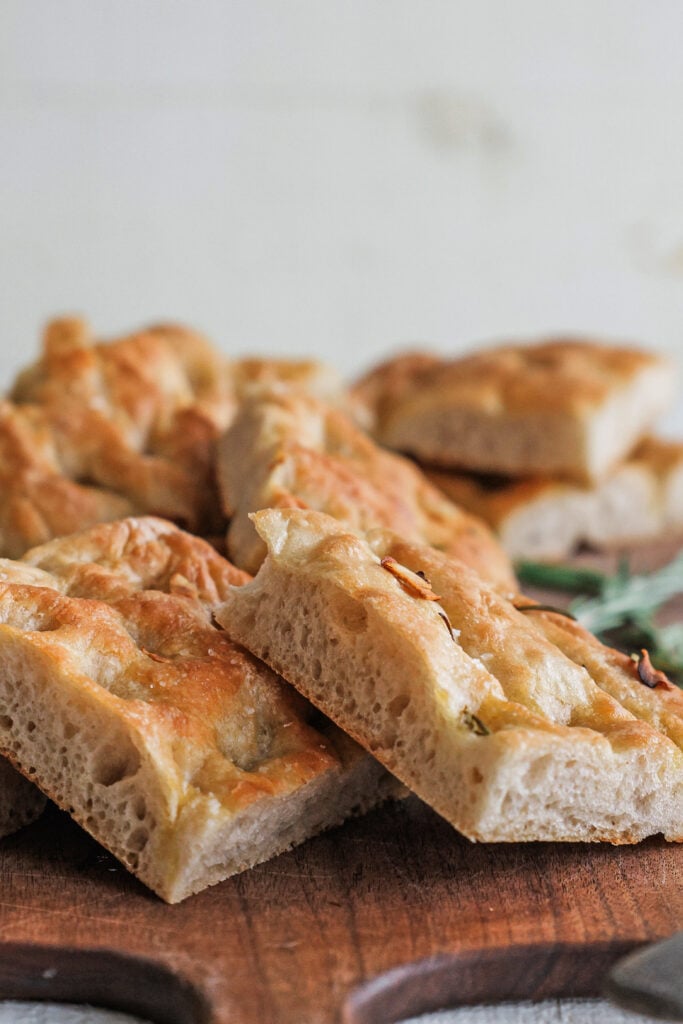
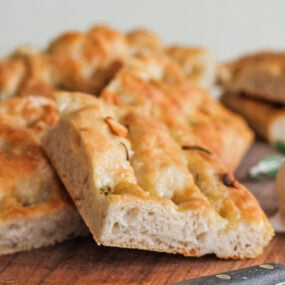
Focaccia is a classic Italian square bread known for its golden, olive oil-soaked crust and tender, airy interior. Unlike denser Italian breads like ciabatta or pane casereccio, focaccia is light and delightfully fragrant. This makes it perfect for snacking, dipping, or serving alongside a meal.
The most famous variety, Focaccia alla Genovese, originates from Genoa in Italy’s Liguria region. Traditionally baked as a rustic everyday bread, it was often enjoyed plain or topped with herbs like rosemary or thyme. Over time, the combination of focaccia bread’s crisp crust, soft crumb, and rich olive oil flavor became a staple of Italian cuisine.
What sets this focaccia bread apart is the use of a biga, or pre-ferment, which develops deep, complex flavors and a strong gluten structure while keeping the crumb open and airy. Once baked, the dimpled surface forms little pockets that soak up olive oil, rosemary, and garlic. Simply put, focaccia delivers a perfect trifecta of golden crunch, tender crumb, and rich, savory flavor that other Italian breads just can’t match.
Ingredients and Substitutions
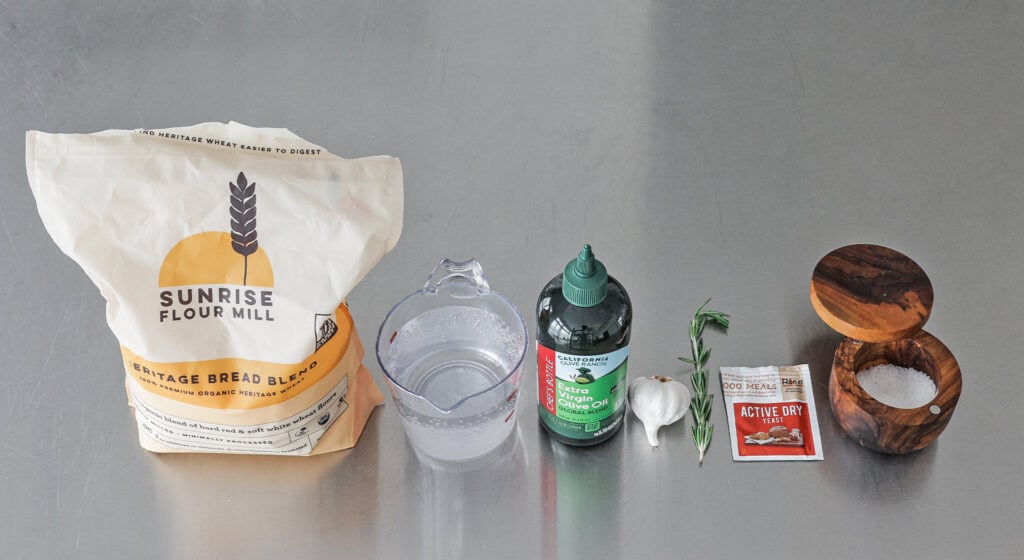
My easy focaccia recipe only requires everyday baking staples. I’ve also included some substitution ideas in case you happen to be out of an ingredient or two. However, I don’t recommend straying too far from the original recipe.
- Biga – I started this recipe with a biga for that true Italian flavor and texture. It’s made from a simple mixture of bread flour, filtered lukewarm water, and active dry yeast. Using bread flour here is key because its high protein content builds the gluten structure that gives focaccia its signature airy interior.
- Flour – I reach for bread flour again when it’s time to make the dough because it gives the bread a chewy crumb. All-purpose flour can be used as a substitute, but it will yield a slightly different texture.
- Water – I use filtered lukewarm water (about 100-105°F) to activate the yeast and hydrate the dough.
- Yeast – Active dry yeast is my go-to in homemade bread recipes.
- Salt – I use coarse salt to add flavor to the dough.
- Oil – It’s important to use high-quality cold-pressed extra virgin olive oil when making focaccia from scratch. Regular olive oil will work, but it’s the grassy, fruity flavor from EVOO that makes the focaccia taste truly authentic.
- Herbs – I used fresh rosemary, but feel free to use fresh thyme or oregano instead.
- Garlic – I also sprinkled thinly sliced garlic cloves over the dough.
How to Make Focaccia Bread
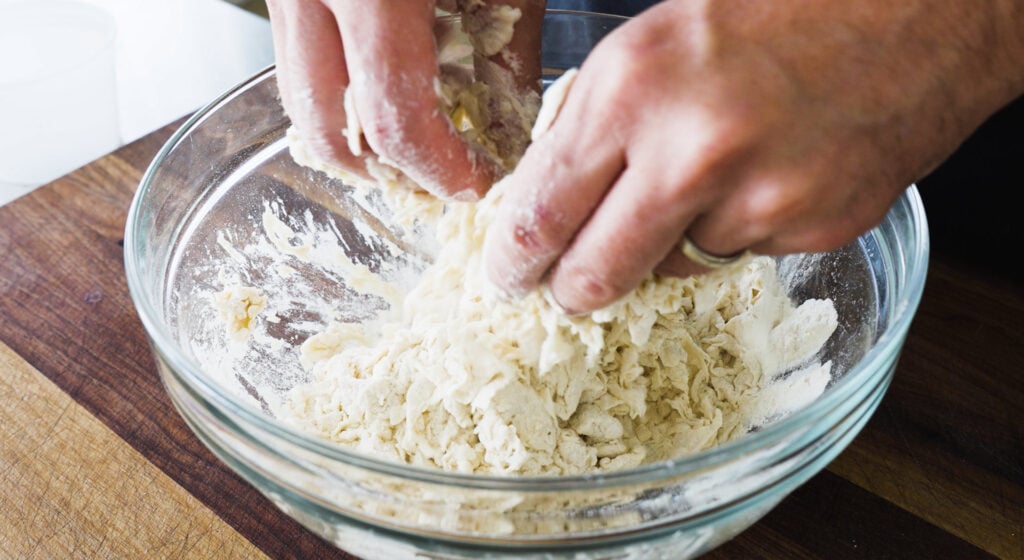
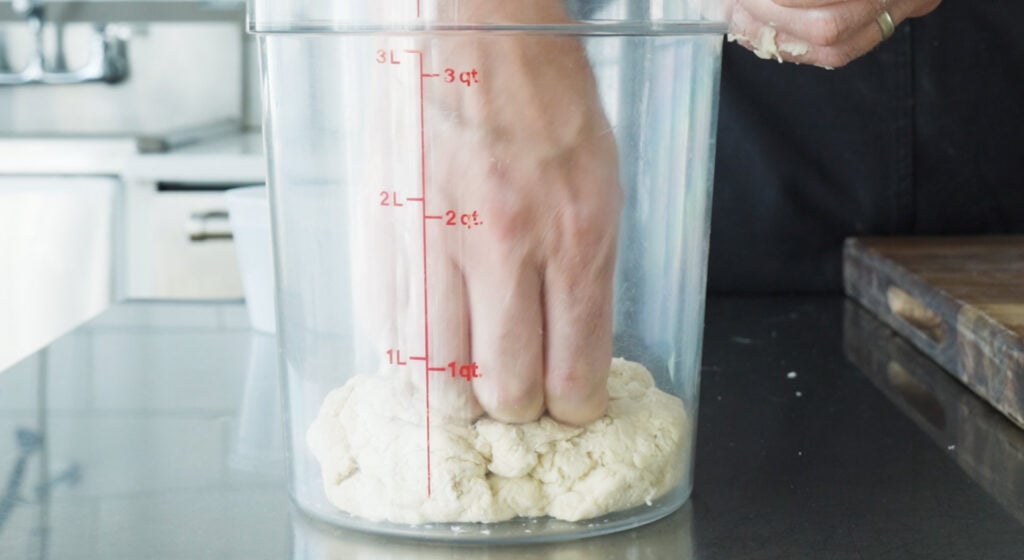
Mix: I start by using my hands to mix the flour, water, and yeast in a large bowl until a shaggy dough forms. I bring this biga together just enough to form a very loose ball before transferring it to a plastic container with a lid.
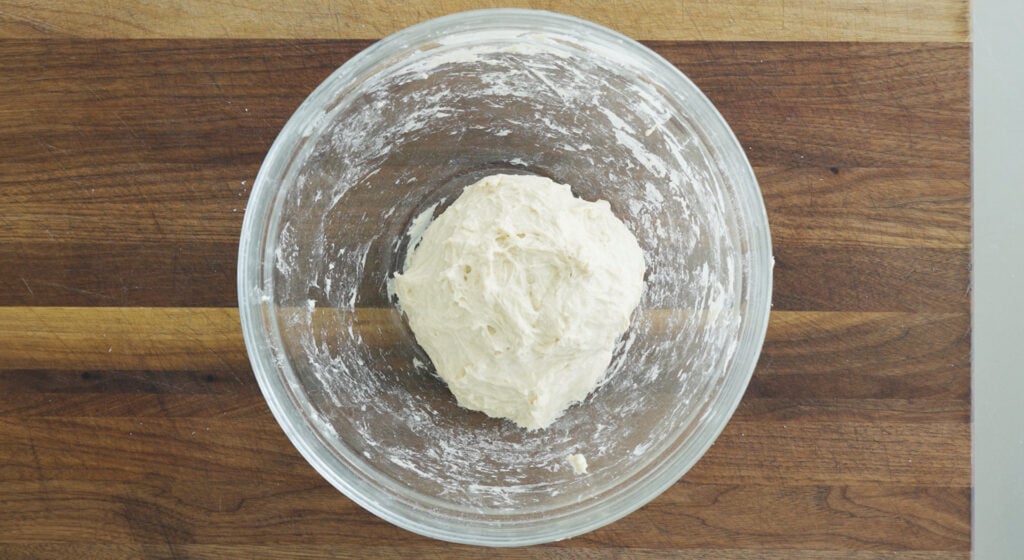
Ferment: I set the biga aside to slowly ferment for 8 to 24 hours. If my kitchen is warmer than 72°F, I’ll move the biga to the fridge, where it can ferment for 24 to 72 hours.
Combine: In a separate large bowl, I mix the flour and 1 cup of water together. Once it’s mixed, I let it rest for 30 minutes. This step is called the autolyse, and it helps hydrate the flour and kickstart gluten development.
Incorporate: Next, I add my biga, the remaining yeast, salt, and ⅓ cup plus 1 teaspoon of lukewarm water to the bowl. I thoroughly mix the dough by squeezing, pinching, and folding it over itself until everything is thoroughly combined. Feel free to use your hands or a stand mixer fitted with a dough hook for this step.
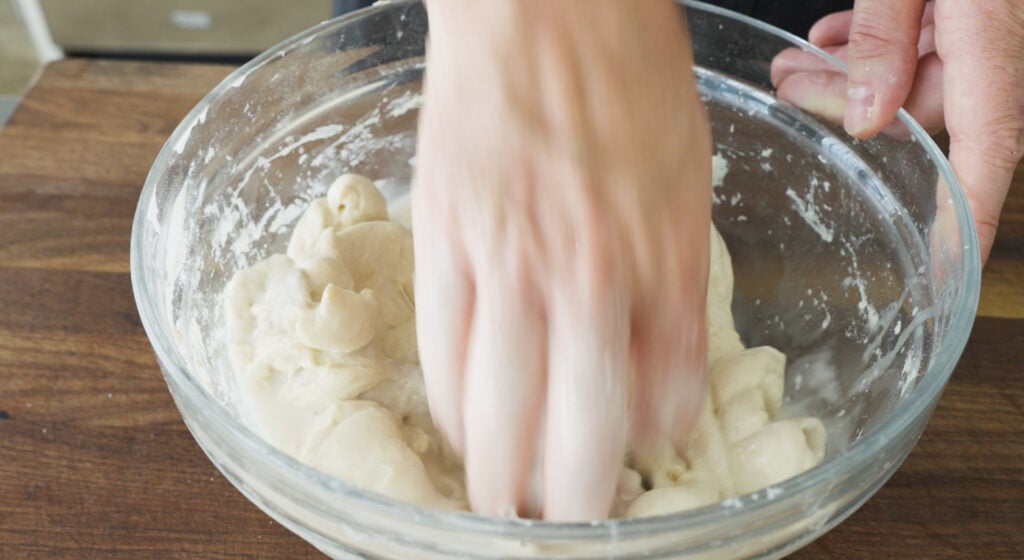
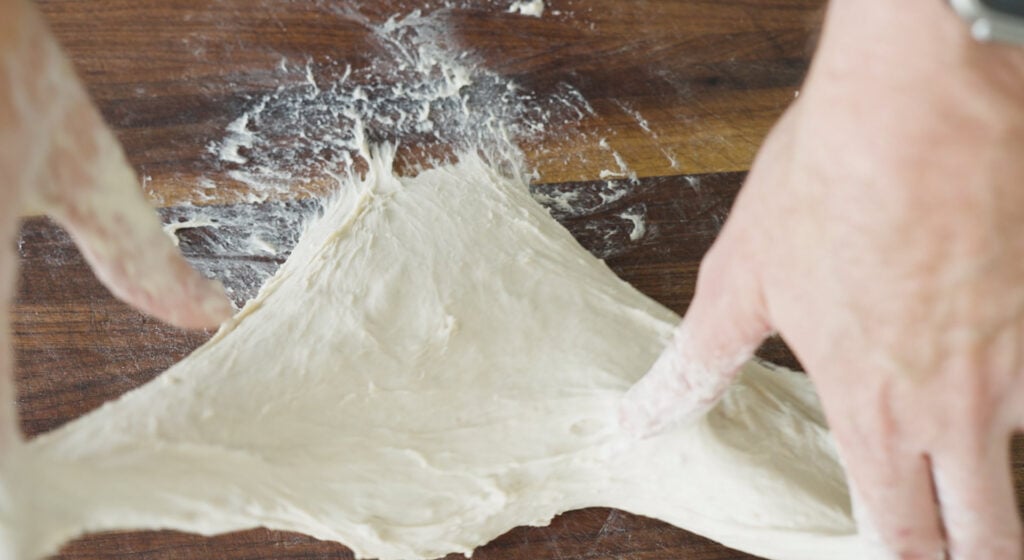
Knead: I transfer the dough to a clean surface and knead it using the slap-and-fold method. This usually takes me 10 minutes by hand or 5 minutes on high speed in a stand mixer. The dough should feel smooth and elastic when it’s done.
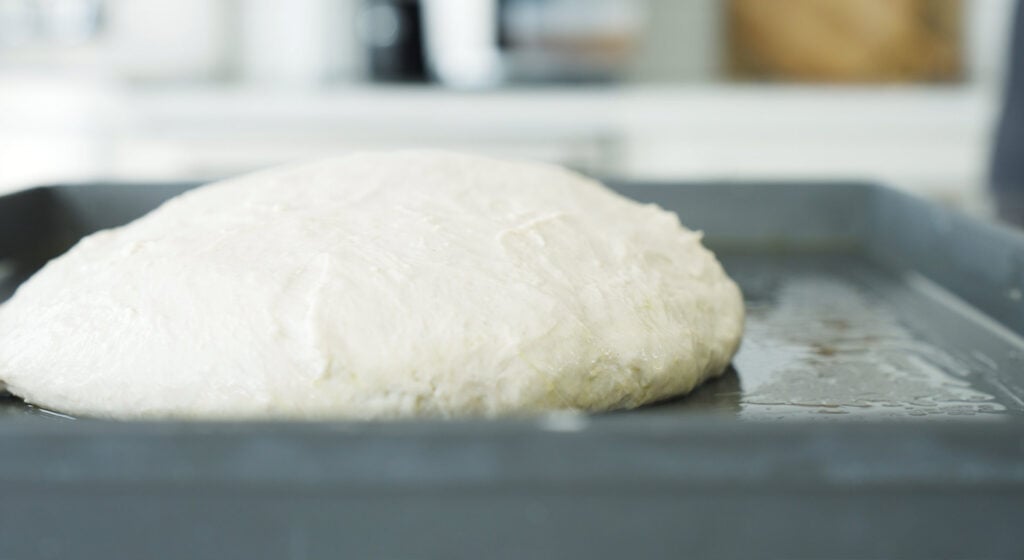
First proof: I brush olive oil generously over the bottom of a baking pan before placing the dough in the center of the pan. I cover the pan with a towel and let the dough proof for 60 to 90 minutes, or until it has doubled in size.
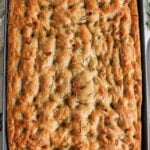
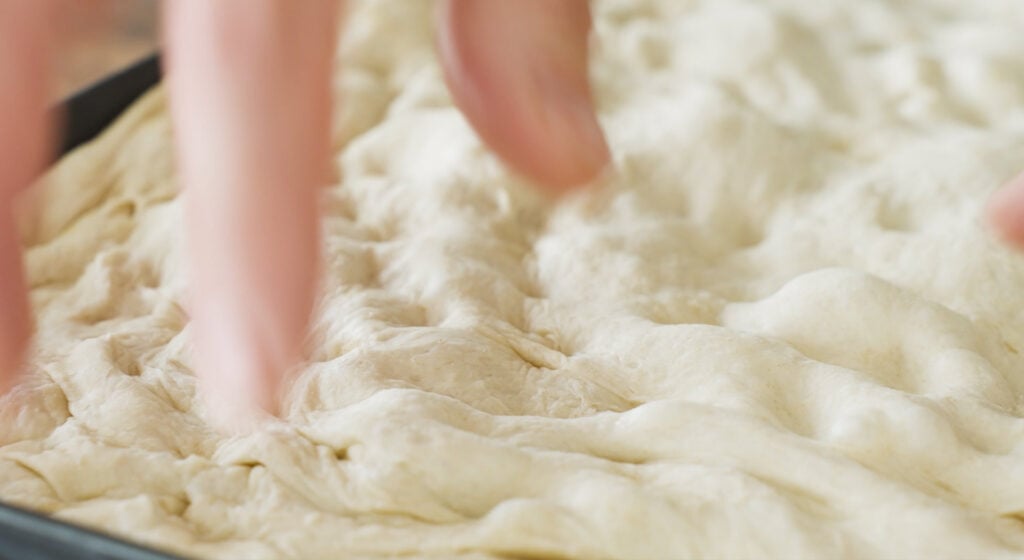
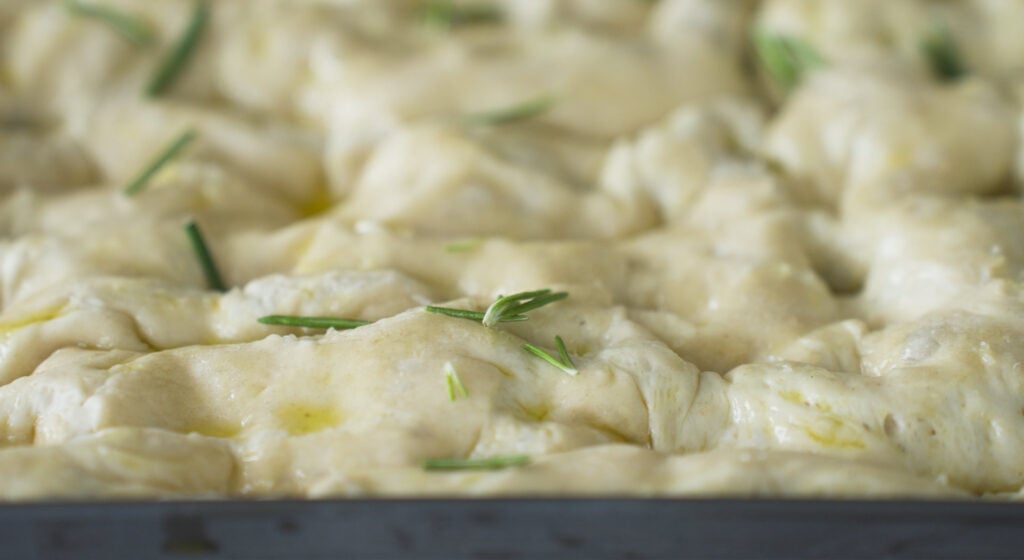
Dimple and proof again: I use my fingertips to press gently but firmly into the dough. This creates deep dimples all over and stretches it toward the edges of the pan. I cover the dough again and let it proof for another 60 to 90 minutes, or until it has doubled in size.
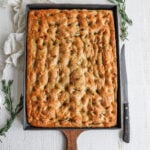
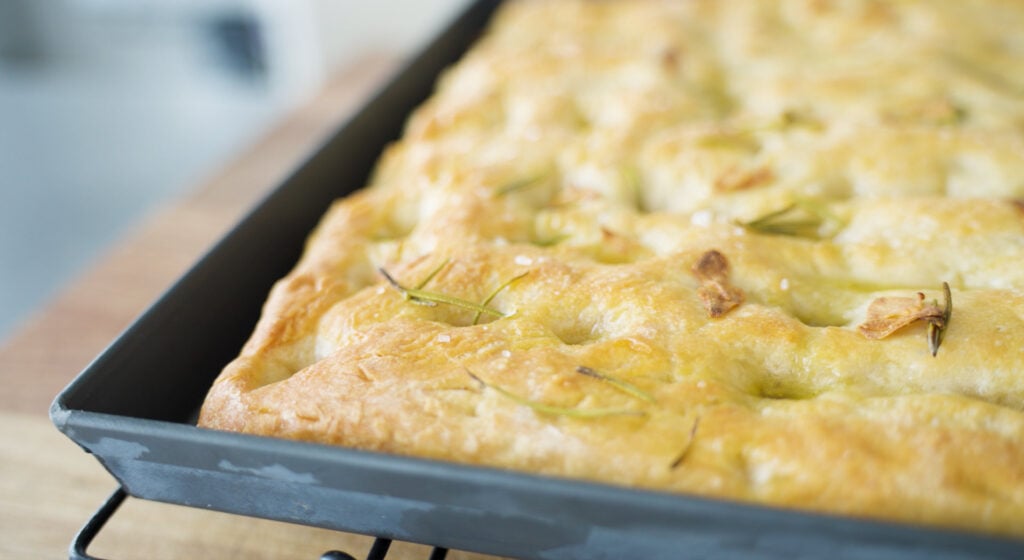
Season: Just before baking, I drizzle extra olive oil over the dough. Then, I dimple it again and sprinkle salt, fresh rosemary, and garlic over top.
Bake and cool: I bake the focaccia until it’s deeply golden brown on top. Once it’s out of the oven, I transfer it to a cooling rack. I let it cool to room temperature before slicing.

Chef Tip + Notes
Does your dough feel sticky and hard to handle? Do not add more flour! Instead, rely on the slap and fold method to develop gluten without losing any moisture. After combining the ingredients in the bowl, transfer the dough to a clean surface. Lift it up, slap it lightly against the surface, and fold it over itself. Repeat these steps to build the elasticity and strengthen the dough.
- Dough not rising: Expired yeast or kitchen temperatures can affect how your dough rises. Always use fresh yeast that isn’t anywhere near its expiration date. Or, if your kitchen is too cool, move the dough to a slightly warmer spot or a preheated and turned-off oven.
- Don’t skimp on the dimples: Use your fingers to press those signature dimples across the entire surface of the dough before baking. This isn’t just for looks—it also creates pockets for olive oil and seasonings to settle into, giving every bite flavor.
- Prevent dry focaccia: Two things can dry out focaccia—not enough olive oil and overbaking. Be generous with the oil (both in the pan and drizzled on top), and bake until it’s golden but not deeply browned. Once it’s done, transfer it immediately to a cooling rack to prevent the steam from turning the crust soggy.
- Focaccia topping ideas: One of my favorite things about baking focaccia bread from scratch is how easy it is to customize the toppings. If rosemary isn’t your thing, use fresh thyme, sage, or oregano instead. You can also press halved cherry tomatoes, olives, or caramelized onions into the dough, or keep it traditional with just olive oil and salt.
Serving Suggestions
Fresh focaccia is always in my bread basket when I’m serving an Italian dinner. The meal, whether I’m treating everyone to swirls of pasta puttanesca or a plate of chicken piccata, usually starts by dipping squares of focaccia into olive oil and balsamic.
Use any leftover bread for sandwiches the next day. Spreading fresh basil pesto on the sliced focaccia and layering arugula, mozzarella, and prosciutto in the middle screams “perfect sandwich” to me.
Make-Ahead and Storage
Make-Ahead: You can bake the focaccia up to a day ahead. You can also prepare the dough through the first rise a day in advance. Refrigerate it overnight for an even deeper flavor.
How to Store: Wrap the leftover focaccia bread in plastic or foil. Store it at room temperature for 2 days. Store in the freezer for up to 2 months.
More Bread Recipes

Focaccia Recipe (Focaccia alla Genovese)
Ingredients
For the Biga:
- 2 ¼ cups bread flour
- 2/3 cup + 1 teaspoon filtered lukewarm water
- 1/3 teaspoon active dry yeast
For the Dough:
- 2 ¼ cups bread flour
- 1 1/3 cup + 1 teaspoon filtered lukewarm water
- 1 teaspoon active dry yeast
- 2 teaspoons + 1/2 teaspoon coarse salt
- 6 tablespoons olive oil
- Fresh rosemary leaves from 3 sprigs
- 2 thinly sliced garlic cloves
Instructions
For the Biga:
- Add the flour, water, and yeast to a large bowl. Using your hands, gently mix and fold everything together to combine. This should take you about 3 to 4 minutes. Throughout making the biga, the dough will start to become really shaggy.
- Bring the shaggy dough a bit more together to form a loose ball. Then, transfer it to a plastic container with a lid. You can also leave it in the bowl covered with plastic.
- It can sit at a room temperature of 72° or less for 8 to 24 hours. If you are over those temperatures, I recommend letting it sit at room temperature for 4 to 6 hours, then placing it in the fridge for 24 hours, and up to 72 hours.
For the Dough:
- In a separate large bowl, mix the flour and 1 cup of the water until well combined, which takes about 3 to 4 minutes. You can also do this in a stand mixer with the hook attachment on low speed. Let it sit for 30 minutes to autolyse.
- Next, add in all of the biga, the remaining 1 teaspoon of active yeast, 2 teaspoons of coarse salt, and 1/3 cup plus 1 teaspoon lukewarm water.
- Thoroughly mix everything together by squeezing, pincing, and folding the dough over until it is completely combined. The biga should be broken up. This can also be done in the stand mixer.
- Once it is combined, remove it from the bowl and place it on a cutting board or clean surface. Knead using the slap and fold method or continue to stretch and coil the dough. Keep it clean by using a scraper to scrape back the dough if it gets too sticky. This process will take about 10 minutes. The dough should have good elasticity. Again, it can be done in 5 minutes in a stand mixer with the hook attachment on high speed. See my notes about sticky dough.
- Brush a Lloyd pan, half sheet tray, or non-stick 13×9 metal pan with 2 tablespoons of olive oil.
- Transfer the dough to the center of the pan. Cover with a towel and let it proof for 60 to 90 minutes or until it doubles in size. It should spread across the pan, not rise up during this process.
- Next, using your finger tips, press down into and all across the dough while stretching it to each corner. Cover with a towel and let it proof for 60 to 90 minutes or until it doubles in size. It should come to the lip of the pan.
- Preheat the oven to convection 425° F or 450° F, no convection.
- Drizzle the remaining 4 tablespoons of olive oil all over the dough and again press your finger tips down into and all over the dough, creating dimples.
- Season with the remaining ½ teaspoon of salt. Evenly sprinkle on the rosemary and garlic.
- Bake on the middle rack at 425° F convection for 20 minutes. Transfer to a cooling rack and cool to room temperature. Enjoy.
It was my first focaccia ever and the result an absolute perfection. I followed the instructions carefully. Thanks Chef Billy, love your recipes and your videos. Everything I tried was insanely delicious. Avec amitié de Montréal, Québec x
So glad it was a success! Thanks for trying it!
I think there is something wrong with the conversion from Imperial to Metric in this version.
Imperial
2 ¼ cups bread flour
2/3 cup + 1 teaspoon filtered lukewarm water
Metric
281.25 g bread flour
315.45 ml + 1 teaspoon filtered lukewarm water
Video
335 g flour
255 g water
Managed to recover with some help from Chat GPT 🙂 I would be great to have the recipe in metric posted here.
Fixed, thank you!
I love your channel, and the recipes are always spot on and delicious! This focaccia is quite a bit different than the one you posted in 2019 (that one didn’t have the “biga,” was “finished with fresh” after cooking and some other notable differences). Does this recipe represent an evolution on how you make the bread (i.e. is newer better?) or is this just a different recipe.
just different
” can I cut this bread recipe in half .?
yes but you’ll need a different pan.
I LOVE THIS RECIPE CHEF, I MAKE IT ABOUT 3 TIMES A MONTH. AND I WILL ALWAYS MAKE IT WHEN I MAKE A GREAT SOUP THAT YOU HAVE TAUGHT US ALL TO MAKE. THIS IS A DELICIOUS AND EASY RECIPE TO MAKE NOT A LOT OF FUSS TO IT BUT THE RESULTS ARE SO AMAZING AND SO DELICIOUS. I CHANGE UP THE HERBS SO IT’S DIFFERENT ALL THE TIME AND I WILL EVEN ADD CHEESE TO THE UNCOOKED DOUGH SOMETIMES. GREAT RECIPE CHEF. ANOTHER HOME RUN FOR MY FAMILY.
Excellent! Thank you!
I want to make this, but I don’t have a convection oven. Is the time still 20 minutes for a non-convection oven set at 450?
turn up 25°