Homemade Salmon Gravlax Recipe

- Published
- 42 comments


This salmon gravlax is cured in salt, sugar, pepper, and fresh dill for 48 hours for a divine flavor. It takes minimal effort and will blow the doors off at your next brunch.
Breakfast and brunch are my favorite meals to serve and eat. I cannot get enough of the variety of foods, especially at buffets. You must try my Breakfast Burrito or Quiche Lorraine if you’re the same.
Gravlax
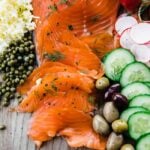
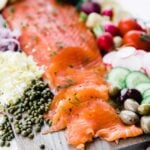
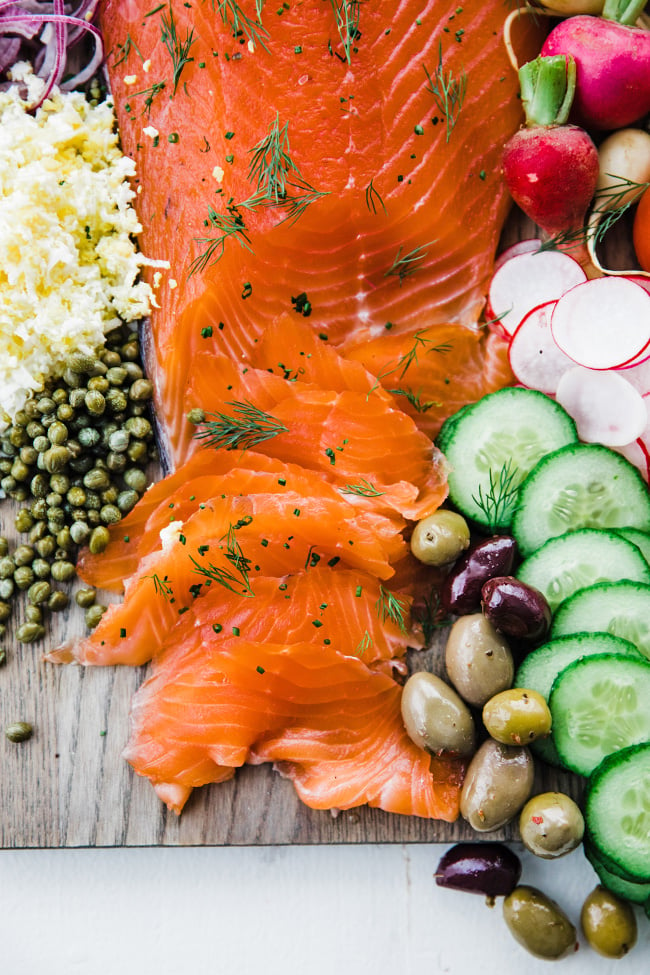
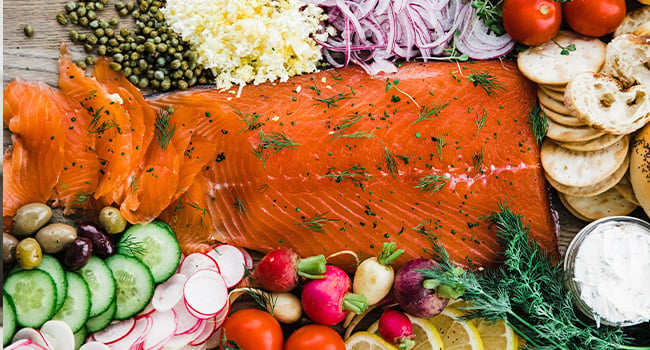
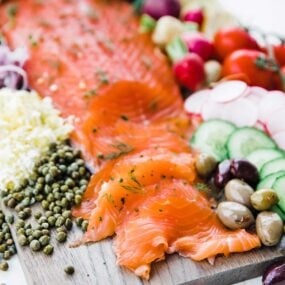
Gravlax is a Swedish specialty consisting of raw fresh salmon cured in salt, sugar, and herbs for 48 hours. It’s then rinsed, sliced paper thin, and served on bread, bagels, or toast alongside assorted toppings and usually offered for breakfast, brunch, or as a snack.
The salt draws out the moisture, making it almost like salmon jerky and safe to eat. It’s different than Smoked salmon in that it’s fresh salmon that has been brined or seasoned with herbs and seasonings and is then smoked, either cold or hot, for several hours.
Ingredients and Substitutions
- Salmon – You will need the freshest, de-boned skin on salmon you can get your hands on. This should be Sashimi grade. There is no substitute for this.
- Salt – I always use coarse salt in my cooking and baking. You’ll at least need a heavier salt such as Kosher, sea, mine, or grey.
- Sugar – Plain granulated sugar is all you need.
- Pepper – I used a combination of whole red, green, white, pink, and black peppercorns. You can use any of these or all of them.
- Herbs – Fresh dill is best for this gravlax. You can also use parsley or basil.
- Lemon – You will need some lemon zest to help brighten up the salmon.
- Accompaniments – My favorites are fresh bread, bagels, crackers, whipped cream cheese, cheeses, sliced vegetables, herbs, hard-boiled eggs, capers, creme fraiche, and pickled onions.
Is It Safe to Eat?
According to the FDA, gravlax is acceptable and safe for eating. When you’re curing the salmon in the salt solution, it’s done so in the refrigerator below 40°. Anything above that is when bacteria grow. The process pulls out all the moisture and liquid from the salmon, which can cause it to go bad in the first place. So, in the end, yes, it’s safe to eat.
How to Make Gravlax
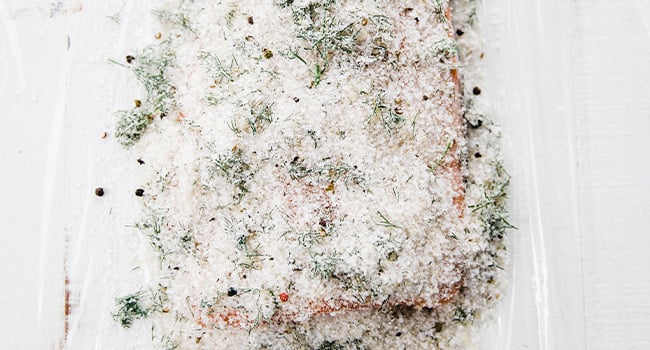
Mix the salt, sugar, peppercorns, dill, and lemon zest in a large bowl until combined.
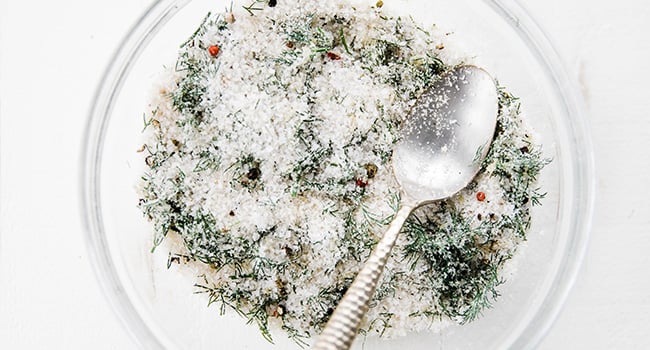
Next, lay half of it down and spread it out to the size of the salmon side on a large sheet of plastic wrap.

Next, place the salmon skin onto the seasoning mixture and cover the salmon with the remaining half of the seasonings.
Wrap the salmon completely with the plastic and place it in a pan.
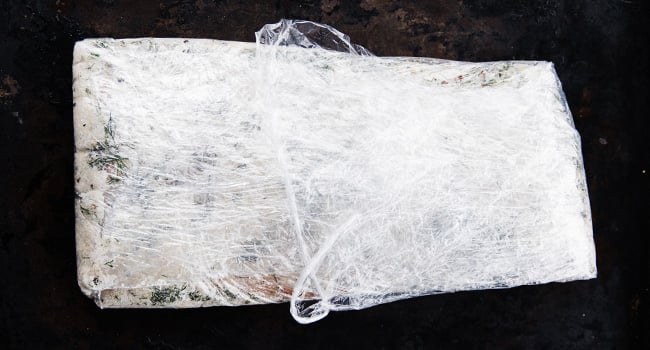
Let it cure in the refrigerator for 48 hours.
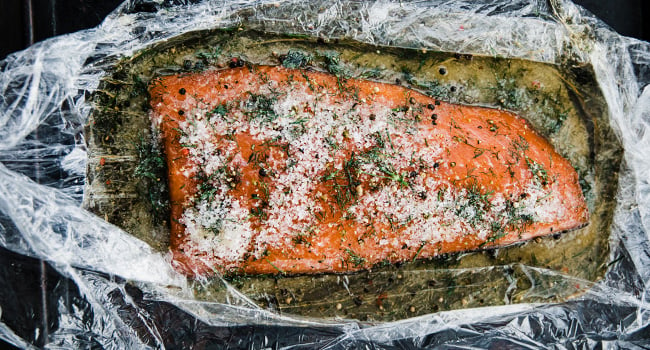
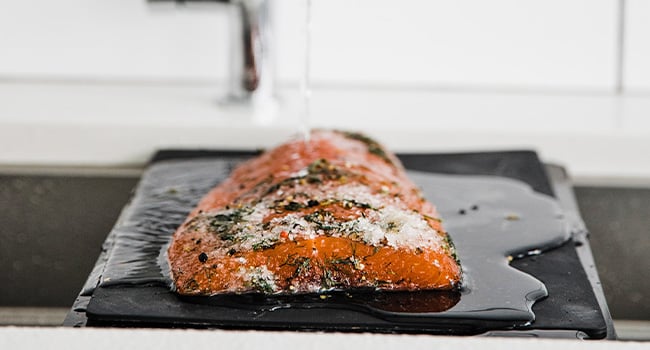
Remove the plastic and rinse very well with cold water.
Thinly slice the gravlax on a bias using a slicing knife, then garnish with fresh dill leaves, slice things, and serve with assorted accompaniments.
Make-Ahead and Storage
Make-Ahead: You can make this up to 2 days ahead of time.
How to Store: Gravlax can last tightly wrapped in plastic or parchment paper in the refrigerator at under 40° for up to 2 weeks. Freeze it wrapped up in plastic for up to 2 months. Thaw for 1 day in the refrigerator before serving. I believe keeping it whole and slicing it to order also helps to preserve life.

CHEF NOTES + TIPS
- You can add other spices to the salt and sugar cure, such as cumin, turmeric, fennel, celery seeds, or coriander.
More Breakfast Recipes

Homemade Salmon Gravlax Recipe
Ingredients
- 1 cup coarse sea salt
- 1 cup granulated sugar
- 1 tablespoon crushed whole peppercorns
- ¼ cup fresh dill leaves
- zest of 1 lemon
- 2- pound side of fresh sashimi grade skin-on wild caught salmon
- assorted crackers, bagels, breads, cream cheeses and vegetables
Instructions
- In a large bowl, mix together the salt, sugar, peppercorns, dill, and lemon zest until combined.
- Next, lay half of it down and spread it out to the size of the salmon side on a large sheet of plastic wrap.
- Next, place the salmon skin side down onto the seasoning mixture and then cover the salmon with the remaining half of the seasonings.
- Wrap the salmon completely with the plastic and place it in a pan.
- Let it cure in the refrigerator for 48 hours.
- Remove the plastic and rinse very well with cold water.
- Thinly slice the gravlax on a bias using a slicing knife, then garnish with fresh dill leaves, slice things, and serve with assorted accompaniments.
Excellent! Our guests LOVED THIS RECIPE. INFACT, they asked for the leftovers the next day!!
Excellent!
No. But i sure like your recipes. Thank You for sharing 👍🦅. V Virgil. 🦅
My pleasure!
This is offered in most European countries especially the Nordic countries and is delicious. Is this equivalent to Lox or is Lox only smoked salmon? I will certainly be making this however most of my fellow American friends have never eaten fish for breakfast so this will be a new experience for them if they try it.
yes
how come it takes only 1 day to make it when it takes 2 days to cure it?
It takes 10 min to prepare and 2 days to cure. Make sure to rinse under running water to remove the saltiness. 48 hrs is ideal for me. I use never frozen salmon.
I’ve made this several times. It’s often weighted down, I vacuum pack everything using a fabulous chamber vacuum machine. I’ll serve this in 5 days to a Mexican Train group. It’s really easy and delicious.
The picture and instructions looks delicious like what I’m aiming for.
Just caught some salmon from Alaskan river and will definitely try your recipe 😋
Excellent! Thank you for giving it a shot!
Too easy and too delicious. I made it with one thawed 10 oz. Alaskan salmon fillet to test the recipe. Made no changes, cured for 48 hours, rinsed and thinly sliced onto crackers with a small schmear of cream cheese and a topping of capers. Fabulous. My husband keeps asking for more, so I’m making a larger quantity tomorrow.
Excellent!