Homemade Dill Pickle Recipe

- Published
- 40 comments
Learn how to make pickles using this quick and easy Homemade Dill Pickle Recipe. In about one hour, you can make them with a handful of affordable ingredients. They taste even better than store-bought pickles and are the best condiment for sandwiches, salads, burgers, and more.
When I’m treating myself to a fully loaded sandwich or a juicy burger, nothing quite takes it up a notch like a sour, crisp, and perfectly tart pickle. And I’m not talking about the store-bought kind… As a self-proclaimed pickle fiend, I always need jars of homemade mason jar pickles in my fridge. That’s why I always make these Dill and Garlic Pickles and homemade bread and butter pickles from scratch. I can never get enough!
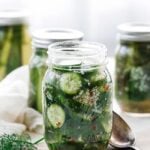
Homemade Refrigerator Dill Pickles
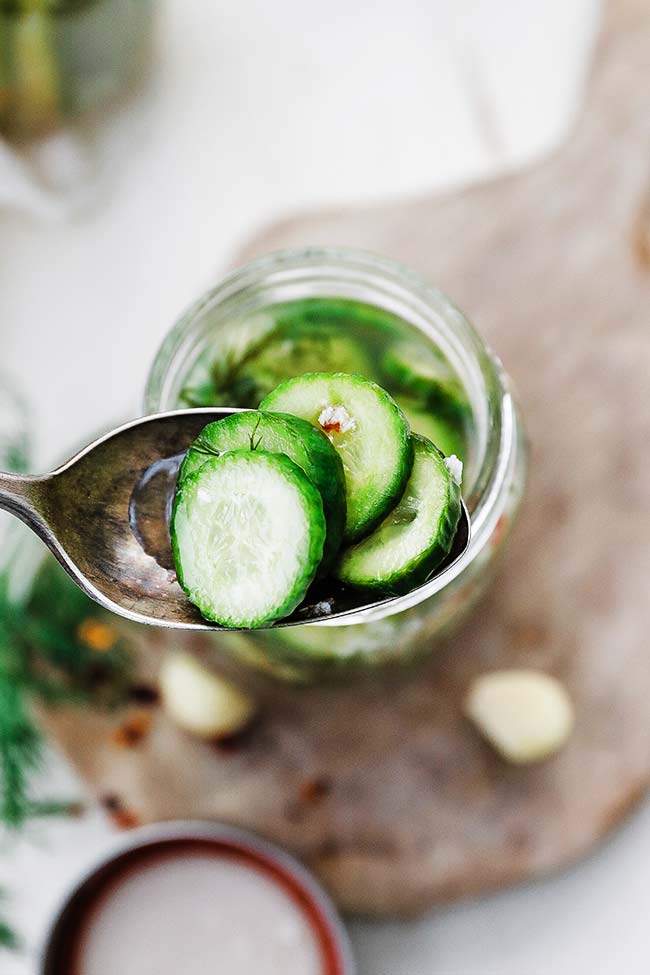
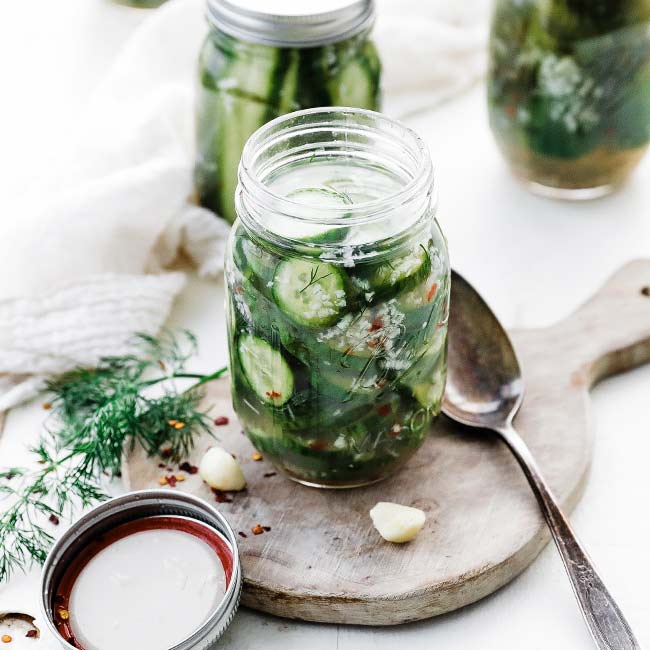
Dill pickles are easy to make from scratch by marinating pickling cucumbers and fresh dill in a tart and tangy brine made from vinegar, water, garlic, and salt. They can be sliced into spears, circles, or slices, or kept whole, depending on how you plan on using the pickles. After soaking in the brine, the dill pickles are ready to be used as a topping or add-in for any dish with a fresh and sour flavor.
If you’re new to pickling and the process sounds intimidating, don’t worry. My refrigerator dill pickles only require 10 minutes of hands-on work and can be eaten the same day they’re made. Try it once and I know you’ll be pickling even more vegetables, like beets and cauliflower, in no time.
The easy pickle brine is simmered on the stove and poured over the cucumbers and fresh dill in their jars to make these mason jar pickles. The brine is left to cool to room temperature before the pickles are ready to be eaten. From grilled cheeseburgers to egg salad, there are endless ways to enjoy your homemade dill pickles.
Ingredients and Substitutions
- Cucumbers – Pickling cucumbers are smaller and much firmer than English cucumbers and other everyday varieties. You can typically find different varieties of pickling cucumbers, like Kirby, Persian, Boston, and Bush, in grocery stores or farmers’ markets throughout the summer. If you can’t find pickling cucumber varieties, you can slice a regular or hothouse cucumber into spears or chips.
- Dill — The dill must be fresh—no exceptions. To enhance the dill flavors, add up to 2 teaspoons of dill seeds to the brine.
- Water – I used a 3-to-1 mix of water and vinegar for the dill pickle brine.
- Vinegar – I made the pickle brine with white distilled vinegar because it gives the pickles an even brighter and tangier flavor. You can also use apple cider vinegar, white wine vinegar, or rice vinegar. The flavor will differ slightly from these alternatives, but it will still be good.
- Garlic – While not always used in dill pickle recipes, I love the savory bite that fresh garlic cloves add.
- Seasonings – Red pepper flakes add enough heat to make the brine and pickles complex. If you don’t want the pickles spicy, you can omit them from the recipe.
- Salt — I recommend using sea or kosher salt to give the pickles a clean, salty flavor. Do not use table salt or any variety of salt that contains iodine, or else the brine will be cloudy, and the pickles will not look as vibrant.
How to Make The Best Homemade Dill Pickles
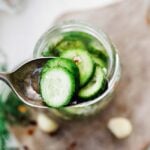
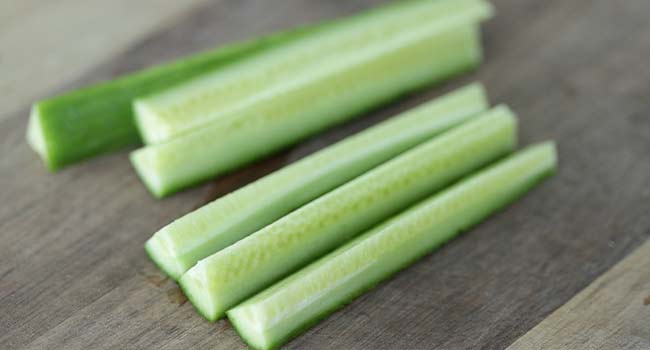
Slice: I start by slicing the pickling cucumbers into my desired shape.
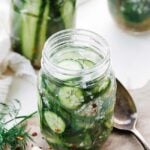
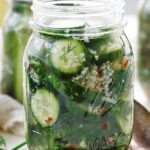
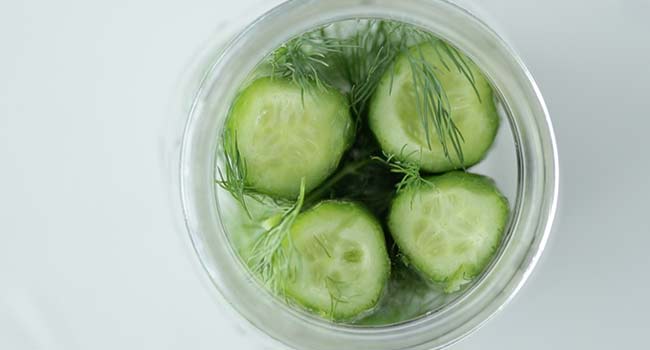
Assemble: I pack the cucumbers into sterilized mason jars along with 2 sprigs of fresh dill.
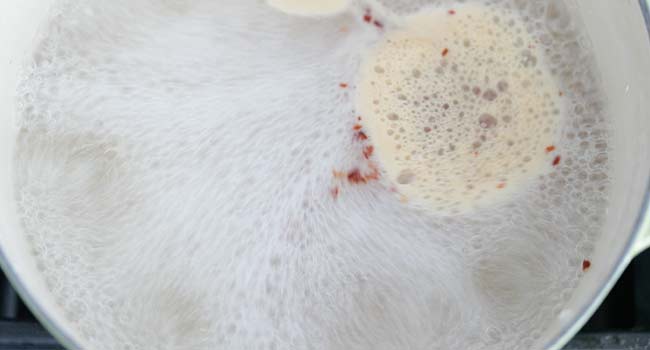
Brine: In a large pot, I boil the water, vinegar, garlic, red pepper flakes, and salt until the salt dissolves.
Pickle: I pour the brine over the cucumbers in the jars until they’re completely covered.
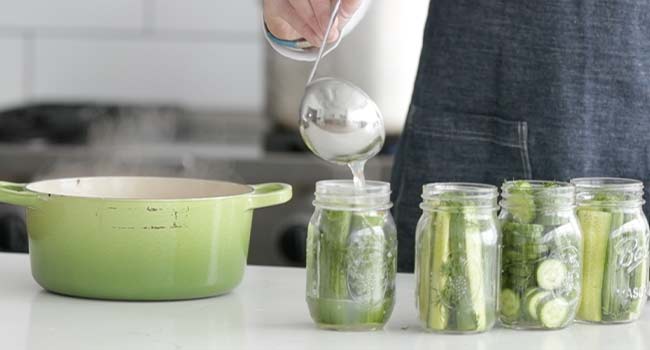
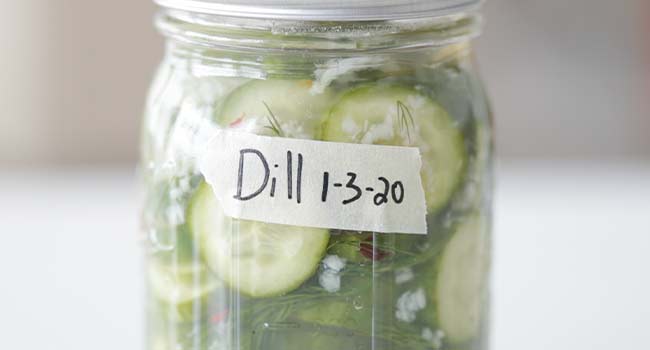
Cool: I wait for the brine to cool before sealing the jar lids on top and labeling each one with the date.
Finish: I place the jars of pickles in the fridge until I’m ready to eat.

Chef Tips + Notes
Sterilizing your mason jars is one of the most critical steps in making dill pickles from scratch. Washing them in the dishwasher is not enough; the jars, lids, and outer bands need to first be washed with hot, soapy water and then simmered (separately) in boiling water for 10 minutes. Watch my YouTube video to learn how to sterilize your mason jars properly.
- You can slice your cucumbers into any shape you like before pickling: Wedges or spears make for a great Reuben side dish, rounds or circles are a delicious topping on sandwiches, and long slices are the best burger topping.
- Label the pickle jars with the date: This will help you keep track of the freshness (the pickles keep in the fridge for 4 to 6 weeks).
- Customize the brine flavors: Whole peppercorns, mustard seeds, and dill seeds can all be added to the brine when you want to play with the flavors. You can also use my Pickling Spice Recipe to really enhance them.
- To make canned dill pickles that last up to 1 year, seal the lids on the mason jars immediately after pouring the brine over the cucumbers. Then, place the jars into a pot of boiling water fitted with a rack on the bottom. Boil for 10 minutes, then set them aside to cool to room temperature. You’ll know the jars were sealed correctly if the lid does not move when you press on the center.
Serving Suggestions
Technically, you can eat your homemade dill pickles as soon as the brine has cooled, but for the best results, refrigerate them for 3 to 5 days first. This is when the brine works its magic, turning those cucumbers into tart and crisp dill pickles no one will be able to resist!
I can eat a whole jar of homemade pickles as a snack. Still, when I’m able to resist, I like using them as a topping on smash burgers and sloppy joes, as an add-in for tuna macaroni salad and egg salad, and as a mix-in in sauces, like homemade tartar sauce and burger sauce.
Make-Ahead and Storage
Make-Ahead: You can make the pickles at least 1 hour before serving. Just make sure the brine has cooled to room temperature before serving.
How to Store: Store the pickles in sealed mason jars in the refrigerator. They’ll stay crisp and flavorful for up to six weeks.
More Quick Pickled Recipes

Video
Dill Pickle Recipe
Equipment
- mason jars
Ingredients
- 12 pickling cucumbers
- 8 sprigs fresh dill
- 3 cups water
- 1 cup white vinegar
- 12 finely minced cloves of garlic
- ½ teaspoon crushed red pepper flakes
- ¼ cup sea salt
Instructions
- Slice your pickles to your desired slice and pack them into 4, 16-ounce sterilized mason jars.
- Place 2 sprigs of fresh dill into each jar alongside the cucumbers. Set aside.
- In a large pot, add the water, vinegar, garlic, red pepper flakes, and salt, and bring to a boil or until the salt is dissolved.
- Evenly pour the brine liquid over the cucumbers in the jar until they are completely covered.
- Cool to room temperature, add a lid, label, and date, and store in the refrigerator for 4-6 weeks.
These pickles are so delicious. We added twice the amount of red pepper flakes, the second time we made them. Both ways were really good, my clan just likes a little more kick. Also, we made spears & chips. Everyone loved the chips way more.
Nice!
Can I use this for a marinade when a recipe calls for pickle juice?
of course
Very easy to make! My son-in-law usually never eats a thing that I make however when I gave him a jargon these pickles, he ate every last one in one sitting! I have to go home and make another batch! Chef Parisi is my favorite chef, He’s down to earth and great chef.
In the past I always canned a dill pickle recipe and I ended up throwing the entire batch away because the pickles were like mush. This recipe, the pickles not only tasted delicious but they were crunchy so I give this recipe five stars!
If you do the seal in a water bath does this recipe need to be refrigerated.
no.
I made these fabulous dill pickles several times now and shared them with several of my friends. They all love them. So thanks for posting this recipe. Chef Billy at what altitude did you gauge your timing for a water bath canner. Here in AZ The altitude is 2000/3000 feet. So what I did was add an additional 5 minutes to feel safe. Is this correct or does it really matter.
My friend and I made 2 dozen quart bottles of these dills using the Persian cucumbers. We put in 2 smashed garlic cloves and 2 dried Japanese dried red peppers with fresh dill fronds. The jars are so pretty and the pickles taste fabulous!! We have requests for “gift” jars. Looks like we are going to be busy.
We are going to use the basic brine recipe for pickling of other veges like okra, green beans, carrots, onions, whatever we find fresh.
We are going to experiment with cutting the amount of salt we use as we have low sodium needs. Any advice?
Mucho Thanks!
OMG!!! I’ve tried at least 50 recipes for dill pickles and didn’t really like one. UNTIL NOW!!!! It is perfect in every way!!! These are the marvelous deli pickles from my youth in the 50s and 60s!! They bring back all of the sweet memories with my Dad, stopping into the local deli for bagels and lox on a Sunday morning… and being able to choose my pickle out of the barrel! Thank you, Chef!!!!
This is so awesome, thanks for sharing your story and for giving them a shot!
the best ever!
I’ve always wanted to make my own! This looks like a fun project to do with the kids after school this week. Thanks!