

Skip to content

Get 5 Secrets to Make Homemade Taste Food Better + New Recipes Weekly!

    Easy Pickled Radishes Recipe

    This post may contain affiliate links. Please read my disclosure policy.

    I love fresh radishes more than almost any vegetable in my garden, and the only thing I love more is a jar of pickled ones. You only need fresh radishes, a Mason jar, and about 45 minutes to make this simple vinegar, salt, and sugar brine that keeps in the fridge for up to a month. They’re perfect for topping tacos, adding to salads, or simply enjoying as a crunchy snack.

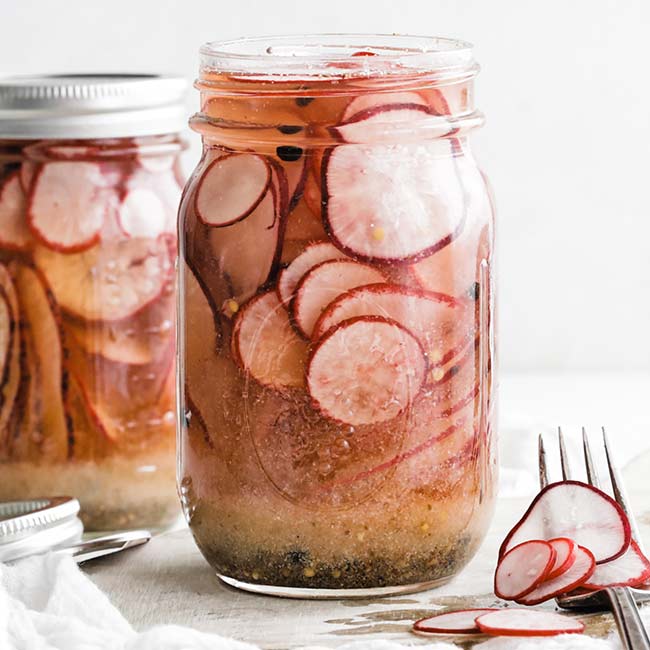
    sliced pickled radishes

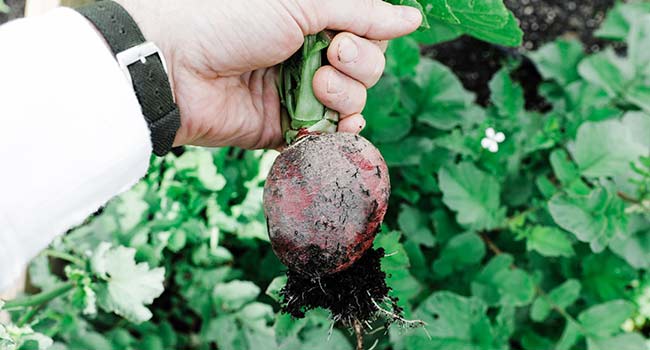
    Radishes were the first thing my parents ever taught me how to grow, because they are ready in a few weeks and just about impossible to mess up. The catch is that a garden row of them all comes in at once, and there is no honest way for one household to eat 20 bunches of fresh radishes before they go soft. That is when a jar of pickled radishes starts to make a lot of sense, just like my homemade dill pickles, my pickled red onions, and my pickled jalapeños, where a 5 minute quick pickle takes a piece of grilled fish, a bowl of rice, or a stack of tacos to another level.

    Pickled Radish

    Pickled radishes are fresh radishes cut thin or into quarters and stored in a brine of vinegar, water, salt, and sugar. The brine tenderizes the radish, seasons it, and stretches it from a bunch that goes soft in a week to a jar that keeps a month in the fridge. Sliced radishes are ready to eat in about an hour, and quartered radishes need a full day in the brine before the flavor is where I want it.

    This one is a versatile recipe. Water, vinegar, salt, and sugar are the four staples in the brine, and then onion granules, garlic granules, celery seed, and whole peppercorns are the optional add-ins that make the jar taste umami, savory, and a lot more like something I want on a plate next to dinner. I use all four every time. Skip them for a straight, classic quick-pickle when that is what the recipe is going on.

    One quick heads-up before you make your first jar. Pickled radishes naturally develop a sulfur smell as they sit in the brine, so don’t be surprised if you catch a bit of a rotten egg smell when you open the lid. It’s completely normal, doesn’t mean they’ve spoiled, and it won’t affect the flavor at all.

    Most people mistake it for a bodily function in the room. Ha! It is just the radishes doing what radishes do. I highly recommend making a jar the next time your garden is producing radishes faster than your family can eat them. That’s exactly what happens at my house, and now I always keep a jar in the fridge door.

    Ingredients and Substitutions

    These are the ingredients I use to make this pickled radishes recipe, plus the optional add-ins that make a jar taste less like a generic quick-pickle and more like something worth putting on a plate:

    For the Base Brine:

    • Radishes – The main event. Any variety works, red globe, French breakfast, watermelon, daikon, and they are in the market year-round. That slightly sweet, sharp, peppery flavor is what the brine plays off of, and thinner cuts pick up the seasoning faster than thick quarters do.
    • Water is the main liquid in the pickling mixture and helps to breakdown the vinegar, salt, and sugar so that it’s not too potent.
    • I like to use plain white distilled vinegar, but white wine or even red wine vinegar will work but will tint the brine and the radishes a rosy pink.
    • Salt – I use Diamond Crystal kosher these days for every jar, and it seasons the brine while working as a natural preservative that draws moisture out of the radish and keeps the jar from going off on the fridge shelf. Sea salt is the direct substitute. Table salt is not.
    • Granulated sugar is the balance point in the jar. A little sugar rounds the salt and the vinegar into something that tastes seasoned rather than sharp, and it also cuts the peppery snap of the radish without erasing it.

    Optional Add-Ins:

    • Onion granules – Simple onion granules or powder just help to give more umami goodness to the pickled radishes. You actually could use fresh onion if you’d like, and I recommend a sweet, red, or white. Remember the ratio of one part dry to three parts fresh.
    • Garlic granules – Same idea, another layer of savory depth to the brine. Garlic powder swaps directly, and a finely minced fresh clove is a stronger route when the jar can handle it.
    • Celery seed – The earthy, slightly bitter flavor that is less common in a radish jar and a favorite addition of mine. It is a natural match for both the brine and the radish itself.
    • Whole black peppercorns – Left whole so they season the brine slowly instead of clouding it grey and gritty. Pink, green, or white peppercorns all work, and a mixed peppercorn blend is the version I like.

    How to Make Pickled Radishes

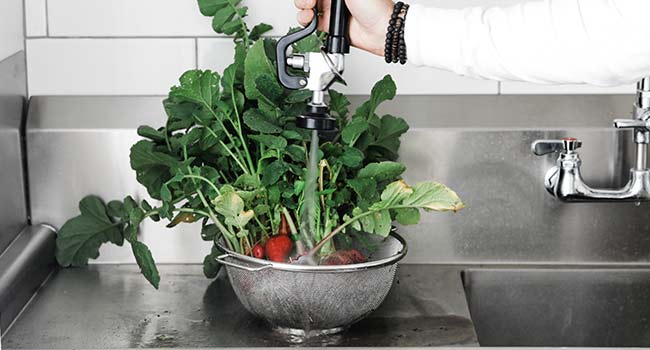
    Rinse the radishes: Rinse 2 bunches of fresh radishes under cold running water to knock the garden dirt loose, then cut the root tail off each one.

    rinsing radishes

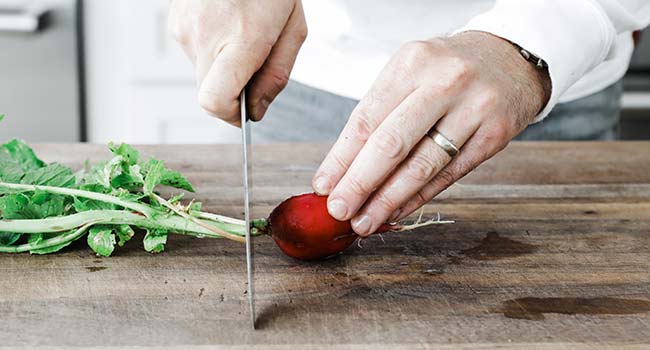
    Trim any green tops down to the bulb, leaving a thin ring of green stem attached looks nice in the jar and does no harm.

    slicing the ends of a fresh radish

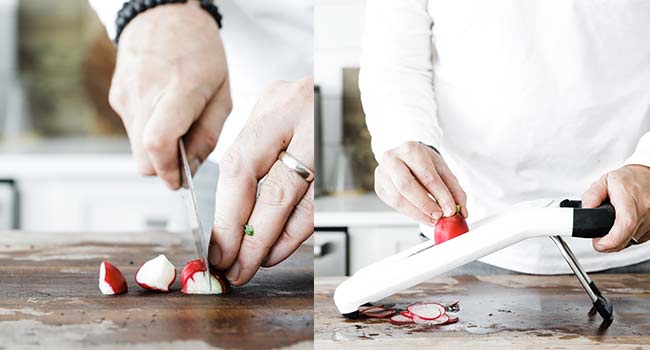
    Cut: Slice the radishes thin on a mandoline for fast pickles that are ready to eat in about an hour, or quarter them through the root end for a firmer chew that needs a full 24 hours in the fridge to hit the right flavor.

    cut and sliced radishes

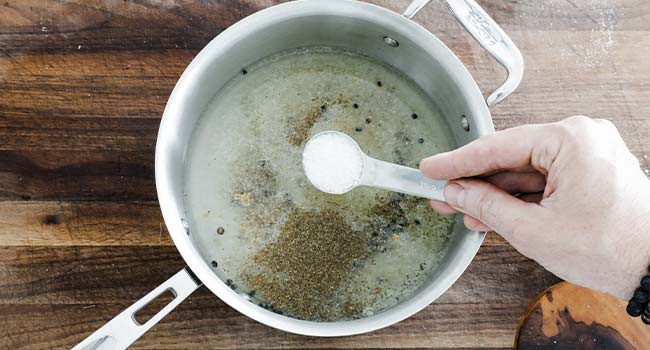
    Combine the brine: Add the water, white distilled vinegar, kosher salt, sugar, and any of the optional aromatics (onion granules, garlic granules, celery seed, whole peppercorns) to a medium saucepan over medium-high heat. Bring the brine to a full boil, and let it boil for about a minute so the salt and sugar are fully dissolved and the aromatics have a moment to bloom in the hot liquid.

    adding salt to a pot of vinegar

    Cool the brine to room temperature: Take the pot off the heat and let the brine sit until it hits room temperature, about 30 minutes.

    adding salt to a pot of vinegar

    Pack the jar: Pack the sliced or quartered radishes into a sanitized quart mason jar, pressing them down so the jar fills to the shoulder. Leave about a half inch of headspace at the top so the brine has room to cover everything without spilling out under the lid.

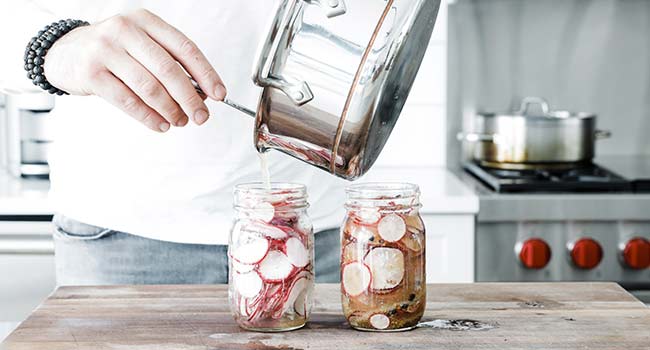
    adding pickling liquid to a jar of sliced radishes

    Pour the brine over the radishes: Ladle the cooled brine, aromatics and all, over the packed radishes until every piece is fully submerged. Tap the jar on the counter once or twice to release any air pockets caught between the slices. Screw the lid on tight and slide the jar onto the fridge shelf.

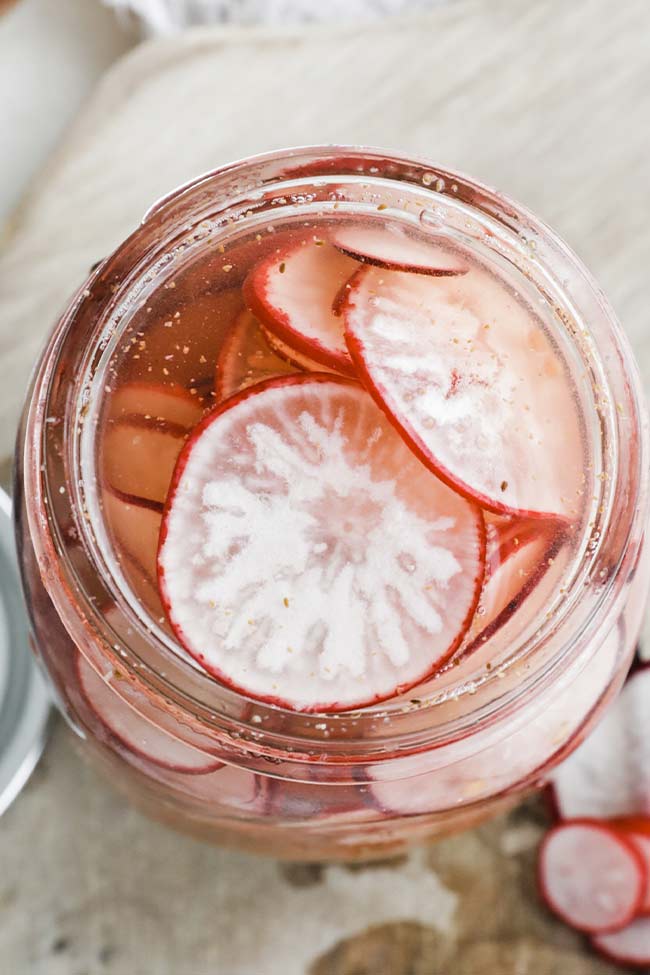
    sliced radishes in a pickling brine
    Chef Billy Parisi

    Chef Tip + Notes

    The most important tip I can give you for perfectly crunchy pickled radishes is to let the brine cool completely before pouring it over the radishes. I always wait until it’s no longer warm to the touch because hot brine will soften the radishes instead of keeping them crisp. Trust me, you don’t want that!

    • Cut the radish to match the plate it is going on: Thin mandoline slices for tacos, salads, and sandwiches. Quarters for a snack jar or anything that needs to hold up against a warm bowl of rice. Same brine, different cuts, different jars.
    • Boil the brine for a full minute: The boil is not about safety. It is about dissolving the salt and sugar completely and letting the peppercorns and celery seed bloom in the hot liquid. A rushed brine leaves grit at the bottom of the jar and a flat aromatic layer throughout the radish.
    • Ignore the rotten-egg smell on day 2. Radishes throw sulfur once they start to pickle, and the first time the lid comes off, the smell is going to seem like something has gone very wrong. Nothing has gone wrong ok? Open the lid over the sink, let the jar breathe for a minute, and the smell blows off. The radishes themselves taste like radishes.
    • Do the optional aromatics: Onion granules, garlic granules, celery seed, and peppercorns are labeled optional on the recipe card, but every jar I make at home gets all four. They take a plain quick-pickle and make it something savory, seasoned, and worth setting on the table next to a piece of grilled fish or a bowl of rice.

    Serving Suggestions

    Most weeks these end up on a plate of easy fish tacos, and a scoop of them goes onto a plate of my authentic carne asada whenever I am doing a Saturday grill night. My daughter picks them straight out of the jar with her fingers before dinner, which is the same thing I used to do when my mom put a bowl of pickled anything on the counter as a kid.

    They’re just as good alongside a hearty meal. I love piling them onto pulled pork to cut through the richness, just like a good homemade vinegar-based coleslaw does, or adding a few on top of my bourbon glazed salmon with rice. I’m seriously drooling just writing about them, so you definitely have to give them a try!

    Make-Ahead and Storage

    Make-Ahead: You can make these pickled radishes up to 3 days ahead of time.

    How to Store: Screw the lid on tight and keep it in the refrigerator for up to 4 weeks. In addition, you can pickle these and store them on the shelves following my bread and butter pickles recipe.

    How to Freeze: I skip the freezer for pickled radishes.

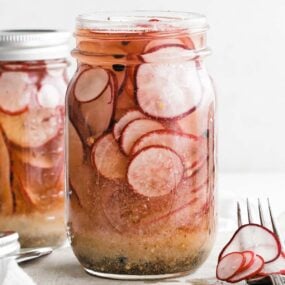
    sliced radishes in a pickling brine

    More Pickled and Preserved Recipes

    Let's Cook - Chef Billy Parisi

    Easy Pickled Radishes Recipe

    I love fresh radishes more than almost any vegetable in my garden, and the only thing I love more is a jar of pickled ones. You only need fresh radishes, a Mason jar, and about 45 minutes to make this simple vinegar, salt, and sugar brine that keeps in the fridge for up to a month. They're perfect for topping tacos, adding to salads, or simply enjoying as a crunchy snack.
    Servings: 12
    Prep Time: 10 minutes
    Cook Time: 5 minutes
    Cooling Time: 30 minutes

    Ingredients 

    • 2 bunches of fresh radishes
    • 2 cups water
    • ¾ cup white distilled vinegar
    • 1 tablespoon sea salt
    • 2 tablespoons sugar

    Optional Ingredients:

    • 2 teaspoons onion granules, or ½ fresh diced
    • 2 teaspoons garlic granules, or 3 minced fresh cloves
    • 1 teaspoon celery seed
    • 1 teaspoon black peppercorns

    Instructions

    • Rinse the radishes under cold water to get any dirt off.
    • Cut off the root end.
    • Slice them thinly on a mandolin or quarter them.
    • Add the water, vinegar, salt, and sugar, and the optional pickling ingredients together in a medium-size pot.
    • Bring it to a boil and them cool it completely to room temperature, which takes about 30 minutes.
    • Once cool, cover the prepared radishes with the pickling liquid in a mason jar. Screw on the lid and store in the refrigerator for up to 4 weeks.

    Notes

    The most important tip I can give you for perfectly crunchy pickled radishes is to let the brine cool completely before pouring it over the radishes. I always wait until it’s no longer warm to the touch because hot brine will soften the radishes instead of keeping them crisp. Trust me, you don’t want that!
    Cut the radish to match the plate it is going on: Thin mandoline slices for tacos, salads, and sandwiches. Quarters for a snack jar or anything that needs to hold up against a warm bowl of rice. Same brine, different cuts, different jars.
    Boil the brine for a full minute: The boil is not about safety. It is about dissolving the salt and sugar completely and letting the peppercorns and celery seed bloom in the hot liquid. A rushed brine leaves grit at the bottom of the jar and a flat aromatic layer through the pickle.
    Ignore the rotten-egg smell on day 2. Radishes throw sulfur once they start to pickle, and the first time the lid comes off, the smell is going to seem like something has gone very wrong. Nothing has gone wrong ok? Open the lid over the sink, let the jar breathe for a minute, and the smell blows off. The radishes themselves taste like radishes.
    Do the optional aromatics: Onion granules, garlic granules, celery seed, and peppercorns are labeled optional on the recipe card, but every jar I make at home gets all four. They take a plain quick-pickle and make it something savory, seasoned, and worth setting on the table next to a piece of grilled fish or a bowl of rice.
    Make-Ahead: You can make these pickled radishes up to 3 days ahead of time.
    How to Store: Screw the lid on tight and keep it in the refrigerator for up to 4 weeks. In addition, you can pickle these and store them on the shelves following my Bread and Butter Pickles Recipe.

    How to Freeze: I skip the freezer for pickled radishes.

    Nutrition

    Calories: 15kcalCarbohydrates: 3gProtein: 0.2gFat: 0.1gSaturated Fat: 0.01gPolyunsaturated Fat: 0.01gMonounsaturated Fat: 0.03gSodium: 585mgPotassium: 18mgFiber: 0.2gSugar: 2gVitamin A: 2IUVitamin C: 0.2mgCalcium: 9mgIron: 0.2mg

    Share this Post

    free email series

    5 Days of Impressive Side Dishes!

    Fresh ways to make any meal feel complete.

    Close the CTA
    Chef Billy Parisi