

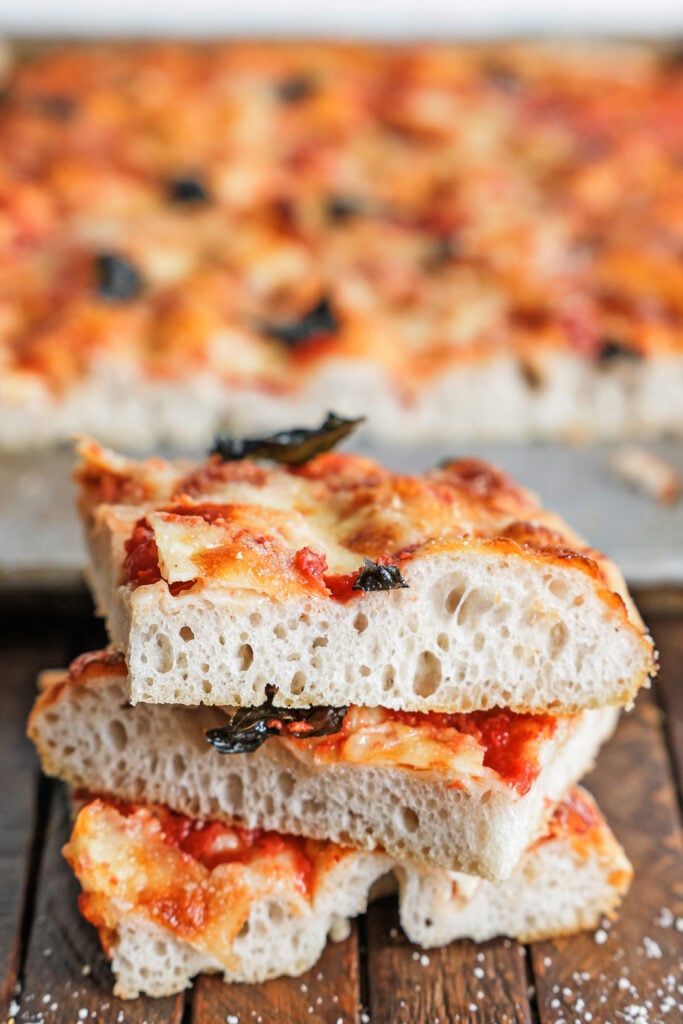
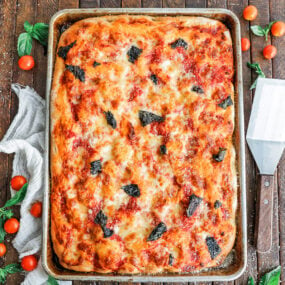
This deep-dish Focaccia Pizza swaps the classic pizza crust for thick and perfectly chewy focaccia bread. I topped it with tomato sauce, mozzarella cheese, and fresh basil, but the topping options are endless. Customize it to your liking for pizza night or a party with friends.
I can’t resist the airy, chewy texture of olive oil-soaked Focaccia Bread, which is why I’ll take any chance to customize the loaf with my favorite flavors. If you also can’t get enough of this classic Italian bread, I recommend giving my Olive Focaccia and Tomato Focaccia recipes a try as well.
What is Focaccia Pizza?
Originating from Liguria in northern Italy, traditional Italian focaccia was often flavored with olive oil, salt, and herbs. Over time, bakers began adding a variety of ingredients, including tomatoes, olives, and peaches, on top. Eventually, that led to replacing pizza dough with focaccia to make an unforgettable focaccia pizza.
What I love most about making pizza with focaccia bread is the many ways you can make it your own. Often, I’ll keep things simple with a margherita focaccia pizza, topping the bread with crushed tomatoes, mozzarella, and basil leaves. You can also add pepperoni slices, olives, and any other toppings you like on your pizza.
This recipe makes a large batch, making it ideal for casual pizza nights at home or dinner parties with friends and family.
Ingredients and Substitutions
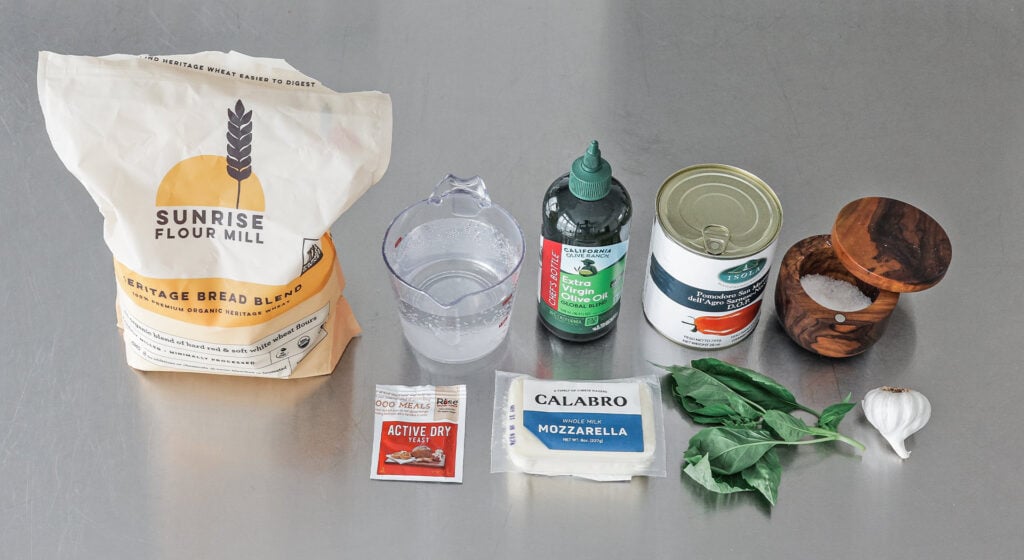
- Biga – Most of my focaccia recipes start with a biga. This is a pre-ferment similar to sourdough starter, but it is made with bread flour, filtered lukewarm water, and active dry yeast. It’s the sole reason why the bread comes out of the oven with complex flavors and a soft crumb.
- Flour – I use bread flour in my focaccia recipes because it has a higher protein content. All-purpose flour should work as a substitute.
- Water – Lukewarm water activates the yeast without killing it. I like filtered water best because it keeps any impurities out of the dough.
- Salt – Coarse salt is my top pick.
- Yeast – I use active dry yeast in both the biga and the dough. You can also use instant yeast if that’s what you already have at home.
- Oil – I always opt for high-quality, cold-pressed extra-virgin olive oil to replicate the flavor of authentic Italian focaccia.
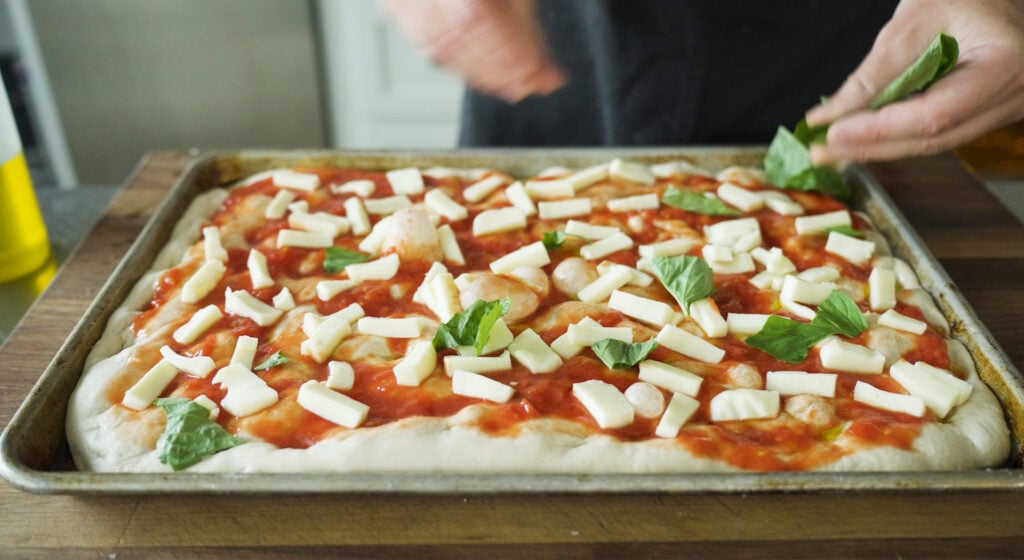
- Tomatoes – To keep this focaccia pizza easy, I layered a can of crushed tomatoes over the top of the dough. You can use tomato purée for a smoother layer or keep things classic with store-bought or homemade pizza sauce.
- Cheese – Because it wouldn’t be pizza without whole milk mozzarella on top. Other kinds of cheeses you can use are provolone, fontina, or dollops of burrata (added after baking).
- Basil – I chiffonade fresh basil leaves before sprinkling them on the pizza.
How to Make Focaccia Pizza
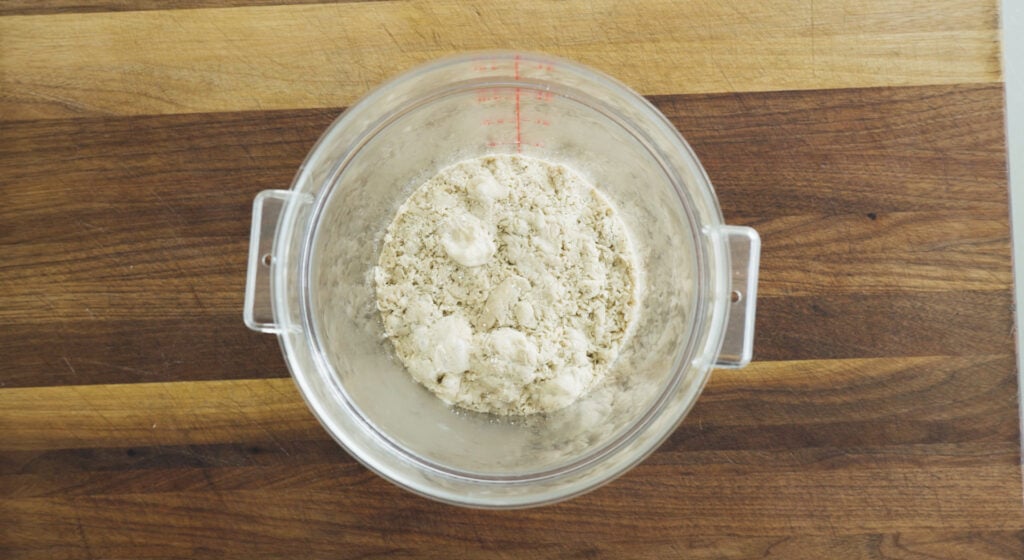
Make the biga: First, I add the flour, water, and yeast to a large bowl. I use my hands to gently mix and fold everything together until it turns into a loose ball of shaggy dough.
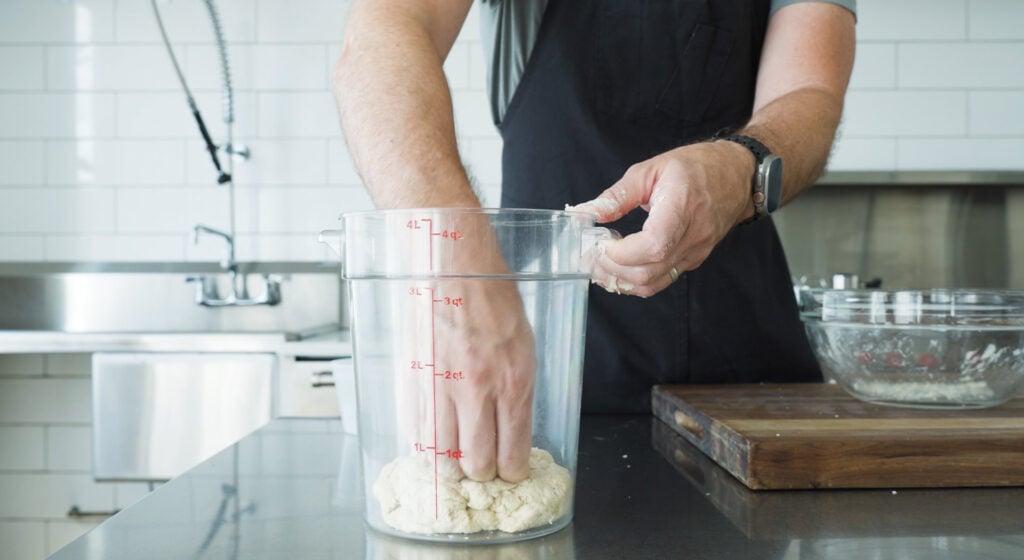
Ferment: I transfer the biga to a plastic container with a lid and let it rest at room temperature for 8 to 24 hours. If my kitchen feels warm, I’ll let it sit at room temperature for 4 to 6 hours, then move it to the fridge to continue fermenting for 24 to 72 hours.
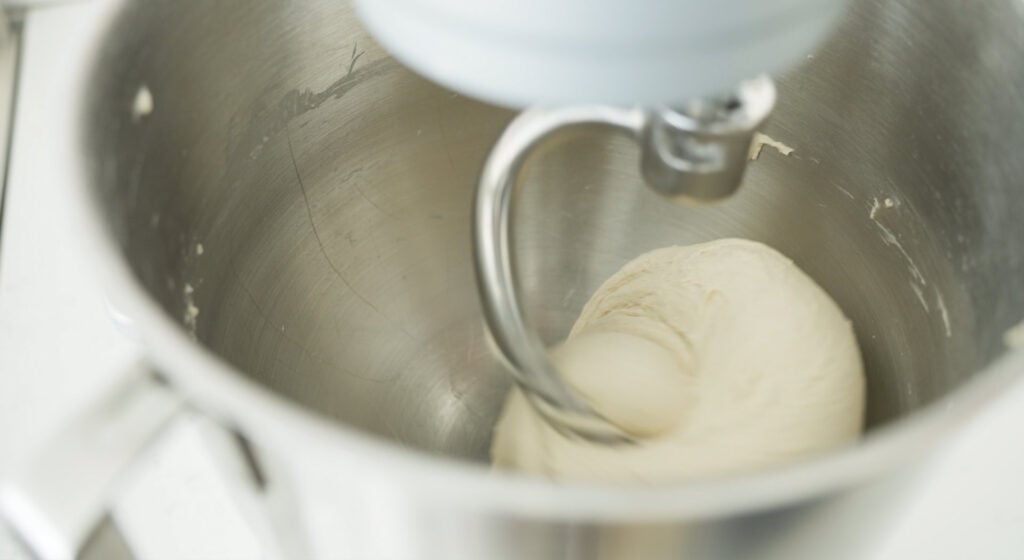
Autolyse: In the bowl of a stand mixer fitted with the dough hook, I mix the flour and 1 cup of lukewarm water on low speed. I let this mixture rest for 30 minutes to autolyse (giving the gluten time to rest before kneading).
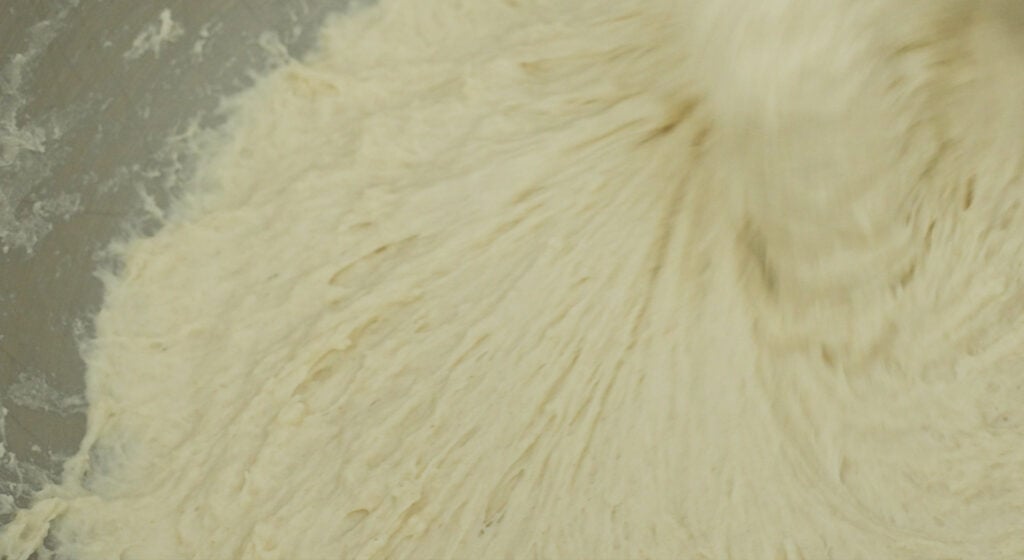
Knead: Next, I add all of the biga and the remaining yeast, salt, and lukewarm water to the bowl with the dough. I mix it on low speed just until the biga breaks down and everything is combined. Then, I increase the speed to high and continue mixing until the dough becomes smooth and elastic.
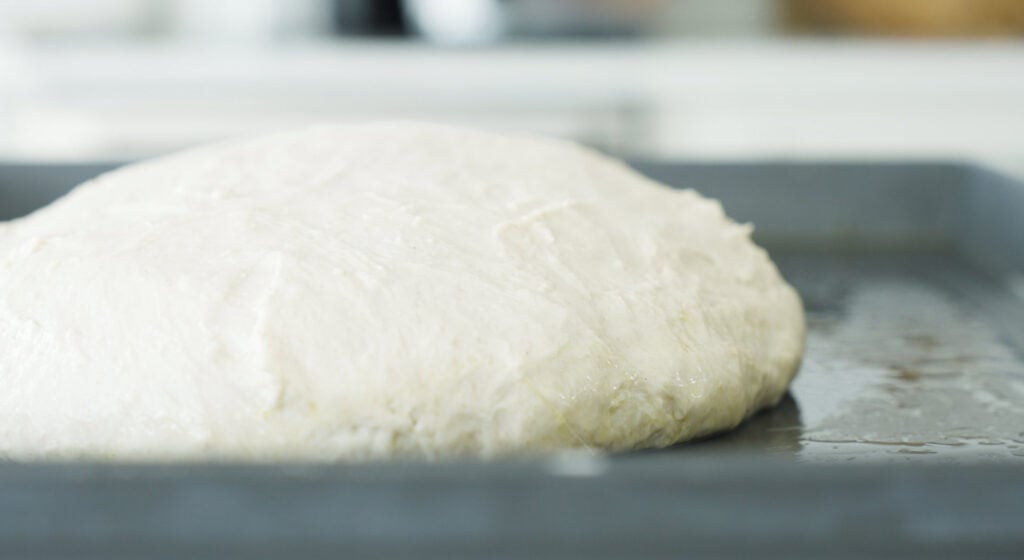
First proof: I brush my baking pan with olive oil, then I transfer the dough to the pan, cover it with a towel, and let it proof in a warm spot in the kitchen for 60 to 90 minutes.
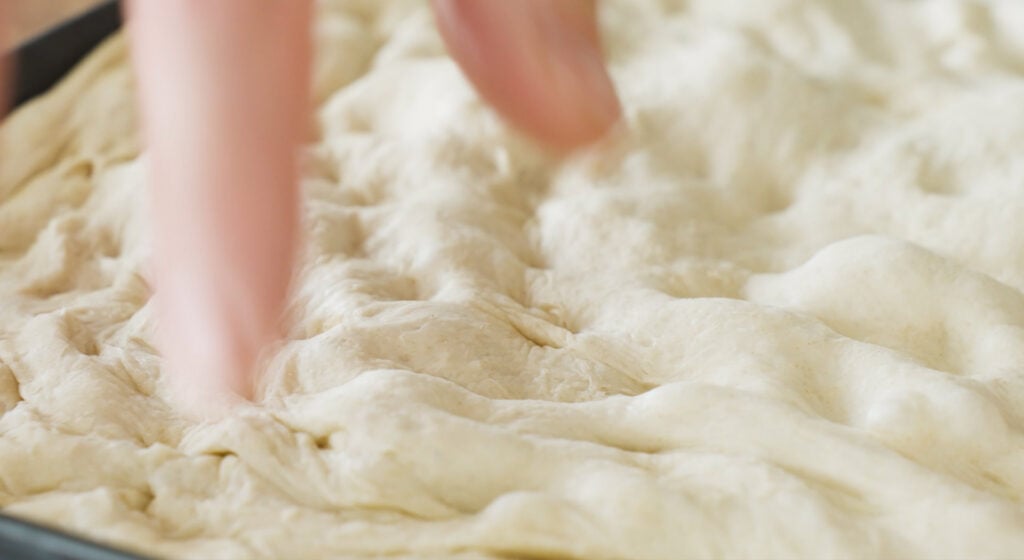
Dimple and second proof: Next, I use my fingertips to press down into the dough to create dimples and gently stretch it to the corners of the pan. I cover it again with a towel and let it proof for another 60 to 90 minutes.
Top: I drizzle the remaining olive oil over the dough, then use my fingertips to reinforce the dimples. Next, I spread the tomato purée evenly across the top. I finish by topping the pizza with the cheese and basil.
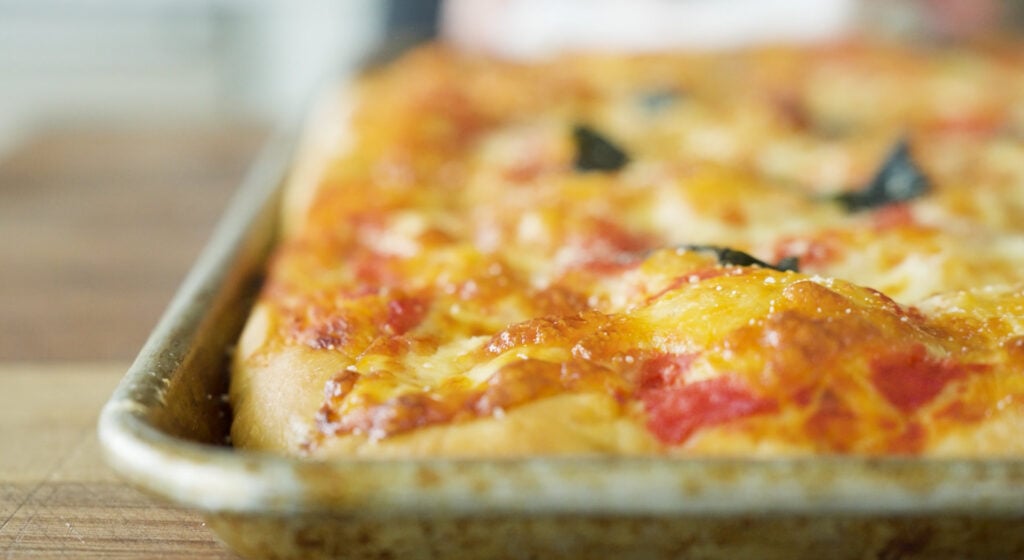
Bake and cool: I bake the pizza until the edges are golden brown and the cheese is gooey. I transfer the pan to a cooling rack and let the pizza cool briefly before slicing.

Chef Tip + Notes
Patience always pays off when it comes to homemade focaccia pizza. The longer the biga has to ferment, the more complex and delicious your pizza will be. Leaving the dough anywhere from 8 to 24 hours at room temperature, or even longer in the refrigerator, creates an incredible depth of flavor and gives the dough its signature open crumb. A rushed biga makes for flatter, less flavorful focaccia.
- Sticky dough: Focaccia dough is naturally sticky when it’s properly hydrated, yielding a soft, airy interior. Even if it feels very sticky and hard to handle, resist adding more flour to the dough. Simply oil your hands when handling the dough to prevent them from sticking.
- The perfect proof: In the first proof, your dough should spread across the pan rather than rise upward. In the second proof, it should double in size, reaching close to the lip of the pan, and look airy and bubbly. You’ll know it’s perfect when you press your fingertip into the dough and it slowly springs back.
- Recommended baking pans: My go-to is a Lloyd pan (these are restaurant-quality, heavy-duty pans designed for Detroit-style pizza). A well-oiled half-sheet tray or a 13×9 non-stick metal pan also works. Avoid glass or ceramic dishes, as they don’t conduct heat as evenly.
- More topping ideas: Top your focaccia pizza with pepperoni, caramelized onions, pineapple, anchovies, roasted red peppers, crumbled Italian sausage, or anything else you like. After it’s out of the oven, finish it with a dollop of pesto, burrata cheese, or a drizzle of hot honey to take things over the top.
Serving Suggestions
This is one of my favorite pizzas to serve to my family on a Friday night or for a fun weekend meal. We can’t get enough, especially when it’s paired with ranch dressing for dipping and a Caesar salad on the side. And for dessert, my peach focaccia is perfect since I am already having a focaccia party every time I make this pizza.
Make-Ahead and Storage
Make-Ahead: The biga can be made up to 3 days in advance and stored in the fridge until you’re ready to mix the dough.
How to Store: Once baked and cooled, slice the focaccia pizza into squares and store them in an airtight container in the fridge for up to 4 days or in the freezer for up to 2 months.
How to Reheat: Reheat the pizza slices in a 375°F oven for 8 to 10 minutes or until the focaccia is crispy again.

More Pizza Recipes

Focaccia Pizza Recipe
Ingredients
For the Biga:
- 2 ¼ cups bread flour
- 2/3 cup + 1 teaspoon filtered lukewarm water
- 1/3 teaspoon active dry yeast
For the Dough:
- 2 ¼ cups bread flour
- 1 1/3 cup + 1 teaspoon filtered lukewarm water
- 1 teaspoon active dry yeast
- 2 teaspoons coarse salt + ½ teaspoon
- 6 tablespoons olive oil
- 2 cups crushed tomatoes or tomato puree
- 1 cup shredded mozzarella cheese
- 10-15 fresh basil leaves
Instructions
For the Biga:
- Add the flour, water, and yeast to a large bowl. Using your hands, gently mix and fold everything together to combine. This should take you about 3 to 4 minutes. Throughout making the biga, the dough will start to become really shaggy.
- Bring the shaggy dough a bit more together to form a sort of loose ball, then transfer it over to a plastic container with a lid, or you can leave it in the bowl covered with plastic.
- It can sit at a room temperature of 72° or less for 8 to 24 hours. If you are over those temps, I recommend letting it sit at room temperature for 4 to 6 hours, then placing it in the fridge for 24 hours and all the way up to 72 hours.
For the Dough:
- In a stand mixer with the hook attachment on low speed, add in the flour and 1 cup of the lukewarm water and mix to combine, about 2 to 3 minutes. Let it sit for 30 minutes to autolyse.
- Next, add in all of the biga, the remaining 1 teaspoon of active yeast, 2 teaspoons of coarse salt, and 1/3 cup plus 1 teaspoon of lukewarm water. Mix on low speed until combined and the biga is broken up, which takes about 3 to 4 minutes.
- Turn the speed to high and mix it until the dough cleans the bowl, which takes about 5 minutes. The dough should have good elasticity. See my notes about sticky dough.
- Brush a Lloyd pan, half sheet tray, or non-stick 13×9 metal pan with 2 tablespoons of olive oil.
- Transfer the dough to the center of the pan. Cover with a towel and let it proof for 60 to 90 minutes or until it is doubled in size. It should spread across the pan, not rise up during this process.
- Next, using your finger tips, press down into and all across the dough while stretching it to each corner. Cover with a towel and let it proof for 60 to 90 minutes or until it is doubled in size. It should come to the lip of the pan.
- Preheat the oven to 425°F (convection) or 450°F (no convection).
- Drizzle the remaining 4 tablespoons of olive oil all over the dough and again press your fingertips down into and all over the dough, creating dimples.
- Spread the tomato puree around evenly on the pizza, leaving a 1-inch crust around the outside. Next, evenly sprinkle the cheese and basil all across the top of the dough.
- Bake on the middle rack at 425°F convection for 20 minutes. Transfer to a cooling rack and cool to room temperature. Enjoy.
Focaccia Pizza Recipe