


This pillowy soft and golden Tomato Focaccia is topped with juicy cherry tomatoes, sweet onions, and fresh rosemary. It’s one of my favorite ways to use up an abundance of fresh tomatoes during late summer.

Focaccia is one of the easiest and most delicious breads you can make from scratch. Once you give my Focaccia recipe a try, I recommend branching out with my olive focaccia and my pizza focaccia next.
Tomato Focaccia
Focaccia is one of Italy’s most beloved breads. It originated in the Liguria region, where it was traditionally baked as a rustic, everyday loaf with a golden, olive oil-rich crust and tender, airy interior.
Just like how sourdough begins with sourdough starter, most traditional focaccia bread starts with a biga pre-ferment. This slow-fermented mixture of flour, water, and yeast adds depth of flavor and strengthens the gluten, creating the open, airy crumb that focaccia is known for.
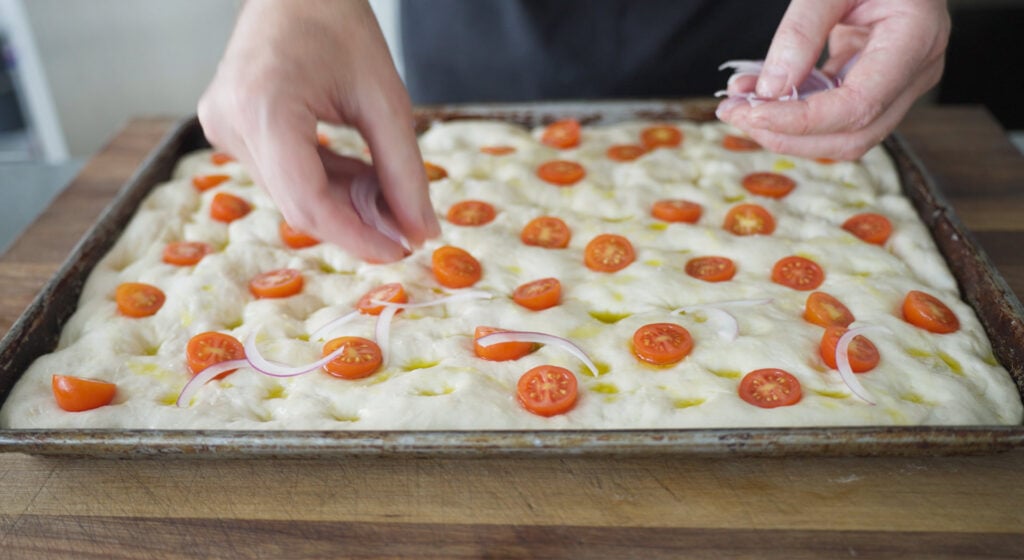
Golden, crisp, and olive oil-soaked focaccia is delicious as-is, but I like to enhance the flavor and presentation with the right toppings. For this tomato focaccia, I pressed cherry tomatoes (the ones I also use in my Tomato Basil Pasta Recipe), red onion, and rosemary onto the dough right before baking. This gives every slice a burst of fresh, summery flavors I can’t get enough of.
Ingredients and Substitutions
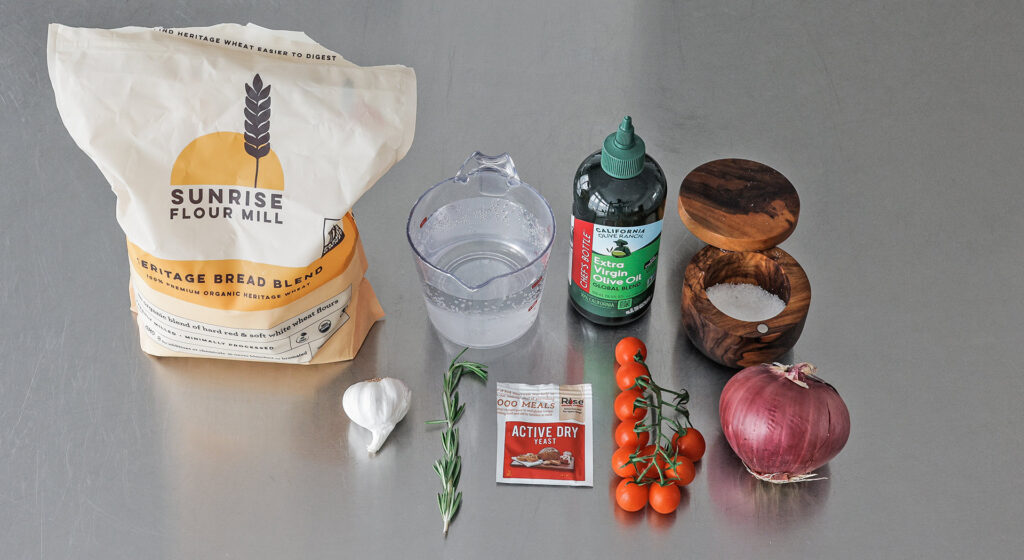
- Biga – I start most of my focaccia recipes with a biga pre-ferment. This is a simple way to enhance the depth of flavor and the airy, pillowy interior. Luckily, it’s easy to make with only bread flour, water, and yeast.
- Flour – I typically reach for bread flour in most of my homemade bread recipes due to its high protein content. All-purpose flour should work as a substitute.
- Water – You need lukewarm filtered water (between 100ºF and 105°F) to activate the yeast.
- Yeast – Active dry yeast is my go-to for homemade focaccia.
- Salt – I use coarse salt for both the flavor and structure of the bread.
- Oil – I highly recommend splurging on a quality cold-pressed extra-virgin olive oil. Its rich, grassy, and floral flavor is what helps the bread taste authentic.
- Tomatoes – I used fresh, late-summer cherry tomatoes for this recipe. Other tomatoes that can be used are sliced Roma tomatoes, heirloom tomatoes, or grape tomatoes. Or, for a gourmet flavor, use a combination of fresh tomatoes and tomato confit or sun-dried tomatoes.
- Onion – I combined the tomatoes with thinly sliced red onion. A sliced shallot can be used as a substitute.
- Rosemary – Use fresh rosemary for a stronger aroma and earthy flavor. If you only have dried rosemary, use only 1 teaspoon instead.
How to Make Focaccia with Tomatoes
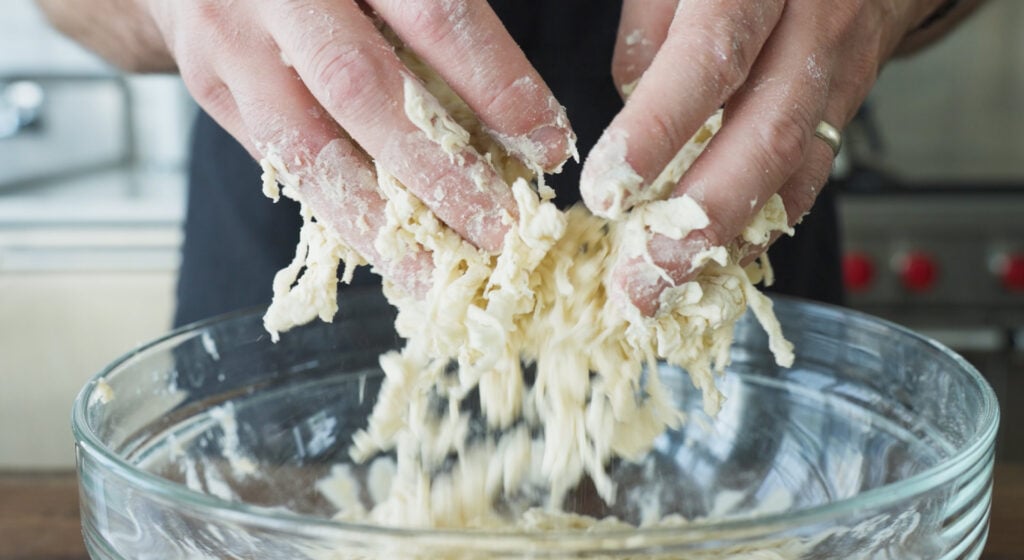
Make the biga: First, I use my hands to gently mix the flour, water, and yeast in a large bowl until the dough looks shaggy.
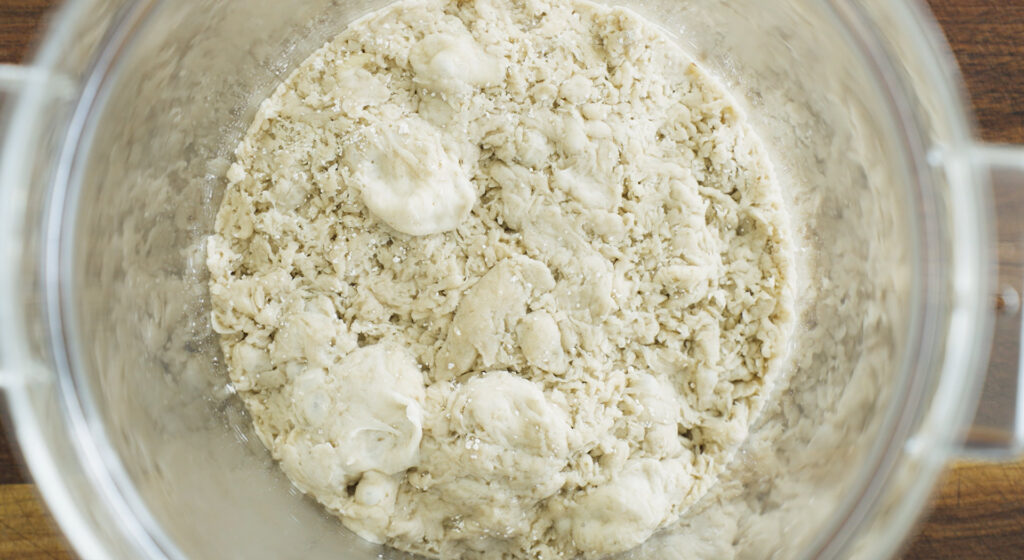
Shape and rest: I gather the dough into a ball and transfer it to a plastic container with a lid. Then, I let it sit at room temperature for 8 to 24 hours. If my kitchen is warmer than 72°F, I let it rest at room temperature for 4 to 6 hours, then move it to the fridge to ferment for 24 to 72 hours.
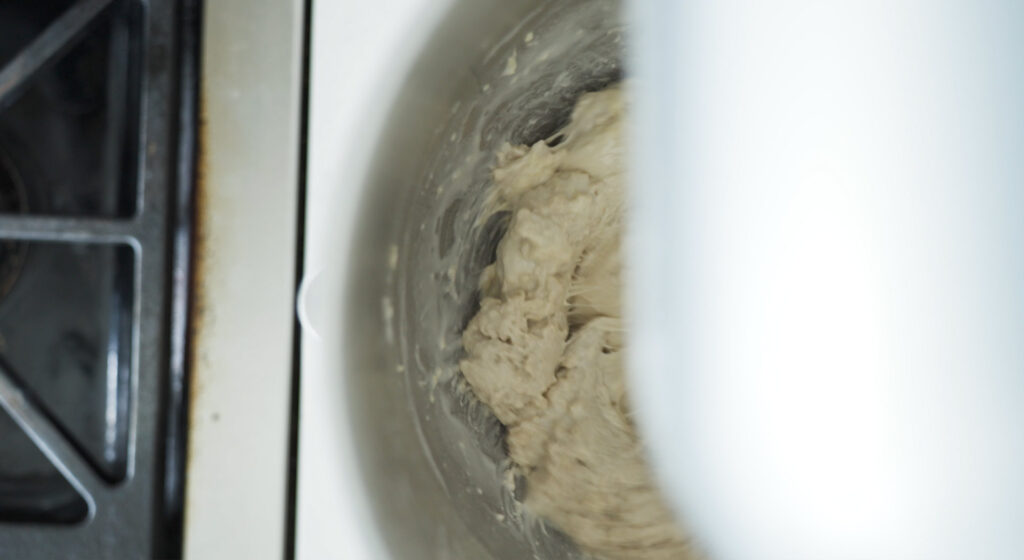
Start the dough: In my stand mixer fitted with a dough hook, I mix the flour and 1 cup of lukewarm water on low speed, then let it rest for 30 minutes to autolyse (a process that helps develop the gluten structure).
Mix in the biga: Next, I add all of the biga, the remaining yeast, salt, and 1/3 cup plus 1 teaspoon of lukewarm water. I mix it on low speed until the biga is broken up and fully incorporated.
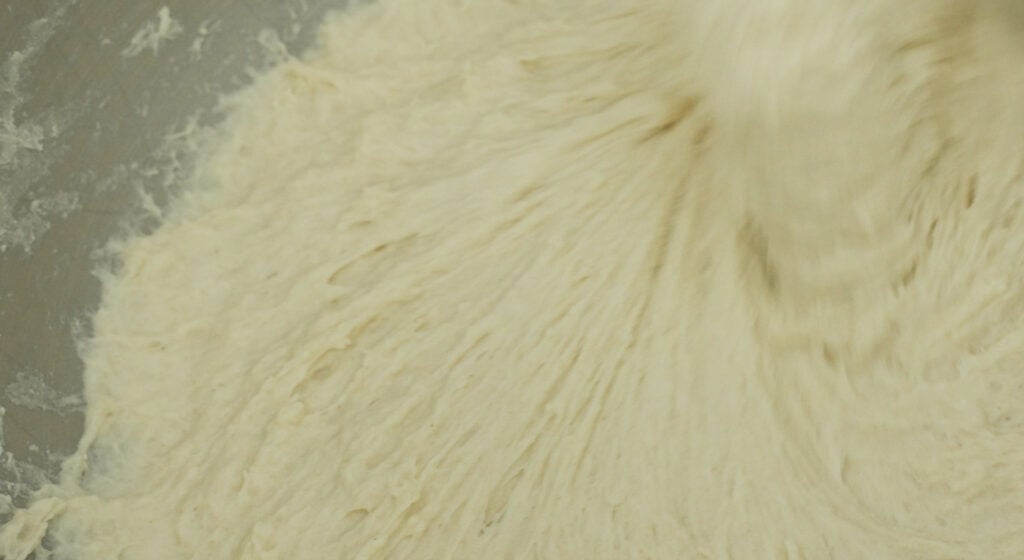
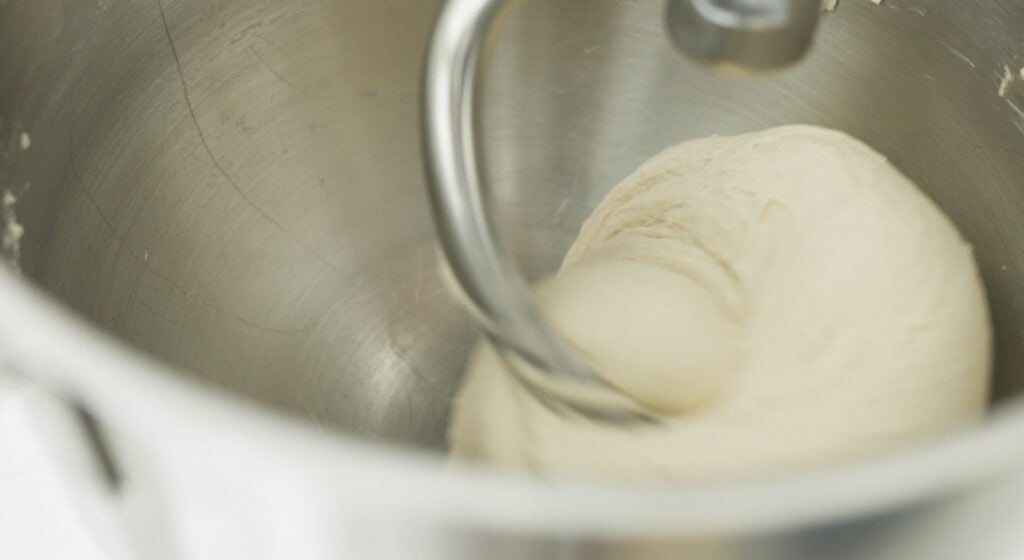
Knead: I increase the speed to high and mix until the dough pulls away from the sides of the bowl. It should be elastic and smooth when it’s done.
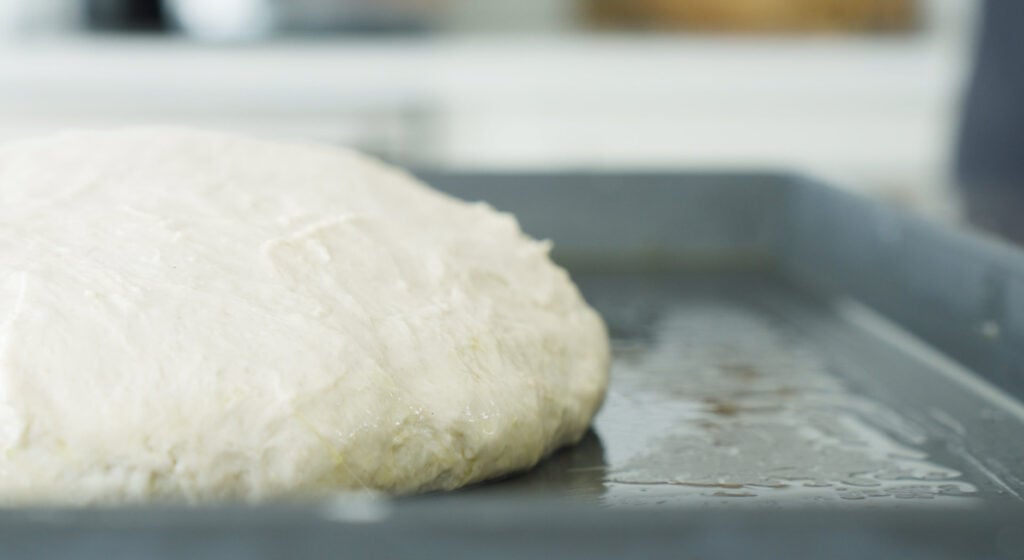
First proof: I brush a pan with olive oil, then place the dough in the center of the pan. I cover it with a towel and let it proof for 60 to 90 minutes, or until it has doubled in size.
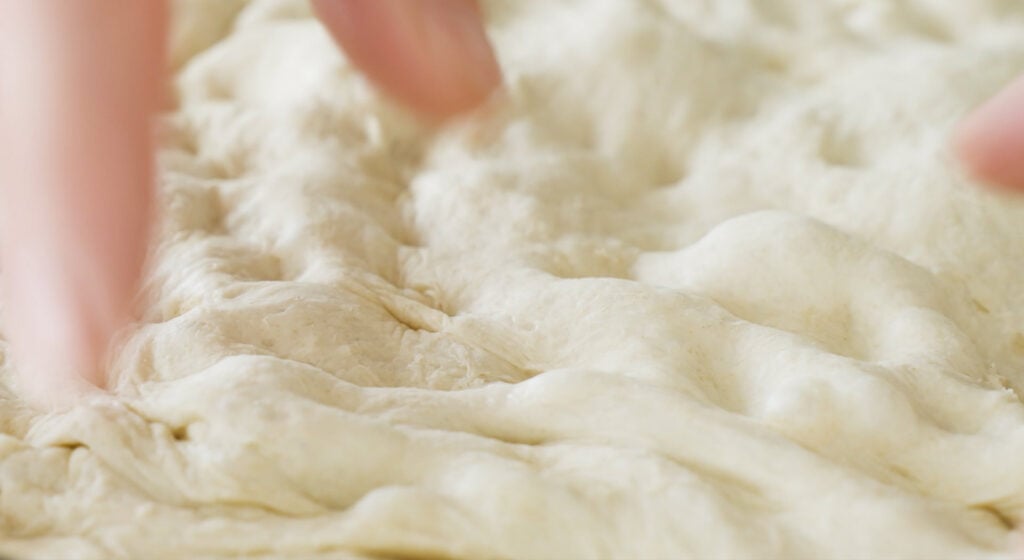
Dimple and second proof: I press my fingertips all across the dough to create dimples and gently stretch it to the corners. I cover it again with a towel and let it proof for another 60 to 90 minutes, or until it has doubled in size and rises to the lip of the pan.
Add toppings: I drizzle the remaining olive oil over the dough, then create more dimples with my fingertips. I evenly scatter the tomatoes into the dimples, followed by the sliced red onion and rosemary.
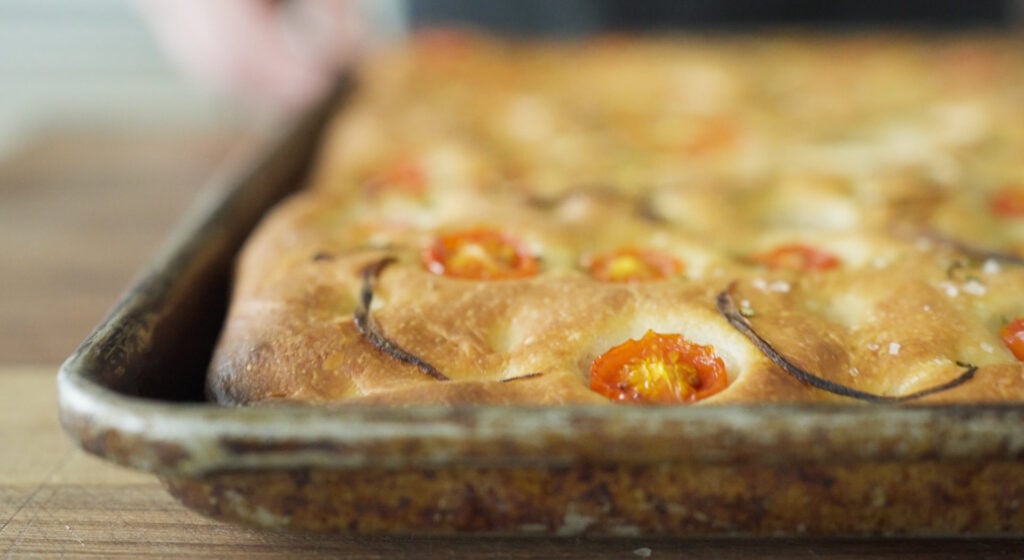
Bake: I bake the tomato and onion focaccia until the loaf is golden brown and has a crisp crust. To finish, I transfer the bread to a cooling rack and let it cool completely before slicing.

Chef Tip + Notes
Making the focaccia by hand? Try not to panic if the dough feels very wet or it’s challenging to handle. A hydrated dough yields fluffy focaccia with an open, airy crumb every time. Instead of adding more flour to the dough, coat your hands and bowl lightly with olive oil to make handling easier. A bench scraper is also your best friend when the dough inevitably sticks to the counter.
- Water temperature matters: Both the biga and the focaccia dough are very sensitive to water temperature. If your water is too hot, it will kill the yeast; if it’s too cold, fermentation will slow way down. Aim for lukewarm filtered water between 100ºF and 105°F for the most reliable rise.
- When it’s done, the focaccia should be deeply golden with slightly crisp edges. If the top is brown but the bottom is pale, leave it in a few extra minutes (better a well-baked crust than underdone bread).
- Optional toppings: Try tucking roasted garlic cloves or thinly sliced black or green olives into the dimples alongside the tomatoes and onion. For something heartier, scatter mozzarella, feta, or goat cheese crumbles over the top. You could also mix and match the rosemary with basil, thyme, oregano, or sage.
- Steaming technique: Steaming is a popular technique bakers use to bake bread that is soft on the inside and crisp on the outside. If you’d like to try this, place a small pan of hot water in the oven during the first 10 minutes of baking.
Serving Suggestions
When I can resist eating the freshly baked tomato focaccia straight from the pan, I like pairing the slices with a mix of olive oil and balsamic vinegar for dipping. This makes for a perfect appetizer before an Italian dinner of chicken marsala with a side of creamy risotto hits the table.
I also like using the day-old focaccia for sandwiches. A Caprese sandwich with fresh mozzarella, basil, and tomatoes is hard to beat.
Make-Ahead and Storage
Make-Ahead: Bake the focaccia up to 1 day ahead of serving. For the focaccia dough, prepare it up until after the first rise is complete. Then, keep it in a covered bowl in the refrigerator overnight. Bake the next day.
How to Store: Keep the baked bread covered and on the kitchen counter for up to 2 days. It also freezes well for up to 2 months.
More Homemade Bread Recipes

Tomato Focaccia Recipe

Ingredients
For the Biga:
- 2 ¼ cups bread flour
- 2/3 cup + 1 teaspoon filtered lukewarm water
- 1/3 teaspoon active dry yeast
For the Dough:
- 2 ¼ cups bread flour
- 1 1/3 cup + 1 teaspoon filtered lukewarm water
- 1 teaspoon active dry yeast
- 2 teaspoons coarse salt + ½ teaspoon
- 6 tablespoons olive oil
- 1 cup cherry tomatoes, sliced in half
- ¼ thinly sliced red onion
- 1 tablespoon finely minced fresh rosemary
Instructions
For the Biga:
- Add the flour, water, and yeast to a large bowl. Using your hands, gently mix and fold everything together to combine. This should take you about 3 to 4 minutes. Throughout the process of making the biga, the dough will start to become shaggy.
- Bring the shaggy dough a bit more together to form a loose ball. Then, transfer it to a plastic container with a lid. You can leave it in the bowl covered with plastic.
- It can sit at a room temperature of 72° or less for 8 to 24 hours. If you are over those temps, I recommend letting it sit at room temperature for 4 to 6 hours, then placing it in the fridge for 24 hours, and up to 72 hours.
For the Dough:
- In a stand mixer with the hook attachment on low speed, add the flour and 1 cup of the lukewarm water and mix to combine, about 2 to 3 minutes. Let it sit for 30 minutes to autolyse.
- Next, add in all of the biga, the remaining 1 teaspoon of active yeast, 2 teaspoons of coarse salt, and 1/3 cup plus 1 teaspoon of lukewarm water, and mix on low speed until combined and the biga is broken up, which takes about 3 to 4 minutes.
- Turn the speed to high and mix it until the dough has cleaned the bowl, which takes about 5 minutes. The dough should have good elasticity. See note about sticky dough.
- Brush a Lloyd pan, half sheet tray, or non-stick 13×9 metal pan with 2 tablespoons of olive oil.
- Transfer the dough to the center of the pan. Cover with a towel and let it proof for 60 to 90 minutes or until it is doubled in size. It should spread across the pan, not rise up during this process.
- Next, using your finger tips, press down into and all across the dough while stretching it to each corner. Cover with a towel and let it proof for 60 to 90 minutes or until it is doubled in size. It should come to the lip of the pan.
- Preheat the oven to 425°F (convection) or 450°F (no convection).
- Drizzle the remaining 4 tablespoons of olive oil all over the dough and again press your fingertips down into and all over the dough, creating dimples.
- Evenly add the tomatoes over the dough into the already created dimples. Evenly sprinkle on the thinly sliced onions and rosemary.
- Bake on the middle rack at 425°F (convection) for 20 minutes. Transfer to a cooling rack and cool to room temperature. Enjoy.
Tomato Focaccia Recipe