Olive Focaccia Recipe


This golden-brown, oil-soaked Olive Focaccia is made with a biga starter and topped with green and black olives for a burst of briny flavor. This is one of the easiest homemade bread recipes you can make.
Making my own bread is one of my favorite pastimes because the process is so rewarding. If you want to skip the store-bought bread and start making your own, I recommend starting with my homemade white bread recipe and then move to my easy Focaccia alla Genovese recipe.
Olive Focaccia
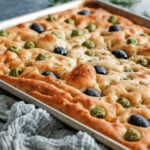
Focaccia is a classic Italian bread that dates back to ancient Rome. The most famous variety, Focaccia alla Genovese, originated in Genoa in the Liguria region. There, bakers perfected the golden, crisp crust and soft, pillowy interior. Olive focaccia puts a briny spin on the original, topping the fluffy, golden, and chewy bread with olives and fresh herbs.
A mix of green Castelvetrano olives and black olives is the true star of this Italian bread. However, you wouldn’t achieve bakery-style results without starting the focaccia dough with a biga pre-ferment. Similar to sourdough starter, the biga adds more complex flavors and develops strong gluten strands in the dough. It’s kind of like giving your focaccia a head start in the easiest way possible.
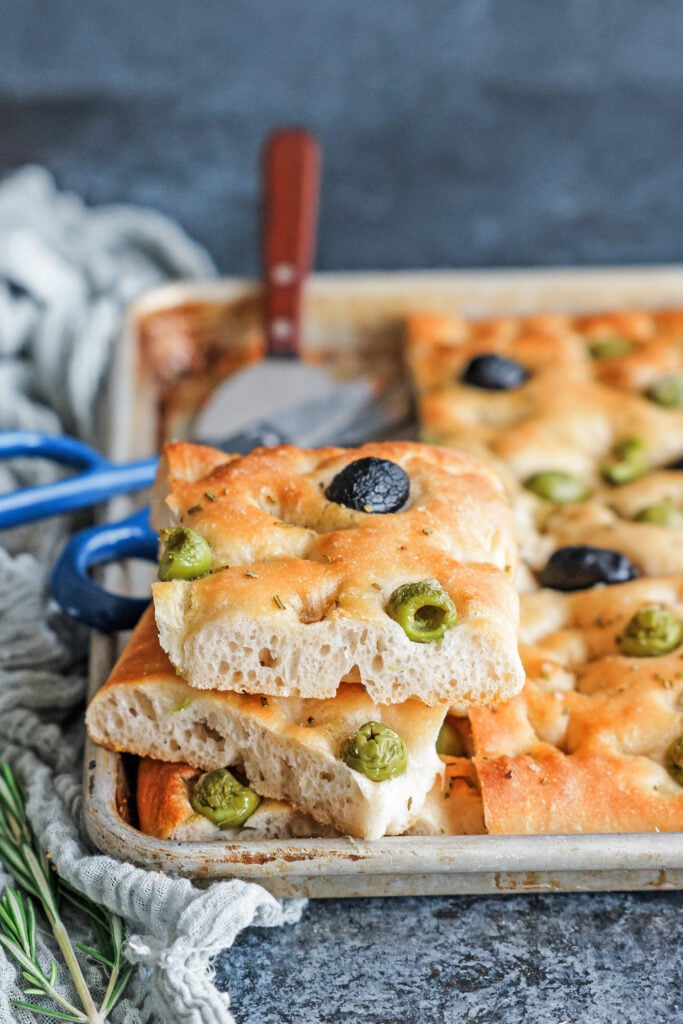
Once it’s ready, the olive focaccia emerges from the oven, golden and aromatic. Then, it is decorated with olives, fresh herbs, and lots of olive oil. I highly recommend enjoying it fresh-baked with your Italian dinner.
Ingredients and Substitutions
- Biga – I start all of my focaccia recipes with a biga pre-ferment, made from a mix of bread flour, filtered lukewarm water, and yeast. I typically make it 1 to 3 days ahead of the bread to give it plenty of time to ferment.
- Flour – Bread flour is what I used for this recipe, but all-purpose flour can also be used.
- Water – You need lukewarm (between 100ºF and 105°F) filtered water.
- Yeast – I use active dry yeast because it consistently gives my bread dough a nice rise. Remember to check the expiration date before you start this recipe (expired yeast will not activate).
- Salt – I use coarse salt to flavor the dough and give it structure.
- Oil – Quality cold-pressed extra virgin olive oil is essential to focaccia (both in the dough and on top).
- Olives – I opted for a mix of pitted green olives and black olives for a colorful presentation. The mix also gives a blend of buttery sweet and briny flavors. Green Castelvetrano olives, jarred black olives, and Kalamata olives are all good options.
- Herbs – Fresh rosemary and olive focaccia are a classic pairing. I recommend using fresh herbs, but you can substitute dried rosemary in a pinch (use about half the amount).
How to Make Olive Focaccia
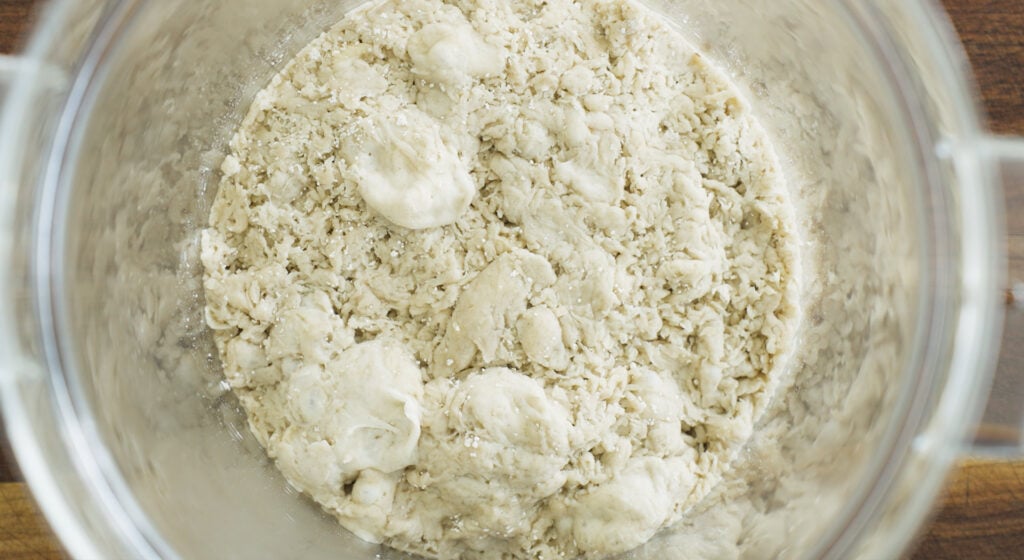
Mix the biga: First, I mix the flour, water, and yeast in a large bowl with my hands until the dough looks shaggy. From there, I bring the dough together into a loose ball.
Ferment: I transfer the dough to a plastic container with a lid and let it sit at room temperature for 8 to 24 hours. If my kitchen is warmer than 72°F, I’ll leave it on the counter for 4 to 6 hours. Then, I transfer it to the fridge for 24 to 72 hours.
Autolyse: In a separate large bowl, I mix the flour with 1 cup of water (either by hand or with a stand mixer fitted with a dough hook). I let it rest for 30 minutes to “autolyse” (a step that helps the flour hydrate and makes the dough easier to work with).
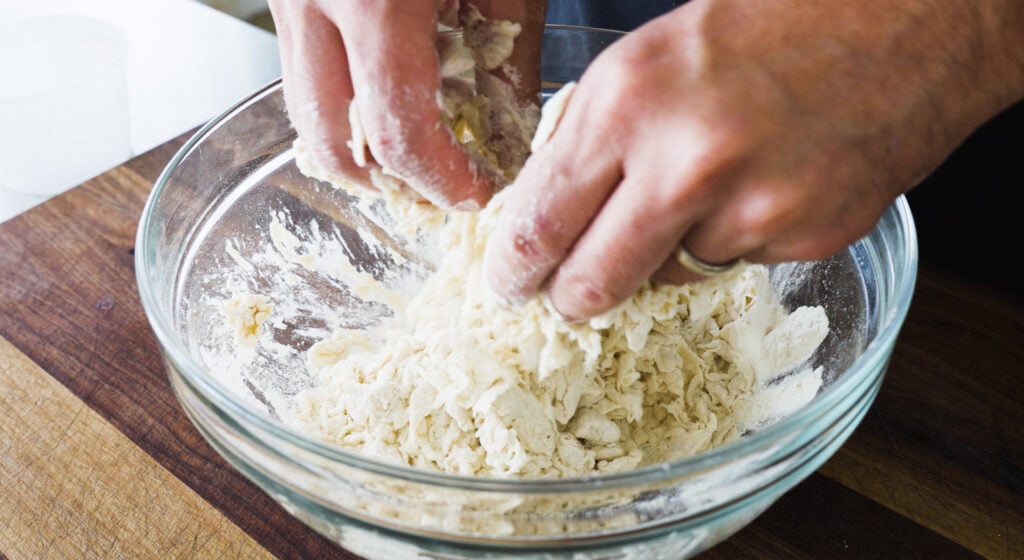
Combine: After resting, I add all the biga, the remaining yeast, salt, and ⅓ cup plus 1 teaspoon of lukewarm water to the bowl. I thoroughly mix everything by squeezing, pinching, and folding the dough until the biga breaks up and everything is evenly combined.

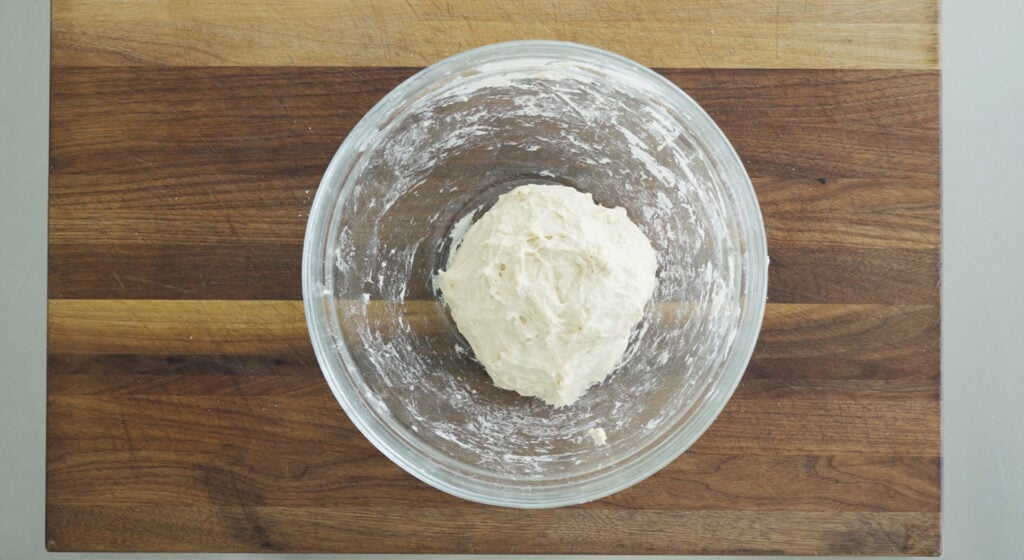
Knead: I transfer the dough to a clean surface and knead it using the slap-and-fold method. The dough should feel elastic and smooth when it’s done.

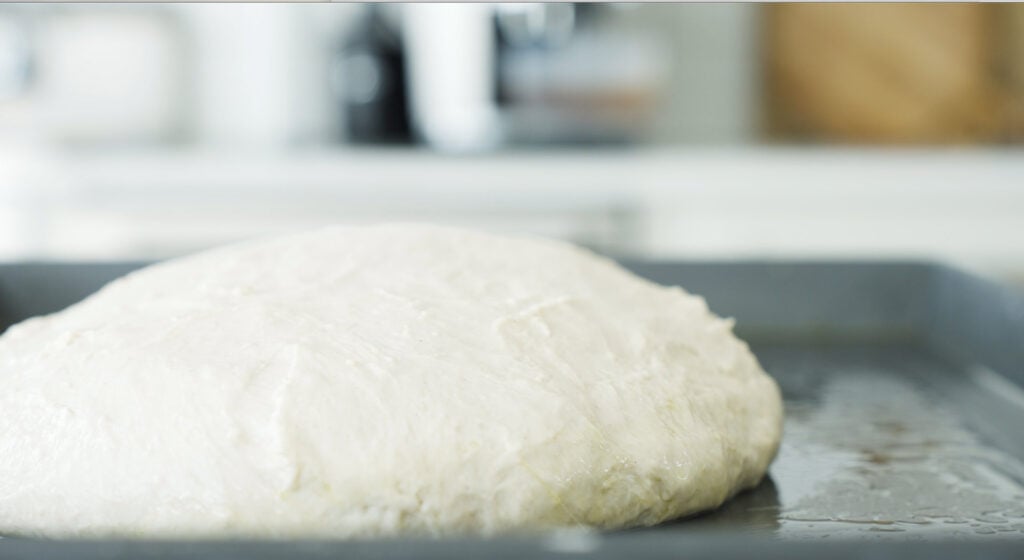
First proof: I transfer the dough into a generously oiled baking pan. Then, I cover it with a towel, and let it proof for until it’s doubled in size. This takes 60-90 minutes.
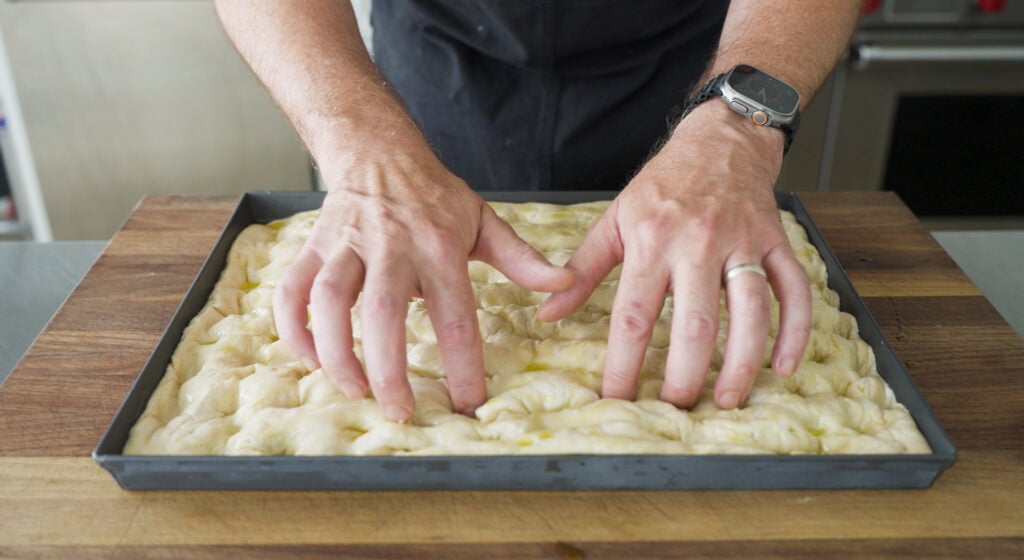
Dimple and second proof: Using my fingertips, I press firmly into the dough, dimpling it evenly all over. I cover it again and let it proof for another 60 to 90 minutes or until it has doubled and reached the lip of the pan.
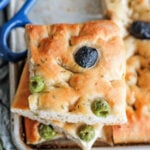
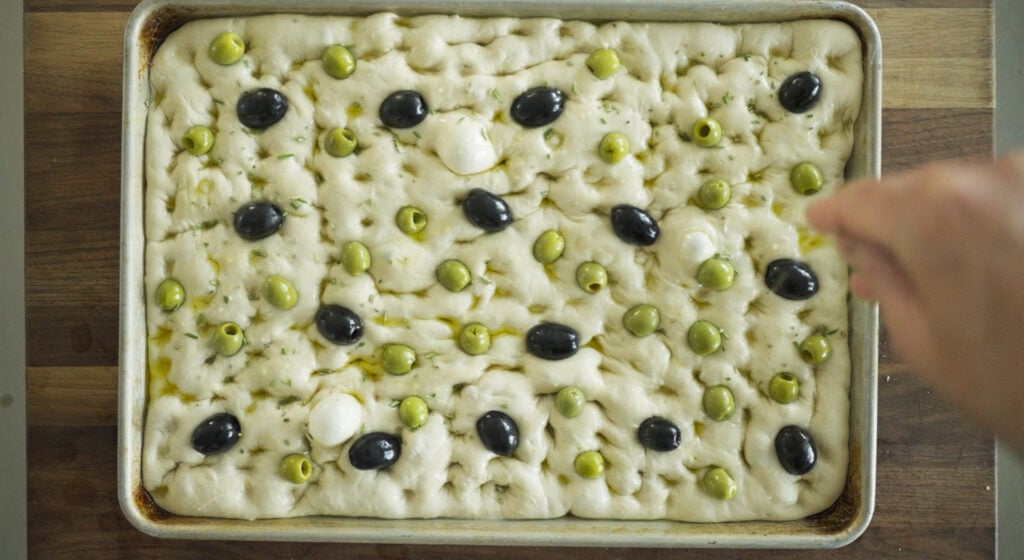
Decorate: I drizzle the remaining olive oil over the dough. Then, I use my fingertips to create deeper dimples all across the surface. I scatter the olives evenly into the dimples and finish by sprinkling the fresh rosemary over top.
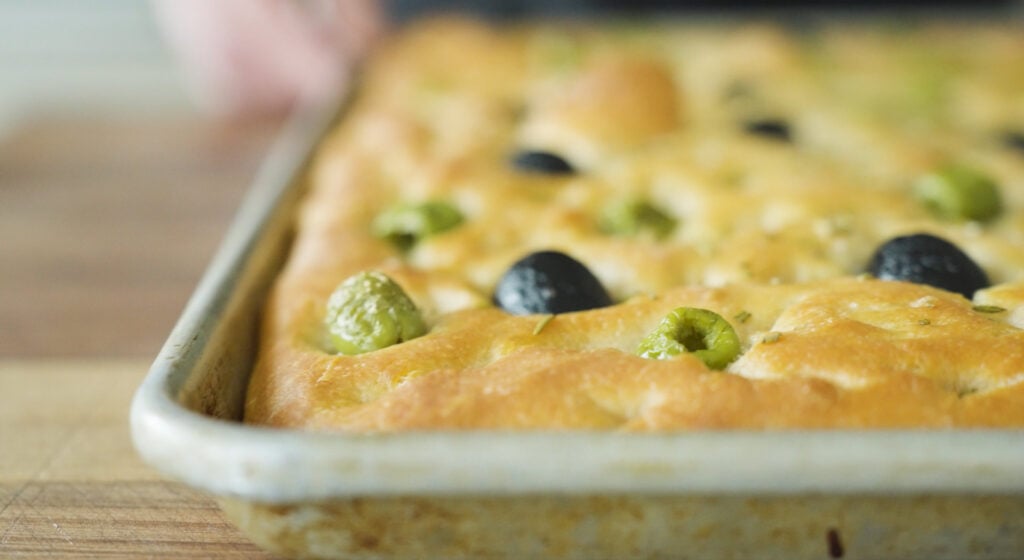
Bake: I bake the olive focaccia until it’s golden brown with a crisp crust. Finally, I transfer the focaccia to a cooling rack and let it cool to room temperature before slicing.

Chef Tip + Notes
The single most important tip for making bakery-quality focaccia from scratch is patience with fermentation. Allowing your biga and dough to proof slowly creates the airy texture, golden crust, and nuanced flavor that the bread is known for. Don’t rush this step—time is your secret ingredient!
- Sticky dough fix: Focaccia dough is naturally sticky due to its high hydration level. This makes it somewhat challenging to work with. Instead of adding more flour (which can weigh the bread down), keep a dough scraper nearby to help you work with the dough. Lightly oiling your hands and work surface also makes kneading and shaping easier.
- The pan matters: For the best crust, use a dark metal Lloyd pan, a half-sheet tray, or a non-stick 13×9” pan brushed generously with olive oil. Glass and ceramic pans won’t give you the same crisp.
- Dense bread troubleshooting: If your loaf turns out heavy or gummy, you likely under-proofed it. Next time, make sure the dough has at least doubled in size during each rise. Also, do not skip the resting times. A good 60 to 90-minute rest allows the gluten to relax and encourages air pockets to form.
- Cool before slicing: As tempting as it is to slice into it right away, let your focaccia cool for 20 minutes on a wire rack first.
- More topping ideas: There’s plenty of room alongside the olives for more savory toppings. Try sun-dried tomatoes, roasted red peppers, Parmesan or feta cheese, or caramelized onions. You can also mix and match the rosemary with other herbs, such as thyme, oregano, or sage.
Serving Suggestions
One of my favorite ways to serve olive focaccia is as an appetizer alongside my pizza focaccia. Cut into squares, it’s perfect with a charcuterie spread, a simple olive oil and balsamic vinegar dip, and a big bowl of pasta primavera.
I also love using the extras for sandwiches. The salty, olive-studded slices add a nice pop of flavor when I’m digging into a chicken cutlet sandwich.
Make-Ahead and Storage
Make-Ahead: Prepare the focaccia dough (up until after the first rise is complete) up to 1 day before baking and refrigerate it overnight. Bake the focaccia up to 1 day ahead of serving.
How to Store: Wrap the leftover olive focaccia in plastic or foil. Store it at room temperature for up to 2 days or in the freezer for up to 2 months.
More Bread Recipes

Olive Focaccia Recipe

Ingredients
For the Biga:
- 2 ¼ cups bread flour
- 2/3 cup + 1 teaspoon filtered lukewarm water
- 1/3 teaspoon active dry yeast
For the Dough:
- 2 ¼ cups bread flour
- 1 1/3 cup + 1 teaspoon filtered lukewarm water
- 1 teaspoon active dry yeast
- 2 teaspoons coarse salt + ½ teaspoon
- 6 tablespoons olive oil
- ½ cup pitted green olives
- ½ cup pitted black olives
- 1 tablespoon finely minced fresh rosemary
Instructions
For the Biga:
- Add the flour, water, and yeast to a large bowl. Using your hands, gently mix and fold everything together to combine. This should take you about 3 to 4 minutes. Throughout making the biga, the dough will start to become really shaggy.
- Bring the shaggy dough together a bit more to form a loose ball. Then, transfer it to a plastic container with a lid, or you can leave it in the bowl covered with plastic.
- It can sit at a room temperature of 72° or less for 8 to 24 hours. If you are over those temperatures, I recommend letting it sit at room temperature for 4 to 6 hours, then placing it in the fridge for 24 hours and up to 72 hours.
For the Dough:
- In a separate large bowl, mix the flour and 1 cup of the water until well combined, which takes about 3 to 4 minutes. You can also do this in a stand mixer with the hook attachment on low speed. Let it sit for 30 minutes to autolyse.
- Next, add all of the biga, the remaining 1 teaspoon of active yeast, 2 teaspoons of coarse salt, and 1/3 cup plus 1 teaspoon lukewarm water.
- Thoroughly mix everything together by squeezing, pinching, and folding the dough over until it is completely combined. The biga should be broken up. This can also be done in the stand mixer.
- Once it is combined, remove it from the bowl and transfer it to a cutting board or clean surface. Knead using the slap and fold method or continue to stretch and coil over the dough. Keep it clean by using a scraper to scrape back the dough if it gets too sticky. This process with take about 10 minutes. The dough should have good elasticity. Again, it can be done in 5 minutes in a stand mixer with the hook attachment on high speed. See my notes about sticky dough.
- Brush a Lloyd pan, half sheet tray, or non-stick 13×9 metal pan with 2 tablespoons of olive oil.
- Transfer the dough to the center of the pan. Cover with a towel and let it proof for 60 to 90 minutes or until it has doubled in size. It should spread across the pan, not rise up during this process.
- Next, using your finger tips, press down into and all across the dough while stretching it to each corner. Cover with a towel and let it proof for 60 to 90 minutes or until it has doubled in size. It should come to the lip of the pan.
- Preheat the oven to 425° F (convection) or 450° F (non-convection).
- Drizzle the remaining 4 tablespoons of olive oil all over the dough and again press your fingertips down into and all over the dough, creating dimples.
- Add the olives all over the dough into the already created dimples. Then, evenly sprinkle on the rosemary.
- Bake on a middle rack at 425° F (convection) for 20 minutes. Transfer to a cooling rack and cool to room temperature. Enjoy.
I am going to make this. I love focaccia bread and have made a number of versions. I have seen it made with biga before, but was unimpressed with the rest of the recipe. One of my tricks in working with a sticky dough is to wet my fingers with cold water. Works like a charm.
Thank you for giving it a shot!