How to Sharpen a Knife

- Updated
- 16 comments

Learn how to sharpen a knife using a whetstone. These easy-to-follow techniques will take your knife from dull to easily slicing through any meat, fruit, or vegetable. You will be blown away at how sharp your knife will be after this.
I’ve always said that mastering the art of cookery requires understanding fundamental techniques, and keeping your tools in great shape is no different. If you are looking to hone your skills, then you must check out How to Season a Cast Iron Skillet or How to Use Different Cooking and Finishing Salts.
Knife Sharpening
Knife sharpening uses a stone or grinder to sharpen your blade to your acceptable standard. it’s important to have a sharp knife. It will cut and prepare things easier and be a lot safer. We want the blade to do the heavy lifting of cutting, not your triceps and forearms, which can often lead to disaster.
The techniques used in this post will work on any knife shape or size. I’ve learned throughout my career that knife sharpening is a bit like making gumbo: Everyone has their way of doing it, but only theirs is correct. Please know there are multiple ways to sharpen a knife, and all the ways I describe will work. However, if you have a method that works well for you, I implore you to continue using it. This is meant to be a basic 101 course for beginners.
How to Sharpen a Knife Video
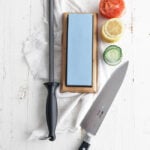
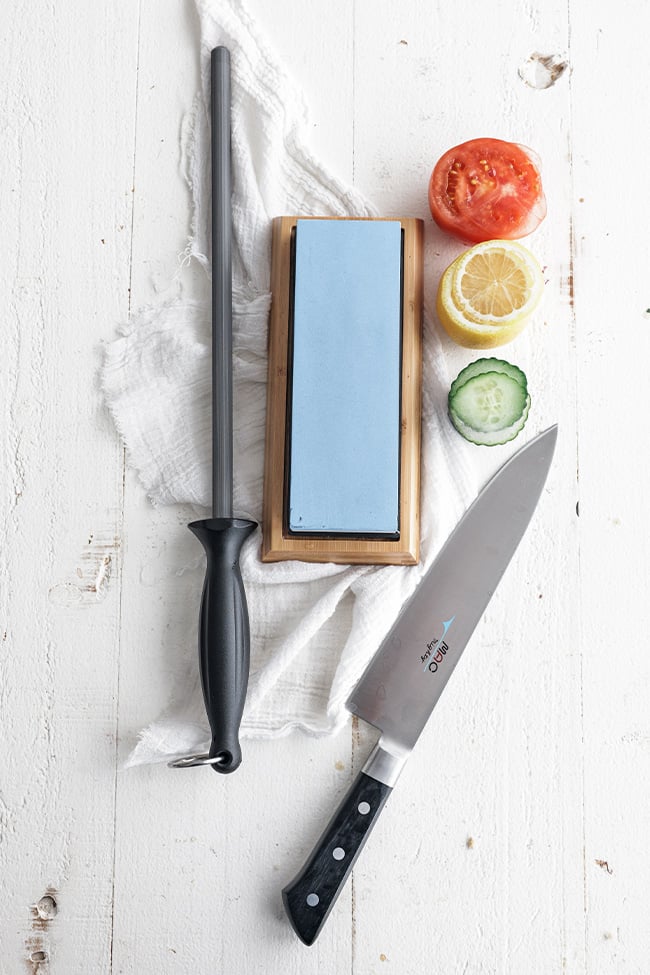
Tools and Substitutions
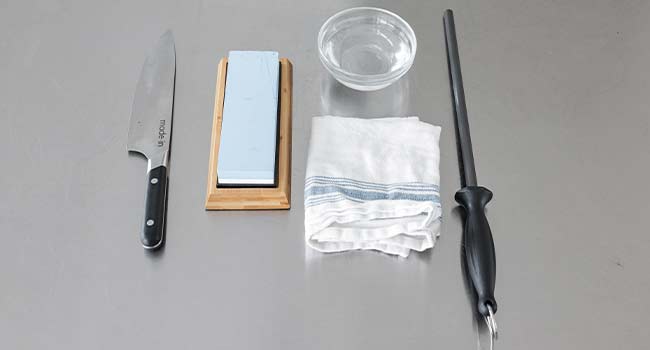
- Knives — All kitchen knives will work, but I used the chef knife in this tutorial because it is the most popular kitchen tool. In addition, a serrated knife cannot be sharpened on a grinder or whetstone. Instead, it’s best to sharpen it using a ceramic or steel rod.
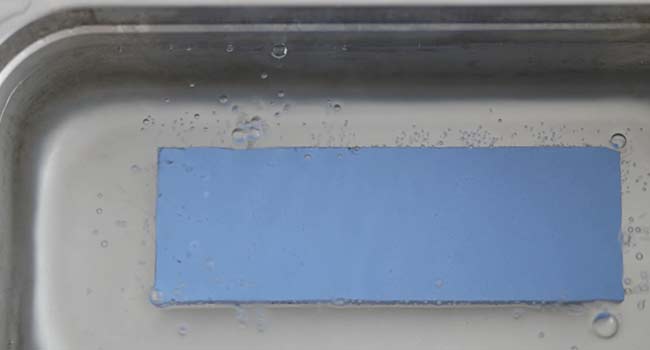
- Water – Plain tap water is used to keep the whetstone wet.
- Stone—I used a 6000-grit and 1000-grit whetstone in this demonstration and believe this combination is the most versatile. A 1000 is a medium-grit stone for sharpening, while a 6000 is a fine stone for polishing. Coarse-grit stones fall between 200 and 800 grit. Medium-grit stones range between 800 and 2,000. Fine-grit stones range from 2000 up to 8000. This is the one I used (affiliate link).
- Steel – You will need a ceramic or steel honing rod.
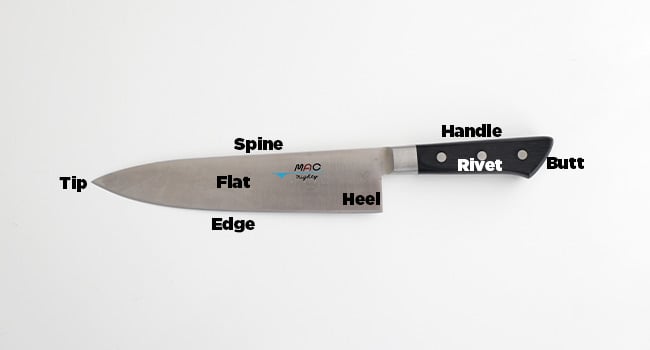
Parts of a Knife
Knife Sharpening Prep
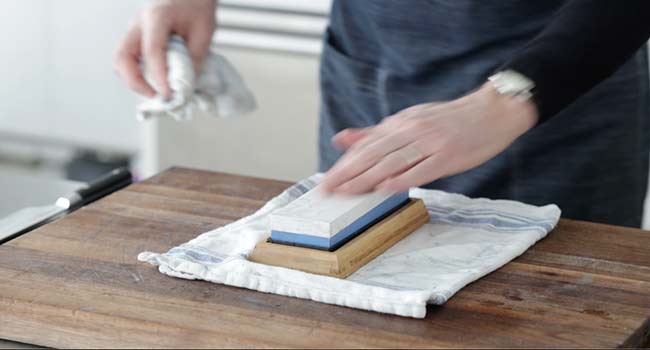
Start by submerging the stones in cold water for 15 to 20 minutes. Also have a small bowl of water to the side.
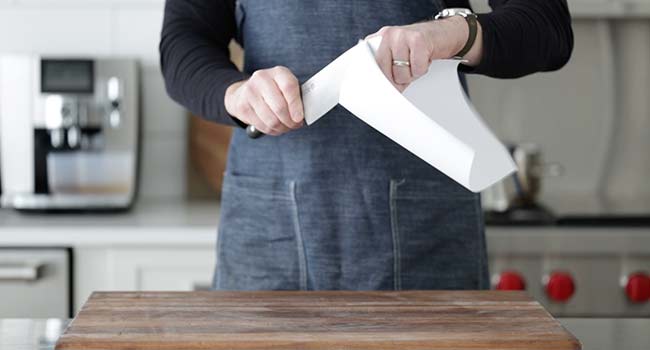
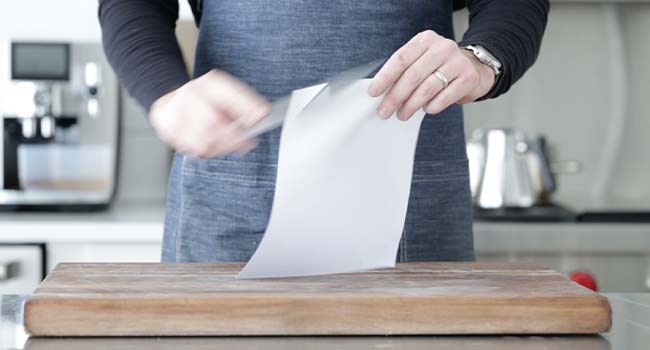
In the meantime, gauge the sharpness of your chef knife. To do this I run it from the heel to the tip of the knife on a piece of paper. If it does not slice through with ease, then I know it needs sharpening. See the video below.
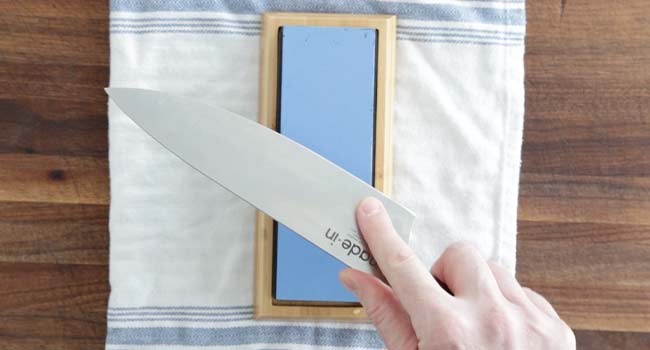
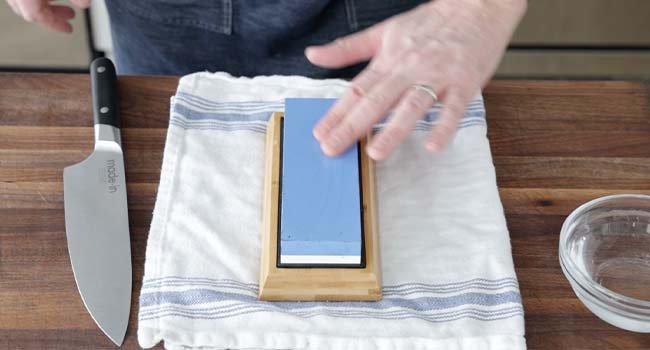
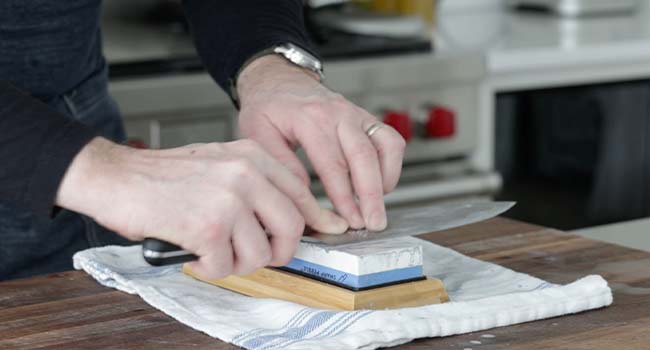
Place the stone coarse to medium grit side up on a dry towel to prevent it from moving. Often the stones will come with a block and rubber insert to hold the stone which is even better. Even with that, I still like to have a towel underneath to keep things secure.
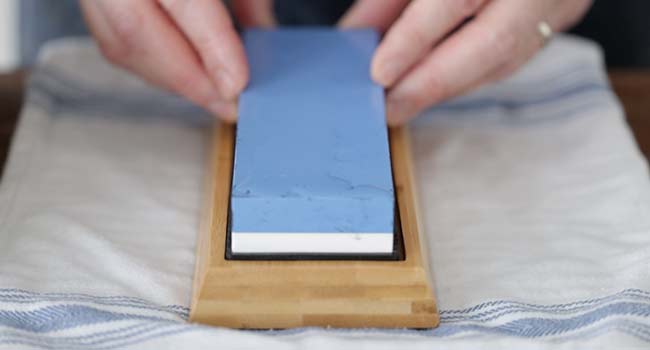
If the stone is not wet, add a few drops of water from your bowl to the top of it and gently move it around to cover the stone.
How to Sharpen a Knife
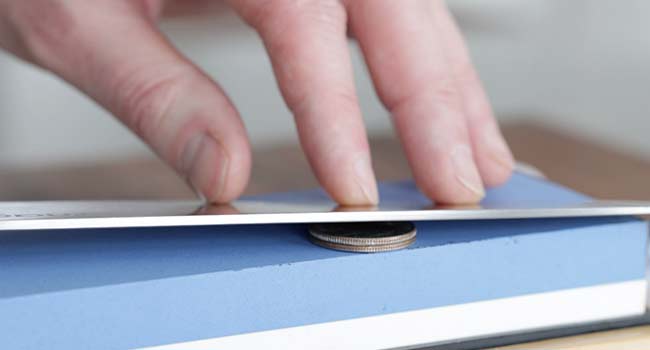
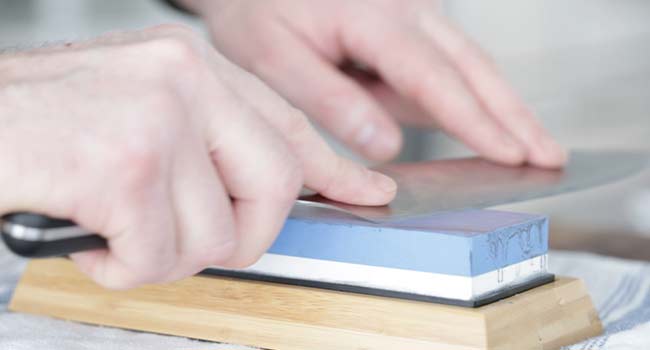
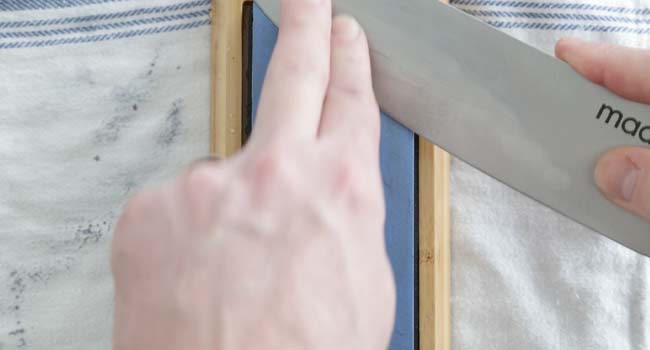
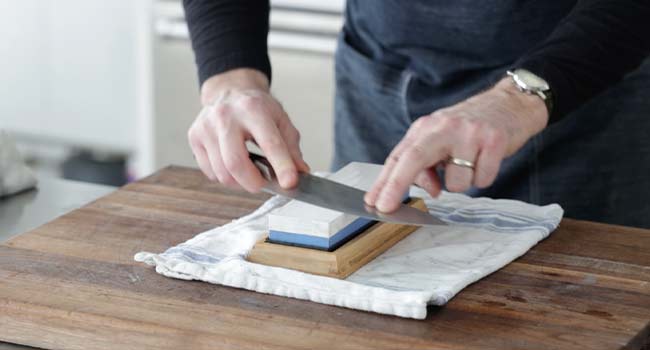
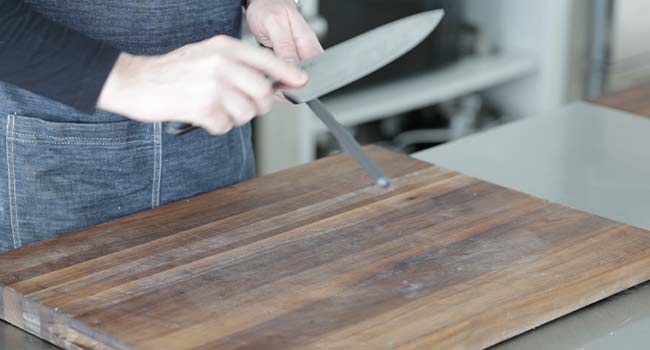
Set your knife at a 20° angle. To achieve this, start at a right angle of 90°, cut it in half, cut it in half again, and then just a hair more. Some chefs and master knife sharpeners say it’s about the degree of 2 quarters or 3 pennies between the spine and the stone.
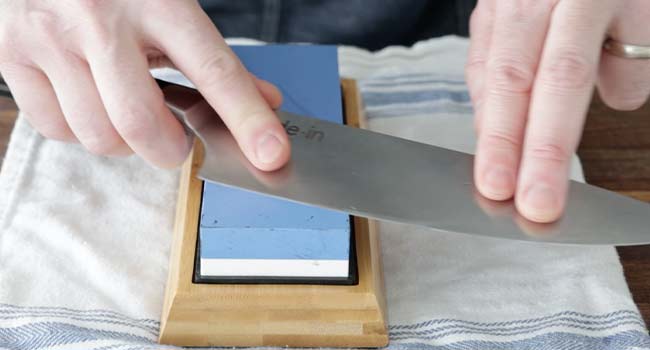
Once you have your degree set, you now want to ensure your hands are in place. Thumb on the spine and pointer finger on the heel and you will be taking edge trailing strokes which work away from you as opposed to edge leading, which is towards you and can cause an undesirable burr.
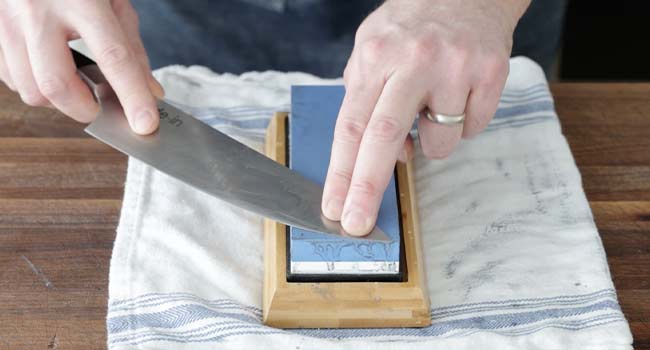
Placing about 2 to 4 pounds of pressure on the blade using you’re your pointer and middle finger from your left hand and start at the heel and curve around the blade moving it up across the stone to the tip of the knife.
Turn the knife over with your thumb on the heel and your pointer finger on the heel, use the same amount of pressure with your other fingers and start at the tip and curve around the blade moving it down across the stone top the heel of the knife. Repeat the process going back and forth between each side. Remember that however many you do one side, it needs to be done on the other. I’d say 15 to 20 strokes per side is a good place to start in sharpening your knife.
Sharpening the Same Side
You can also do all the strokes on one side, and then flip it and do the same number on the other side.
Be sure to add a few more drops of water to the stone if the water becomes to grey from the steel being worn away or if the stone is too dry.
Other Knife Sharpening Techniques.
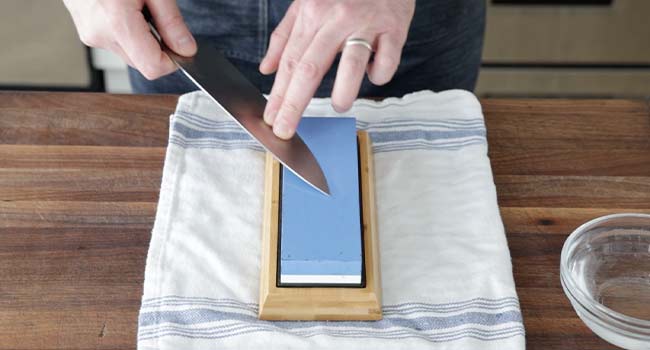
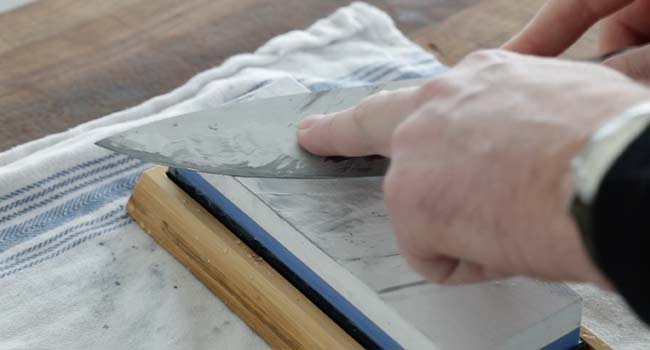
Using the same grit stone working in sections start with your thumb on the spine and pointer finger on the heel and your pointer and middle finger. From your other hand on the blade using 2 to 4 pounds of pressure and at the 20° angle start at the upper 1/3 section of the knife by the tip and scrape it back and forth, but only using pressure on the edge trailing stroke.
Do 3 to 6 strokes in this section. Move down to the middle section doing several strokes, and then to the bottom section.
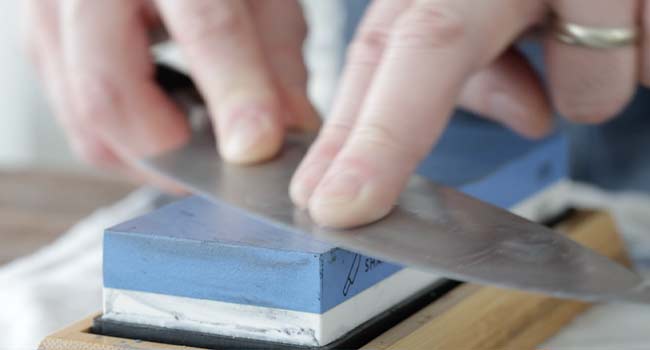
Flip the knife and repeat the process. Do this until the knife is evenly sharp.
How to Polish a Knife
The same process applies, but on the 6000-grit side.
You can use the heel to tip procedure, or the scraping procedure as shown in the video.
Another option would be the scraping method. However, you go in circular motions from the tip to the heel and the same on the other side.
Honing a Knife
Hold the knife in your dominant hand and the steel in the other, ensuring your hands are below the grip guard.
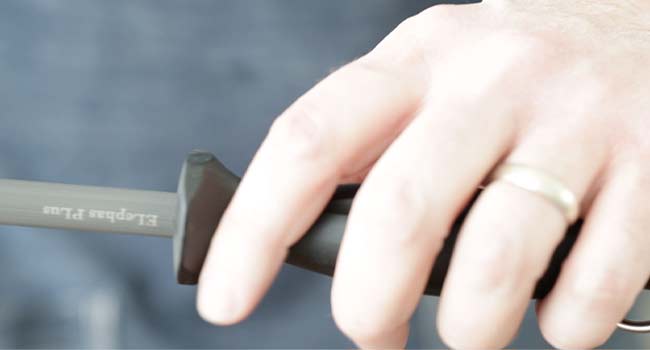
Using a 20° angle start from the heel and work down the steel while pulling back until it reaches the tip.
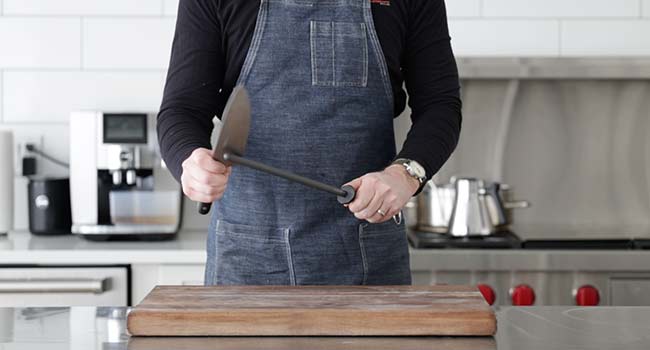
Do the same process on the other side of the knife. Repeat the process 10 to 15 times per side. Likewise, you can also do all the strokes on side of the blade and then the same number of strokes on the other.
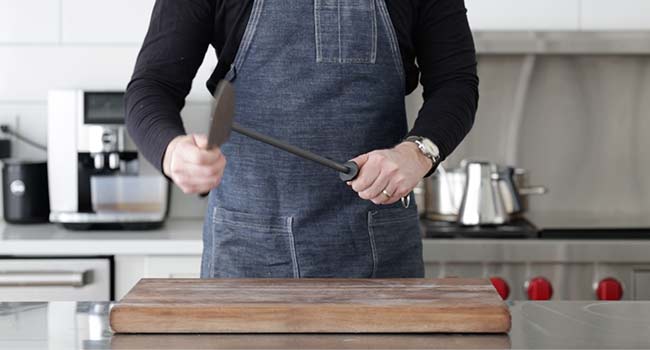
Feel free to point the blade away as well while doing this.
Lastly, try to cut through that piece of paper now following the same techniques as before. It should slice straight through.

Chef notes + Tips
- Soaking a stone in water too long can cause it to crack over time.
- A burr is a raised lip where one side of the edge meets the other and begins to curve over. You want this to be even all the way down the knife.
- Edge trailing is working away from the blade’s edge to sharpen it.
- Edge leading is working towards the edge of the blade to sharpen it.
- When you feel your knife gently with your thumb, it will gently tug, but this indicates it’s sharp, whereas if it isn’t, it will be a very smooth feeling if did, which means it’s time to sharpen.
- Polishing a knife removes the blemishes and imperfections at the blade’s edge, refining it and making it sharper.
- Honing a knife is used to maintain and align the edge to keep it sharp. You do this to tune your blade in between stone sharpening. Honing can help keep the edge while sharpening creates the edge.
- Make sure the stone is completely air-dried before storing it.
I have to purchase the stone. Thank you
My pleasure.
You cannot have dull knives in the kitchen. Thank you so much for this very detailed video! I learned so much. One happy cook right here!!
My pleasure!
Thank you, Chef. This is very helpful information.
This article was very informative. Thank you for taking the time to give instructions. I like to have a sharp knife when I’m cooking.
My pleasure.
THANK YOU for this post! I remember my daddy sharpening all of our knives with a whetstone. He kept them razor sharp as he said it was better to cut yourself with a sharp knife than a dull one!
I’ve tried over the years to do this but was never able to master the technique. Again thank you for this tutorial!
My pleasure!
Nice! Thank you so much.
My pleasure.
I purchased a knife sharpener, and I was wondering if you could demonstrate sharpening using electric sharpener
What type of knife to you use?
MAC
I would appreciate information on where I can find the same water stone you are using. I was hoping a link would be provided. Please email me information. I always enjoy—and USE—your videos.
the link is in the post under the tools and substitutions section.