Homemade Waffle Cone Recipe

- Published
- 6 comments


This fun homemade ice waffle cone recipe comes together in minutes and perfectly accompanies your favorite ice cream. You will love how easy these are to make and how delicious they are.
Now that you have homemade ice cream cones, you need something to scoop into them. Try my homemade Vanilla Ice Cream or Fresh Berry Ice Cream.

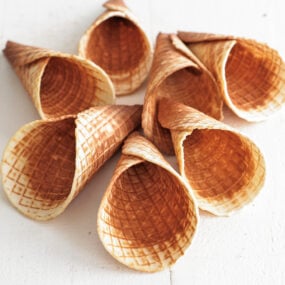
Waffle Cone
Waffle cones are made from a simple thin waffle batter. They are then cooked in a special waffle cone iron until lightly browned and crisp. They are then rolled using a cone mold to form the perfect ice cream cone. These are very easy to make, and each cone cooks in under 4 minutes.
These are a lot of fun to make and are a great, easy-to-prepare recipe for your kids. You can use either a waffle iron that is used directly on your cooktop or an electric waffle iron.
Ingredients and Substitutions
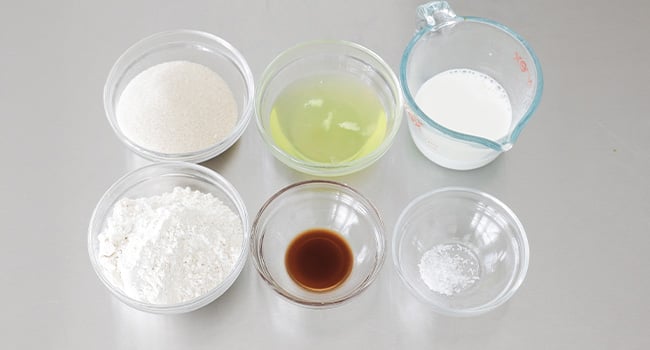
- Flour – all-purpose flour is used to give the streusel structure.
- Milk – I used whole milk for this recipe. You can also use 1%, 2%, or skim milk.
- Vanilla – Any vanilla extract will work.
- Salt – I always use coarse salt in my cooking and baking.
- Eggs – You will need only the egg whites from 3 cold or room temperature large eggs.
- Sugar – You will need some regular granulated sugar for this.
How to Make Waffle Cones from Scratch
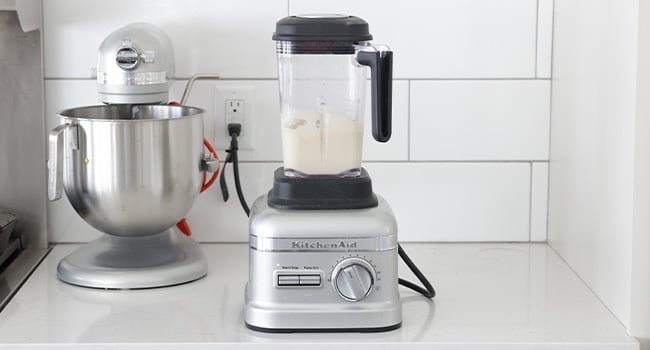
Add all the ingredients to a blender and blend on high until smooth. Transfer to a container with a spout to make it pourable.
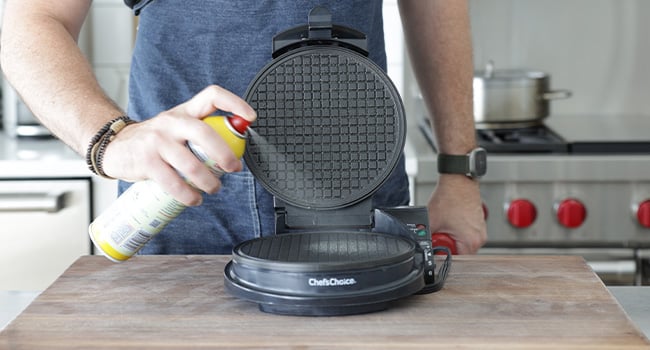
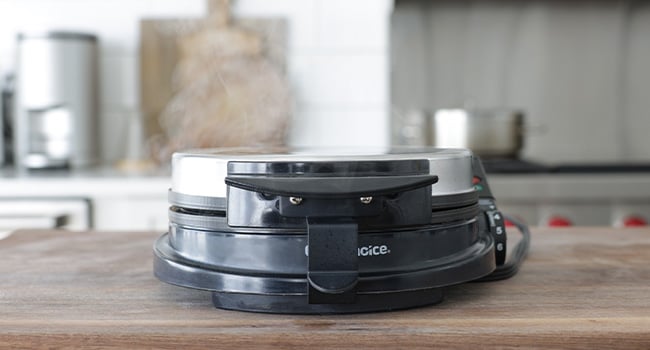
Spray a pre-heated waffle cone maker to low-medium heat.
Pour about 3 tablespoons of the waffle batter into the center of the waffle iron or cone maker and close the top.
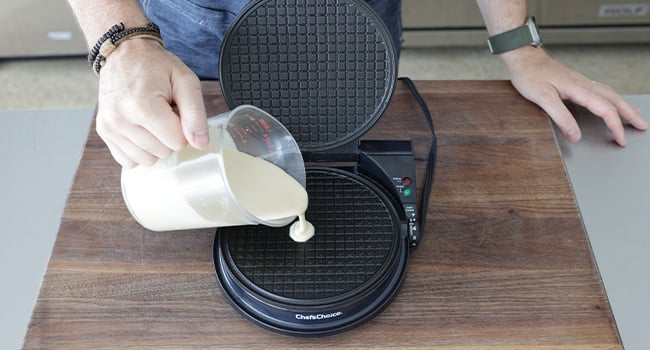
Cook for 3 to 4 minutes or until lightly browned. It’s ok if some areas over the cone are darker than others. This will not change the flavor or consistency in any way.
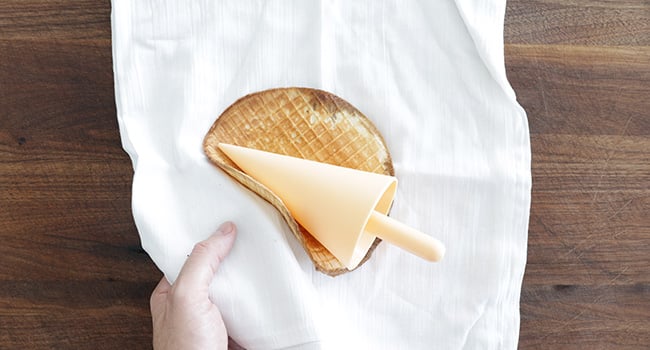
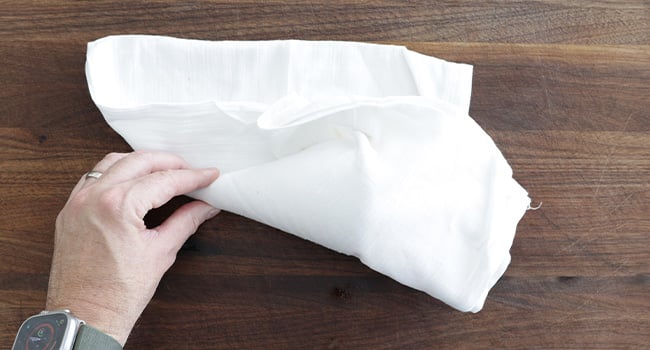
Immediately transfer the flat-cooked waffle to a kitchen towel and begin to form the cone by rolling it around the cone mold using the towel.
Keep it wrapped up for 2 to 3 minutes to form the cone. In the meantime, continue to make the cones in the waffle maker.
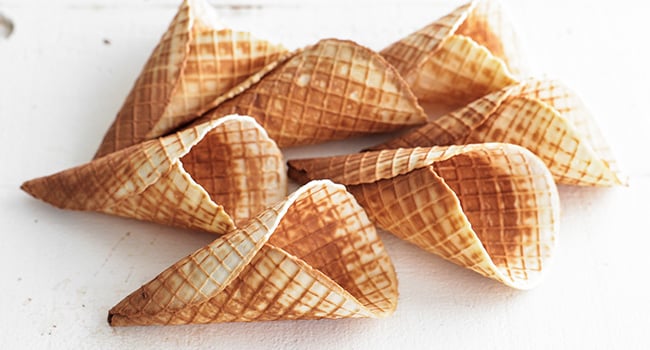
Remove the waffle cone from the cone mold. Use or store the waffle cones.
Make-Ahead and Storage
Make-Ahead: You can make these up to 2 days ahead for freshness.
How to Store: Cover them and keep them at room temperature for up to 4 days. These will not freeze well.

Chef Notes + Tips
- Of course, you can vigorously whisk all the ingredients together until combined. However, I recommend sifting the flour first.
- If you’re using a waffle iron over a cooktop, cook on each side for 1 ½ to 2 minutes.
- When the waffle comes out of the iron, it will be incredibly hot, so be sure to use that kitchen towel to help.
More Dessert Recipes

Homemade Waffle Cone Recipe
Ingredients
- ¾ cup of sugar
- 1 cup of flour
- 3 egg whites
- ¼ teaspoon of sea salt
- 1 teaspoon of vanilla
- 1/2 cup of whole milk
- non-stick spray
Instructions
- Add all the ingredients to a blender and blend on high until smooth. Transfer to a container with a spout to make it pourable.
- Spray a pre-heated waffle cone maker to low-medium heat.
- Pour about 3 tablespoons of the waffle batter into the center of the waffle iron or cone maker and close the top.
- Cook for 3 to 4 minutes or until lightly browned. It’s ok if some areas over the cone are darker than others. This will not change the flavor or consistency in any way.
- Immediately transfer the flat-cooked waffle to a kitchen towel and begin to form the cone by rolling it around the cone mold using the towel.
- Keep it wrapped up for 2 to 3 minutes to form the cone. In the meantime, continue to make the cones in the waffle maker.
- Remove the waffle cone from the cone mold.
- Use or store the waffle cones.
I’ve made vanilla ice cream and would like to try the waffle cones😋 Do you have other ice cream recipes? Chocolate preferably
I do not, but you can search on the site or anything you may want. If it doesn’t show up then I simply do not have it.
I made this, boy oh boy was it delicious
Do you still have the Pumpkin Coconut Milk Ice Cream recipe that used to be linked to this page? I used to make it all the time and haven’t been able to find it recently, but I miss it!
Sorry I don’t have it anymore.
I recently followed yur page in fb with the humus recipe it was awsome the garlic was so good..
Iv recently started to making homemade icecream ..and wen i saw yur icecream recipe in fb it was awsome to knw a few more tips ..i used to add my fruit pulp at the stary ..but nw i understan its latre its to be added..i will try👍.im aso trying to think of more flavours .appreciate few suggestion😊